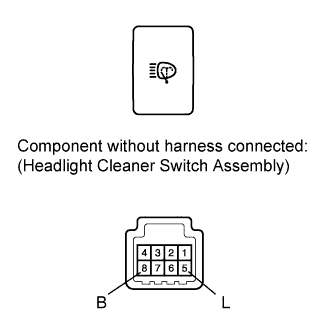
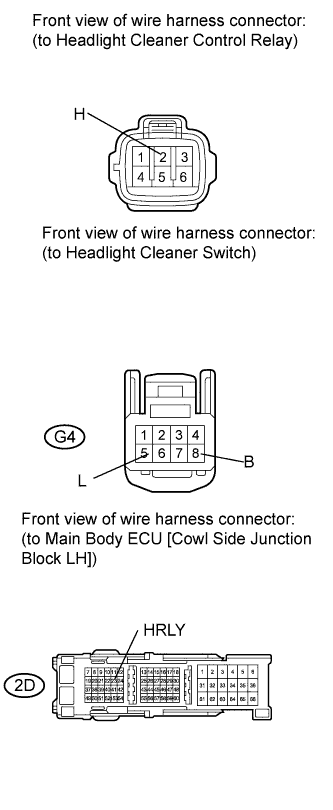
Headlight Cleaner Switch Circuit
Circuit diagnosis · Vehicles built from Jan 2012
Versions by build date: Sep 2011 – Dec 2011 from Jan 2012
DESCRIPTION
This circuit detects the conditions of the headlight cleaner switch.
- Headlight cleaner switch signal
- Headlight operating signal
- Daytime running light operating signal
WIRING DIAGRAM
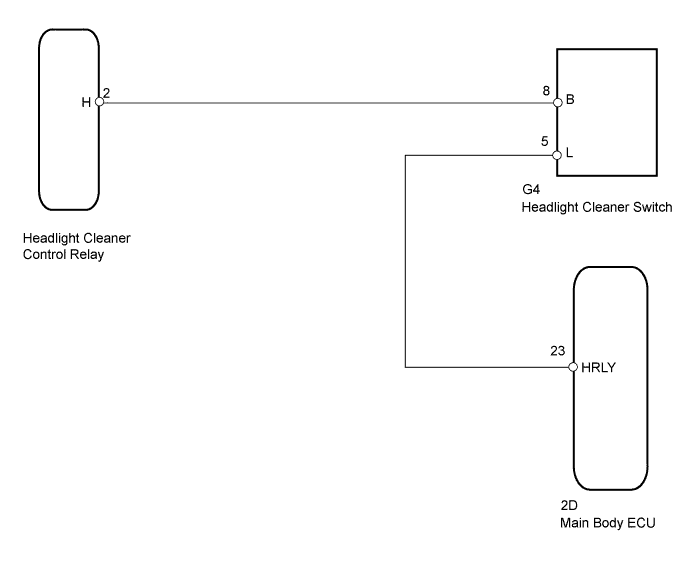

INSPECTION PROCEDURE
| 1. CHECK HEADLIGHT ASSEMBLY (LO BEAM) |
 |
Check that the headlights illuminate in LO beam.
- OK:
- Headlights illuminate in LO beam
|
NG |
 |
|
|
|
| OK |
|
 |
|
| 2. INSPECT HEADLIGHT CLEANER SWITCH ASSEMBLY |
|
- Disconnect the G4 cleaner switch connector.
Measure the resistance according to the value(s) in the table below.
- Standard Resistance:
Tester Connection
|
Condition
|
Specified Condition
|
8 (B) - 5 (L)
|
Headlight cleaner switch off
|
10 kΩ or higher
|
8 (B) - 5 (L)
|
Headlight cleaner switch on
|
Below 1 Ω
|
|
NG |
|
|
| REPLACE HEADLIGHT CLEANER SWITCH ASSEMBLY (Click here)
|
|
|
| OK |
|
|
|
| 3. CHECK HARNESS AND CONNECTOR (HEADLIGHT CLEANER SWITCH ASSEMBLY - HEADLIGHT CLEANER CONTROL RELAY AND MAIN BODY ECU) |
|
- Disconnect the headlight cleaner control relay connector.
Disconnect the G4 switch connector.
Disconnect the 2D main body ECU connector.
Measure the resistance according to the value(s) in the table below.
- Standard Resistance:
Tester Connection
|
Condition
|
Specified Condition
|
2 (H) - G4-8 (B)
|
Always
|
Below 1 Ω
|
G4-5 (L) - 2D-23 (HRLY)
|
2 (H) - Body ground
|
Always
|
10 kΩ or higher
|
G4-8 (B) - Body ground
|
G4-5 (L) - Body ground
|
2D-23 (HRLY) - Body ground
|
|
NG |
|
|
| REPAIR OR REPLACE HARNESS OR CONNECTOR |
|
|
| OK |
|
 |
|
| REPLACE HEADLIGHT CLEANER CONTROL RELAY (Click here)
|
|