2011-2013 Land Cruiser · Service Manual Audio / Visual / Telematics

REMOVAL

Removal / installation · Vehicles built from Jan 2012

Versions by build date: Sep 2011 – Dec 2011 from Jan 2012


1. PRECAUTION

NOTICE:
After turning the ignition switch off, waiting time may be required before disconnecting the cable from the battery terminal. Therefore, make sure to read the disconnecting the cable from the battery terminal notice before proceeding with work (Click here).


2. DISCONNECT CABLE FROM NEGATIVE BATTERY TERMINAL

NOTICE:
When disconnecting the cable, some systems need to be initialized after the cable is reconnected (Click here).


3. REMOVE TONNEAU COVER ASSEMBLY (w/ Tonneau Cover)
  1. Remove the tonneau cover.


4. REMOVE REAR NO. 2 SEAT ASSEMBLY RH (for Face to Face Seat Type)

HINT:
Use the same procedures described for the LH side (Click here).


5. REMOVE REAR NO. 2 SEAT ASSEMBLY RH (except Face to Face Seat Type)

HINT:
Use the same procedures described for the LH side (Click here).


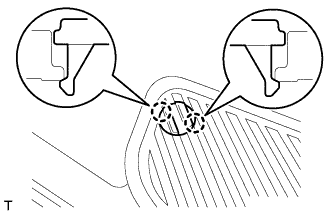
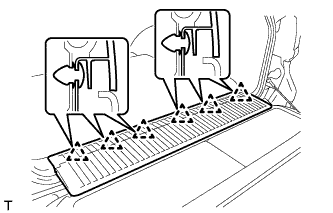
6. REMOVE REAR FLOOR MAT REAR SUPPORT PLATE

B181672
  1. Detach the 6 clips and remove the support plate.


7. REMOVE REAR STEP COVER

B181673

HINT:
Use the same procedure to remove the step cover on the other side.

  1. Detach the 2 claws and remove the step cover.


8. REMOVE REAR DOOR SCUFF PLATE RH

HINT:
Use the same procedures described for the LH side.


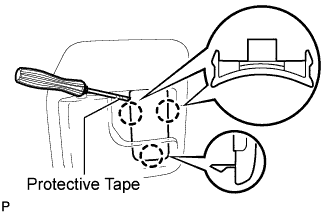
9. REMOVE REAR SEAT COVER CAP (w/ Rear No. 2 Seat, except Face to Face Seat Type)

B190187E01

HINT:
Use the same procedure to remove the rear seat cover cap on the other side.

  1. Using a screwdriver, detach the 3 claws and remove the rear seat cover cap.

    HINT:
    Tape the screwdriver tip before use.


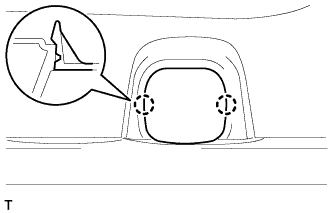
10. REMOVE NO. 1 TONNEAU COVER HOLDER CAP (w/ Tonneau Cover)

B186439

HINT:
Use the same procedure to remove the tonneau cover holder cap on the other side.

  1. Detach the 2 claws and remove the tonneau cover holder cap.


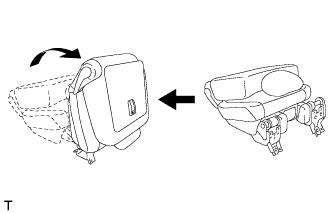
11. REMOVE FRONT QUARTER TRIM PANEL ASSEMBLY RH

B182645

HINT:
When removing the front quarter trim panel, operate the reclining adjuster release handle and move the No. 1 rear seat to the position shown in the illustration.

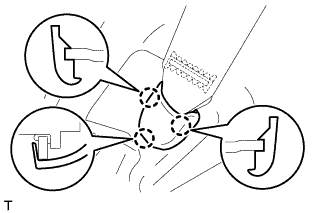
  1. B181688
    Detach the 3 claws and remove the cover.

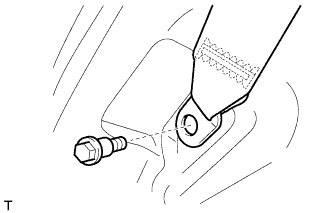
  1. B181690
    Remove the bolt and rear No. 1 seat belt anchor.

  1. B181692
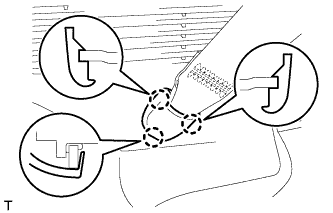
    w/ Rear No. 2 Seat, except Face to Face Seat Type:

    1. Detach the 3 claws and remove the cover.

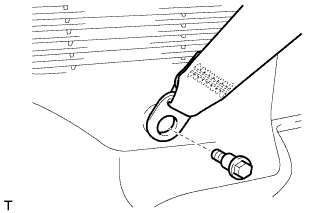
    2. B181693
      Remove the bolt and rear No. 2 seat belt anchor.

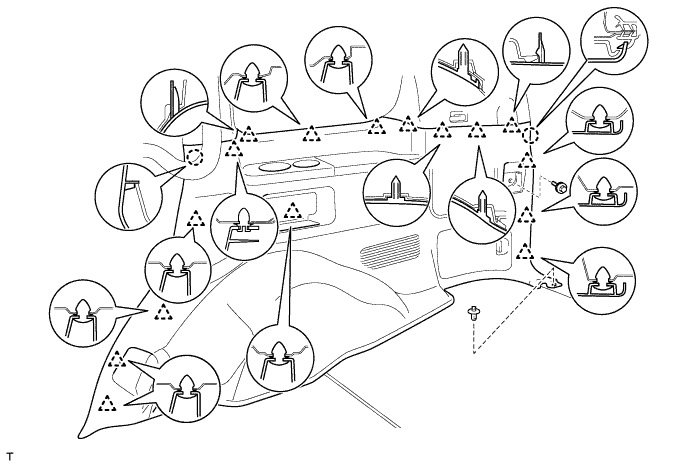
  1. w/ Rear No. 2 Seat, except Face to Face Seat Type:

    1. Remove the clip and bolt.

    2. Detach the 16 clips and 2 claws.

    3. w/o Rear Air Conditioning System:
      Disconnect the rear seat lock control lever cable and then remove the quarter trim panel.

    4. w/ Rear Air Conditioning System:
      Disconnect the thermistor connector and rear seat lock control lever cable, and then remove the quarter trim panel.

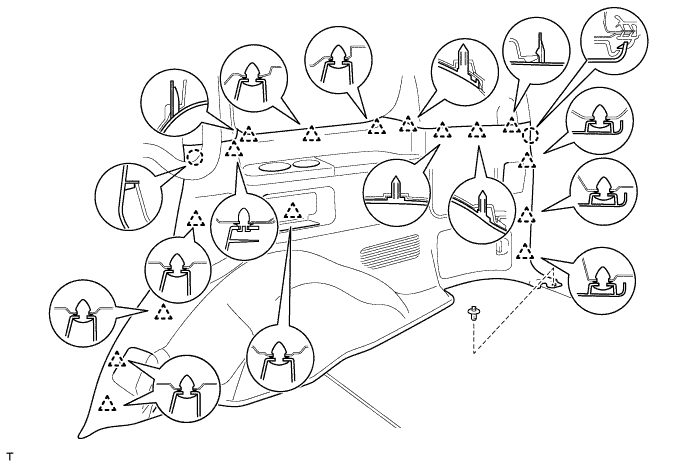
      B186890

  1. w/o Rear No. 2 Seat or w/ Rear No. 2 Seat, for Face to Face Seat Type:

    1. Remove the clip.

    2. Detach the 16 clips and 2 claws, and remove the quarter trim panel.

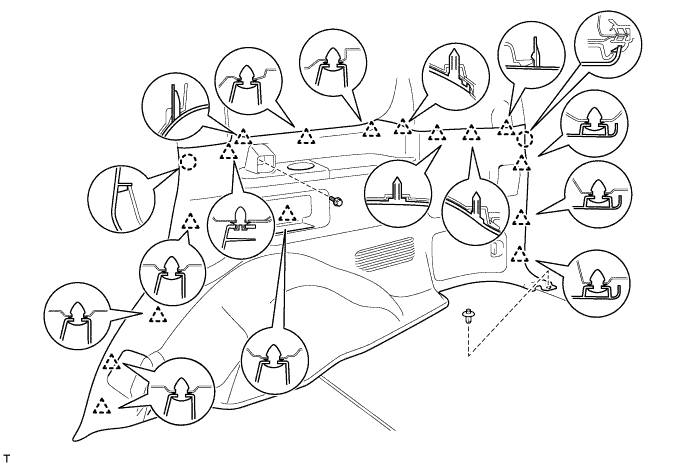
      B190220

  1. w/ Tonneau Cover:

    1. Remove the screw and clip.

    2. Detach the 16 clips and 2 claws, and remove the quarter trim panel.
      B186438


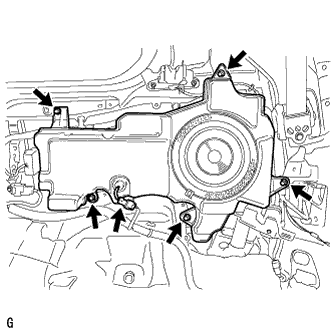
12. REMOVE NO. 1 WOOFER BOX SPEAKER ASSEMBLY

  1. B181527
    Disconnect the connector.

  1. Remove the 5 bolts and box speaker.

← REMOVAL (Sep 2011 – Dec 2011)INSPECTION (from Sep 2011) →