EXTERIOR PANELS / TRIM BACK DOOR GARNISH(w/ Tire Carrier) INSTALLATION
CAUTION / NOTICE / HINT
- HINT:
- ·
A bolt without a torque specification is shown in the standard bolt chart (See page General>SPECIFICATIONS>STANDARD BOLT>SPECIFIED TORQUE FOR STANDARD BOLTS).
·When installing the back door garnish, heat the vehicle body and back door garnish using a heat light.
- Standard Heating Temperature:
Item Temperature Back Door Garnish 20 to 30°C (68 to 86°F) Vehicle Body 40 to 60°C (104 to 140°F)
- NOTICE:
-
Do not heat the back door garnish and vehicle body excessively.
PROCEDURE

 75132C
1.INSTALL REAR LICENSE LIGHT COVER
81270
2.INSTALL LICENSE PLATE LIGHT ASSEMBLY
76802C
3.INSTALL NO. 2 BACK DOOR GARNISH SUB-ASSEMBLY OUTSIDE
Pass the wire harness of the license plate light through the tail gate, and install the wire harness.
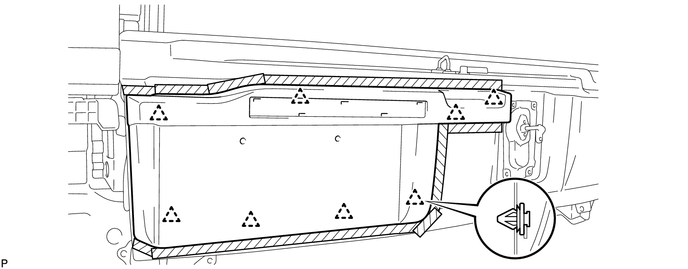
Attach the 7 clips to install the No. 2 back door garnish.
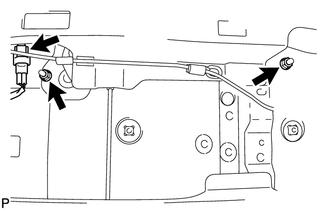
Install the 2 nuts and connect the connector.
64780A
4.INSTALL BACK DOOR TRIM PANEL ASSEMBLY
64893
5.INSTALL BACK DOOR TRIM COVER RH
64894
6.INSTALL BACK DOOR TRIM COVER LH
58574A
7.INSTALL REAR FLOOR MAT REAR SUPPORT PLATE
75741E
8.INSTALL SYMBOL EMBLEM
76801B
9.INSTALL BACK DOOR GARNISH SUB-ASSEMBLY OUTSIDE RH
Clean the vehicle body surface.
Using a heat light, heat the vehicle body surface.
Remove the double-sided tape from the vehicle body surface.
Wipe off any tape adhesive residue with cleaner.
Install a new back door garnish.
Using a heat light, heat a back door garnish and the vehicle body surface.
Remove the peeling paper from the face of the back door garnish.
- HINT:
-
After removing the peeling paper, keep the exposed adhesive free from foreign matter.
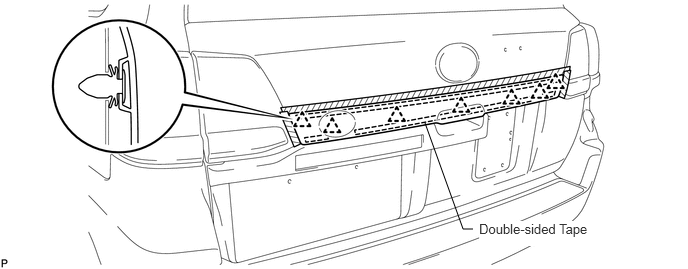
Attach the 7 clips and double-sided tape to install the back door garnish.
- HINT:
-
Press the back door garnish firmly to install them.