HEATING / AIR CONDITIONING COMPRESSOR(for 1GR-FE) INSTALLATION
CAUTION / NOTICE / HINT
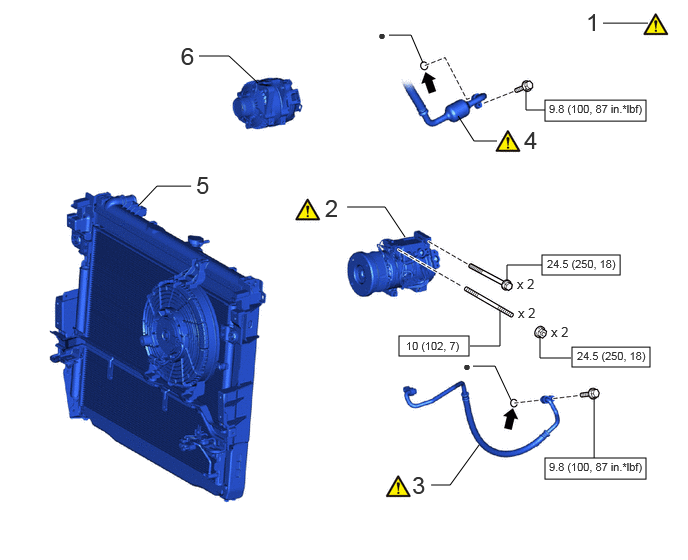
| Procedure | Part Name Code |

|

|

|
|
|---|---|---|---|---|---|
| 1 | ADJUST COMPRESSOR OIL | - | ( ) |
- | - |
| 2 | COMPRESSOR WITH MAGNET CLUTCH | - | () |
- | - |
| 3 | NO. 1 COOLER REFRIGERANT DISCHARGE HOSE | 88711 | () |
- | - |
| 4 | SUCTION HOSE SUB-ASSEMBLY | 88704 | () |
- | - |
| 5 | RADIATOR WITH COOLER CONDENSER ASSEMBLY | - | - | - | - |
| 6 | GENERATOR ASSEMBLY WITH REGULATOR | 27060 | - | - | - |

|
N*m (kgf*cm, ft.*lbf): Specified torque | ● | Non-reusable part |

|
Compressor oil ND-OIL 8 or equivalent | - | - |
PROCEDURE

 1.ADJUST COMPRESSOR OIL
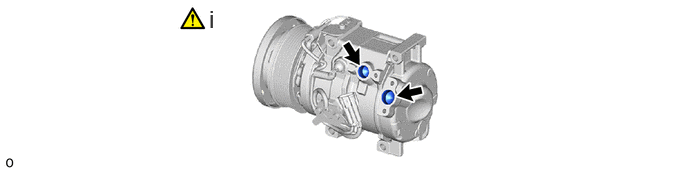
When replacing the compressor with magnet clutch with a new one, gradually discharge the inert gas (helium) from the service valve, and drain the following amount of oil before installation.
- Standard:
-
(The amount of oil in a new cooler compressor assembly: 135 to 150 cc (4.57 to 5.07 fl.oz)) - (The amount of oil in the removed cooler compressor assembly) = (The amount of oil to be removed from the new cooler compressor assembly)
- NOTICE:
-
·
If a new cooler compressor assembly is installed without removing the same amount of compressor oil as is remaining in the pipes, the amount of compressor oil will be excessive. This prevents heat exchange in the refrigerant cycle and will cause the air conditioning system to malfunction.
·A certain amount of compressor oil remains in the cooler compressor assembly during circulation and the compressor may be damaged if the amount of compressor oil is more/less than this amount. Therefore, make sure to adjust the amount of compressor oil correctly.
·If the amount of compressor oil remaining in the removed cooler compressor assembly is excessively low, check for compressor oil leaks.
·Do not race the engine before replacing the cooler compressor assembly.
·Make sure to use ND-OIL 8 or equivalent compressor oil.
2.INSTALL COMPRESSOR WITH MAGNET CLUTCH
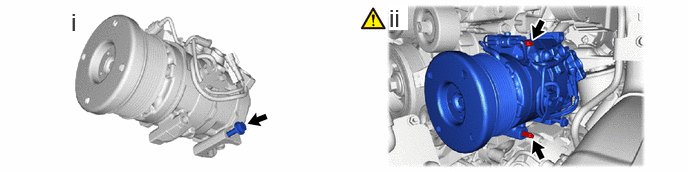
Install the bolt.
Using an E8 "TORX" socket wrench, temporarily install the compressor with magnet clutch with the 2 stud bolts.
- Torque:
- 10 N*m (102 kgf*cm, 7 ft.*lbf)

Install the compressor with magnet clutch with the 2 bolts and 2 nuts in the order shown in the illustration.
- Torque:
- 24.5 N*m (250 kgf*cm, 18 ft.*lbf)
88711 3.INSTALL NO. 1 COOLER REFRIGERANT DISCHARGE HOSE
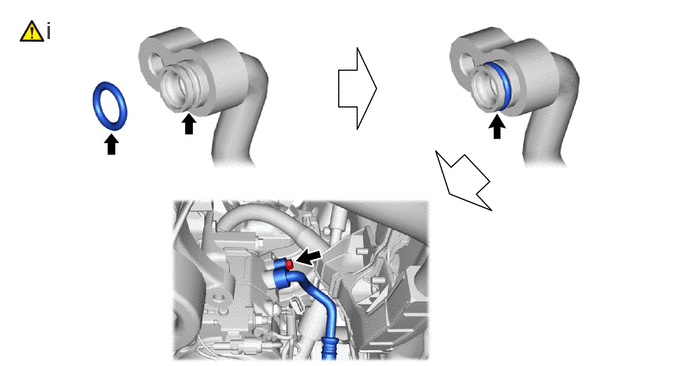
Install the No. 1 cooler refrigerant discharge hose using the following procedure.
1. Remove the vinyl tape from the No. 1 cooler refrigerant discharge hose and connecting part of the compressor with magnet clutch and then sufficiently apply compressor oil to a new O-ring and the fitting surface of the No. 1 cooler refrigerant discharge hose.
- Compressor Oil:
-
ND-OIL 8 or equivalent
2. Install the O-ring to the No. 1 cooler refrigerant discharge hose.
- NOTICE:
-
Keep the O-ring and O-ring fitting surface free of foreign matter.
3. Install the No. 1 cooler refrigerant discharge hose to the compressor with magnet clutch with the bolt.
- Torque:
- 9.8 N*m (100 kgf*cm, 87 in.*lbf)
- NOTICE:
-
Make sure not to cut the O-ring while installing it. (Cut O-rings cannot be installed.)
88704 4.CONNECT SUCTION HOSE SUB-ASSEMBLY
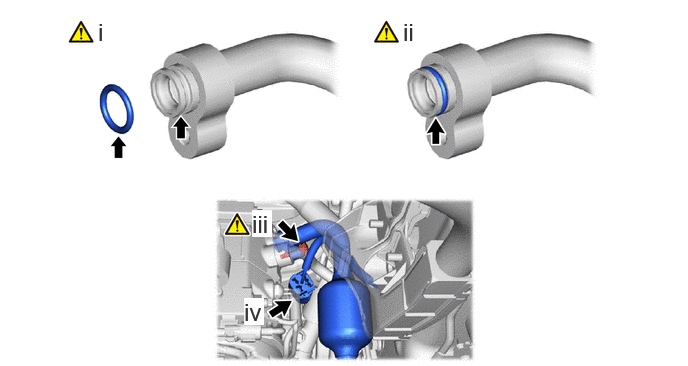
Remove the vinyl tape from the suction hose sub-assembly and connecting part of the compressor with magnet clutch and then sufficiently apply compressor oil to a new O-ring and the fitting surface of the suction hose sub-assembly.
- Compressor Oil:
-
ND-OIL 8 or equivalent
Install the O-ring to the suction hose sub-assembly.
- NOTICE:
-
Keep the O-ring and O-ring fitting surface free of foreign matter.
Connect the suction hose sub-assembly to the compressor with magnet clutch with the bolt.
- Torque:
- 9.8 N*m (100 kgf*cm, 87 in.*lbf)
- NOTICE:
-
Make sure not to cut the O-ring while installing it. (Cut O-rings cannot be installed.)
Connect the connector.
5.INSTALL RADIATOR WITH COOLER CONDENSER ASSEMBLY
27060 6.INSTALL GENERATOR ASSEMBLY WITH REGULATOR