AC60F AUTOMATIC TRANSMISSION / TRANSAXLE TRANSMISSION CONTROL CABLE ADJUSTMENT
PROCEDURE

 1.SECURE VEHICLE
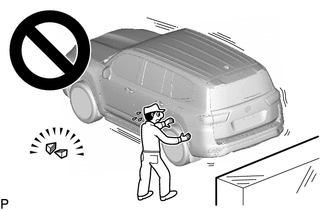
Fully apply the parking brake and chock a wheel.
- CAUTION:
-
-
·
Make sure to apply the parking brake and chock a wheel before performing this procedure.
·If the vehicle is not secure and the shift lever is moved to N, the vehicle may suddenly move, possibly resulting in an accident or serious injury.
84012 2.REMOVE INTEGRATION CONTROL AND PANEL SUB-ASSEMBLY
55403H 3.REMOVE LOWER NO. 2 INSTRUMENT PANEL PAD SUB-ASSEMBLY
33504F 4.REMOVE SHIFT LEVER KNOB SUB-ASSEMBLY
5.REMOVE UPPER CONSOLE PANEL ASSEMBLY
6.ADJUST TRANSMISSION CONTROL SHIFT CABLE
- NOTICE:
-
Before disconnecting the transmission control cable assembly, check that the shift lever is in N.
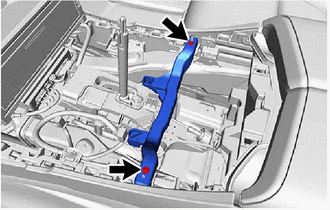
Remove the 2 screws and the No. 2 console box retainer from the rear console box sub-assembly.
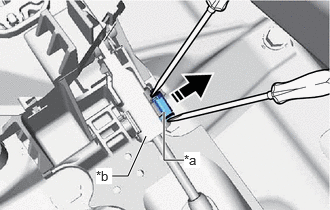
| *a | Lock Piece |
| *b | Adjuster Case |

|
Pull Up |
Using 2 screwdrivers, pull up the lock piece from the adjuster case.
While disengaging the clip as shown in the illustration, disconnect the transmission control cable assembly from the floor shift lever assembly together with the clip.
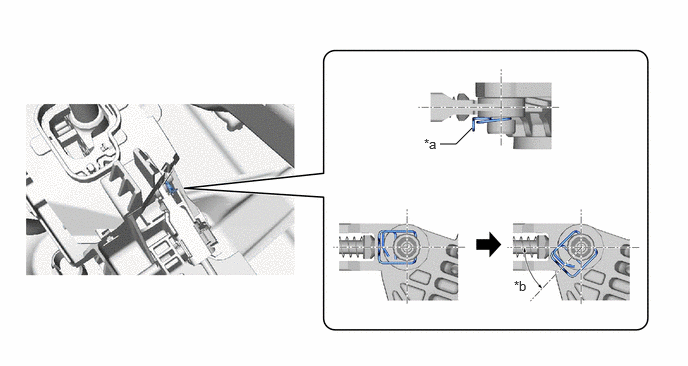
| *a | Clip | *b | 45° to 60° |
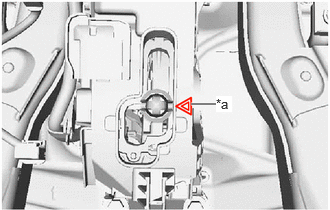
| *a | N Position Mark |
The shift lever shaft position matches the N position mark on the lower position indicator housing.
Connect the transmission control cable assembly to the floor shift lever assembly.
- NOTICE:
-
·
Check that the lock piece is pulled out.
·Push the end of the transmission control cable assembly all the way to the base of the floor shift assembly pin.
·Connect the transmission control cable assembly so that the lock piece faces the passenger side.
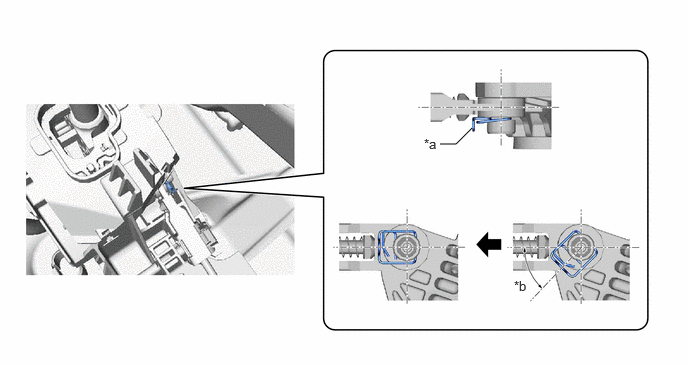
| *a | Clip | *b | 45° to 60° |
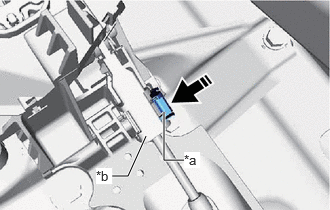
| *a | Lock Piece |
| *b | Adjuster Case |
|
|
Push It |
Push the lock piece into the adjuster case.
- NOTICE:
-
·
Check that the shift lever is in N.
·Securely push in the lock piece until it is engaged.
·Make sure that lever shaft position is not moved in shift direction during adjuster locking operation.
-Do not touch the lever shaft and knob during locking operation.
-Do not pull or push the adjuster case in shift direction during locking operation.
Install the No. 2 console box retainer to the rear console box sub-assembly with the 2 screws.
7.INSTALL UPPER CONSOLE PANEL ASSEMBLY
33504F 8.INSTALL SHIFT LEVER KNOB SUB-ASSEMBLY
55403H 9.INSTALL LOWER NO. 2 INSTRUMENT PANEL PAD SUB-ASSEMBLY
84012 10.INSTALL INTEGRATION CONTROL AND PANEL SUB-ASSEMBLY