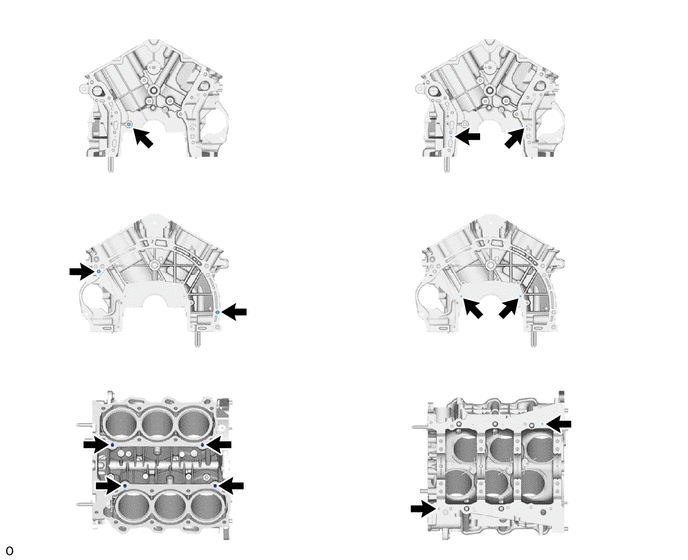
1GR-FE ENGINE MECHANICAL CYLINDER BLOCK DISASSEMBLY
CAUTION / NOTICE / HINT
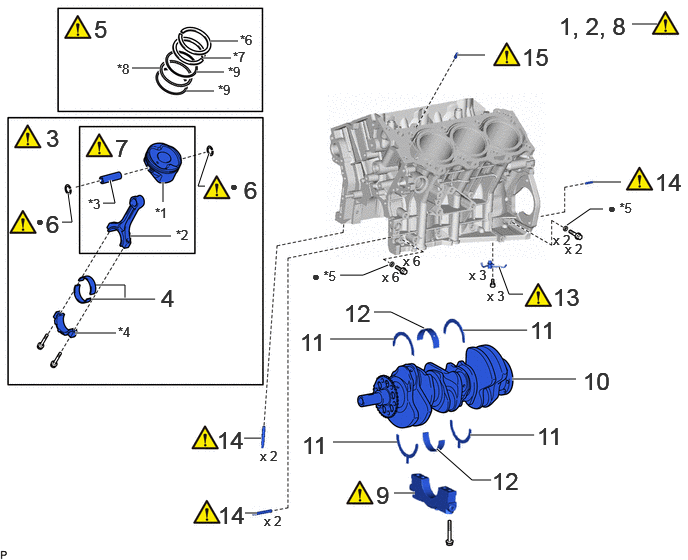
| Procedure | Part Name Code |

|

|

|
|
|---|---|---|---|---|---|
| 1 | INSPECT CONNECTING ROD THRUST CLEARANCE | - | ( ) |
- | - |
| 2 | INSPECT CONNECTING ROD OIL CLEARANCE | - | () |
- | - |
| 3 | PISTON WITH CONNECTING ROD | - | () |
- | - |
| 4 | CONNECTING ROD BEARING | 13041 | - | - | - |
| 5 | PISTON RING SET | 13011 | () |
- | - |
| 6 | PISTON PIN HOLE SNAP RING | 13101A | () |
- | - |
| 7 | PISTON WITH PIN SUB-ASSEMBLY | 13101 | () |
- | - |
| 8 | INSPECT CRANKSHAFT THRUST CLEARANCE | - | () |
- | - |
| 9 | CRANKSHAFT BEARING CAP | - | () |
- | - |
| 10 | CRANKSHAFT | - | - | - | - |
| 11 | CRANKSHAFT THRUST WASHER | 11011 | - | - | - |
| 12 | CRANKSHAFT BEARING | 11702 | - | - | - |
| 13 | NO. 1 OIL NOZZLE SUB-ASSEMBLY | 15708 | () |
- | - |
| 14 | STUD BOLT | - | () |
- | - |
| 15 | STRAIGHT PIN | - | () |
- | - |
| *1 | PISTON | *2 | CONNECTING ROD SUB-ASSEMBLY |
| *3 | PISTON PIN | *4 | CONNECTING ROD CAP |
| *5 | SEAL WASHER | *6 | NO. 1 COMPRESSION RING |
| *7 | NO. 2 COMPRESSION RING | *8 | OIL RING (EXPANDER) |
| *9 | OIL RING (SIDE RAIL) | - | - |
| ● | Non-reusable part | - | - |
CAUTION / NOTICE / HINT
The necessary procedures (adjustment, calibration, initialization, or registration) that must be performed after parts are removed, installed, or replaced during the cylinder block removal/installation are shown below.
| Replaced Part or Performed Procedure | Necessary Procedure | Effect/Inoperative Function when Necessary Procedure not Performed | Link |
|---|---|---|---|
| Battery terminal is disconnected/reconnected | Memorize steering angle neutral point | Parking assist monitor system | () |
| Multi-terrain monitor system | () |
||
| Panoramic view monitor system | () |
||
| Automatic transmission assembly | Reset memory |
·
Large shift shock
·
Engine overruns |
() |
| Automatic transmission fluid | ATF thermal degradation estimate reset | The value of the Data List item "ATF Thermal Degradation Estimate" is not estimated correctly. | |
|
·
Throttle body with motor assembly
·
Cleaning the deposits from the throttle body with motor assembly
·
Cylinder head sub-assembly
·
Camshaft (for intake or exhaust camshaft)
·
Camshaft timing gear assembly
·
Piston or piston ring
·
Fuel injector assembly
·
Fuel pump
·
Air fuel ratio sensor
·
Engine coolant temperature sensor
·
Spark plug
·
Ignition coil assembly
·
Air leaks from intake system
·
Gas leaks from exhaust system
·
Knock control sensor |
Inspection after repairs |
·
Poor idle, etc.
·
Engine start function, etc. |
() |
| Engine assembly | Inspection after repair |
·
Poor idle, etc.
·
Engine start function, etc. |
() |
| Front bumper assembly (Including removal and installation) | Front television camera view adjustment | Panoramic view monitor system | () |
- HINT:
-
When the cable is disconnected/reconnected to the battery terminal, systems temporarily stop operating. However, each system has a function that completes learning the first time the system is used.
-
·
Learning completes when vehicle is driven
Effect/Inoperative Function When Necessary Procedures are not Performed Necessary Procedures Link Lighting system (EXT) Cornering lights Drive the vehicle straight ahead at 35 km/h (22 mph) or more for 5 seconds or more. ( )Pre-collision system Lane tracing assist system Lane departure alert system Adaptive high beam system
·Learning completes when vehicle is operated normally
Effect/Inoperative Function When Necessary Procedures are not Performed Necessary Procedures Link Power back door system Fully close the back door by hand.
- HINT:
-
Initialization is not necessary if the above procedures are performed while the back door is closed.
( )Air conditioning system After the ignition switch is turned to ON, the servo motor and expansion valve standard position is recognized. -
PROCEDURE

 1.INSPECT CONNECTING ROD THRUST CLEARANCE
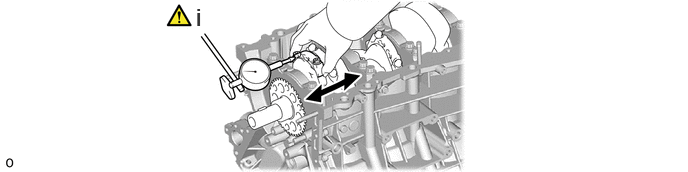
Using a dial indicator, measure the thrust clearance while moving the connecting rod back and forth.
- Standard thrust clearance:
-
0.15 to 0.30 mm (0.00591 to 0.0118 in.)
- Maximum thrust clearance:
-
0.35 mm (0.0138 in.)
If the thrust clearance is more than the maximum, replace one or more connecting rods as necessary.
- Standard connecting rod thickness:
-
20.80 to 20.85 mm (0.819 to 0.821 in.)
If necessary, replace the crankshaft.
2.INSPECT CONNECTING ROD OIL CLEARANCE
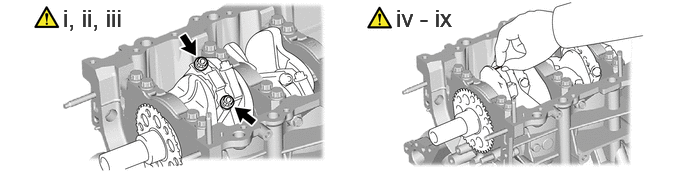
Uniformly loosen the 2 connecting rod bolts and remove the connecting rod cap together with the connecting rod bearing.
Clean the crank pin and bearing.
Check the crank pin and bearing for pitting and scratches. If the crank pin or bearing is damaged, replace the bearings. If necessary, replace the crankshaft.
Lay a strip of Plastigage across the crank pin.
- NOTICE:
-
Do not turn the crankshaft.
Install the connecting rod bearing cap.
Click hereEngine / Hybrid System>1GR-FE (ENGINE MECHANICAL)>CYLINDER BLOCK>REASSEMBLY
Uniformly loosen the 2 connecting rod bolts and remove the connecting rod cap together with the connecting rod bearing.
Measure the Plastigage at its widest point.
- Standard oil clearance:
-
0.040 to 0.066 mm (0.00157 to 0.00260 in.)
- Maximum oil clearance:
-
0.086 mm (0.00339 in.)
If the oil clearance is more than the maximum, replace the bearings. If necessary, inspect the crankshaft.
- HINT:
-
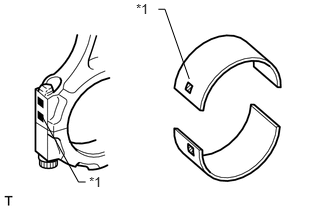 0.928,1.817 1.106,1.985 0.178,0.168 10 *1 1.417,0.015 1.620,0.204 0.203,0.189 10 *1 1.971,0.822 1.718,0.096 false 1.718,0.096 1.65,0.096 false 0.442,1.219 0.818,1.896 false 0.818,1.896 0.891,1.896 false
-
If replacing a bearing, replace it with one that has the same number as the number marked on the connecting rod. There are 4 sizes of standard bearings, marked "1", "2", "3" and "4" accordingly.
- Standard Connecting Rod Diameter:
-
Item Specified Condition Mark 1 59.000 to 59.006 mm (2.32283 to 2.32307 in.) Mark 2 59.007 to 59.012 mm (2.32311 to 2.32330 in.) Mark 3 59.013 to 59.018 mm (2.32334 to 2.32354 in.) Mark 4 59.019 to 59.024 mm (2.32358 to 2.32377 in.)
- Standard Bearing Center Wall Thickness:
-
Item Specified Condition Mark 1 1.484 to 1.487 mm (0.05843 to 0.05854 in.) Mark 2 1.487 to 1.490 mm (0.05854 to 0.05866 in.) Mark 3 1.490 to 1.493 mm (0.05866 to 0.05878 in.) Mark 4 1.493 to 1.496 mm (0.05878 to 0.05900 in.)
- Standard crankshaft pin diameter:
-
55.992 to 56.000 mm (2.2044 to 2.2047 in.)
Completely remove the Plastigage.
Perform the inspection above for each crank pin.
3.REMOVE PISTON WITH CONNECTING ROD
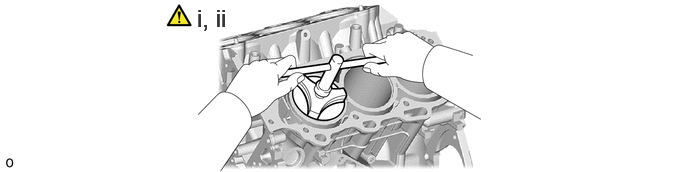
Using a ridge reamer, remove all the carbon from the top of the cylinder.
Push out the piston with connecting rod and upper bearing through the top of the cylinder block.
- HINT:
-
·
Keep the bearings, connecting rod and cap together.
·Arrange the piston and connecting rod assemblies in the correct order.
13041 4.REMOVE CONNECTING ROD BEARING
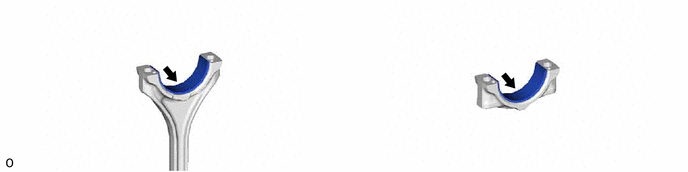
13011 5.REMOVE PISTON RING SET
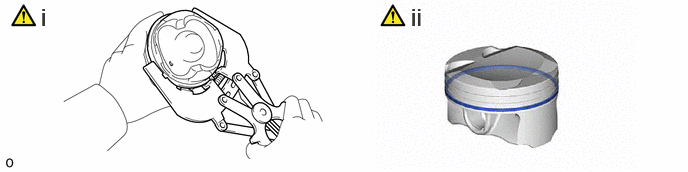
Using a piston ring expander, remove the No. 1 compression ring and No. 2 compression ring.
Remove the 2 oil rings (side rail) and oil ring (expander) by hand.
13101A 6.REMOVE PISTON PIN HOLE SNAP RING

Using a screwdriver, pry out the 2 piston pin hole snap rings.
13101 7.REMOVE PISTON WITH PIN SUB-ASSEMBLY
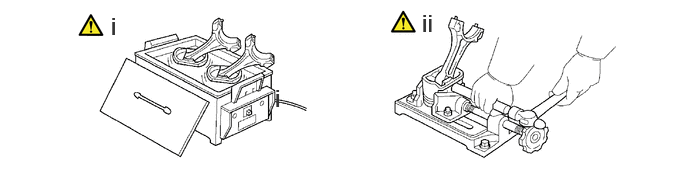
Gradually heat the piston to approximately 80°C (176°F).
Using a plastic-faced hammer and brass bar, lightly tap out the piston pin and remove the connecting rod sub-assembly.
- HINT:
-
Arrange the removed parts so that they can be reinstalled in their original locations.
8.INSPECT CRANKSHAFT THRUST CLEARANCE
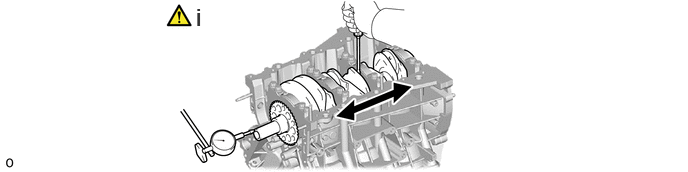
Using a dial indicator, measure the crankshaft thrust clearance while prying the crankshaft back and forth with a screwdriver.
- Standard thrust clearance:
-
0.04 to 0.24 mm (0.00157 to 0.00945 in.)
- Maximum thrust clearance:
-
0.30 mm (0.0118 in.)
If the thrust clearance is more than the maximum, replace the thrust washers as a set.
- Standard thrust washer thickness:
-
1.93 to 1.98 mm (0.0760 to 0.0780 in.)
If necessary, replace the crankshaft.
9.REMOVE CRANKSHAFT BEARING CAP
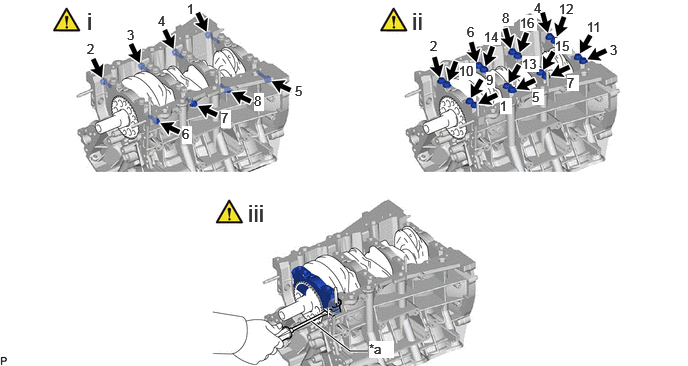
| *a | Protective Tape | - | - |
Uniformly loosen the 8 bolts in several steps in the sequence shown in the illustration and remove the 8 bolts and 8 seal washers.
Uniformly loosen the 16 crankshaft bearing cap set bolts in several steps in the sequence shown in the illustration and remove the crankshaft bearing cap set bolts.
Using a screwdriver, pry out the crankshaft bearing caps. Remove the 4 crankshaft bearing caps and lower crankshaft bearings.
- NOTICE:
-
·
Push up on the crankshaft bearing cap little by little, alternating between the right and left sides until the crankshaft bearing cap can be removed.
·Be careful not to damage the joint surfaces of the cylinder block sub-assembly and crankshaft bearing cap.
- HINT:
-
Tape the screwdriver tip before use.
10.REMOVE CRANKSHAFT
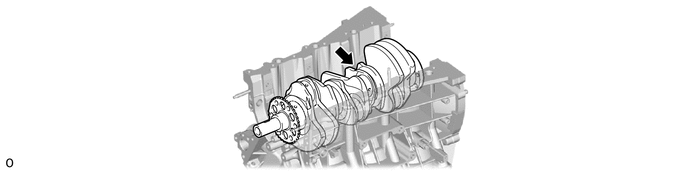
11011 11.REMOVE CRANKSHAFT THRUST WASHER
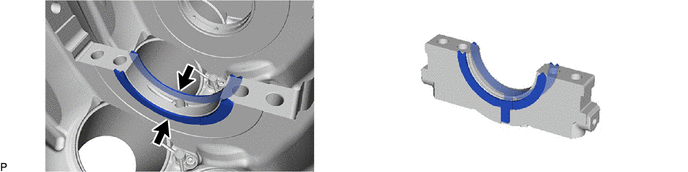
11702 12.REMOVE CRANKSHAFT BEARING
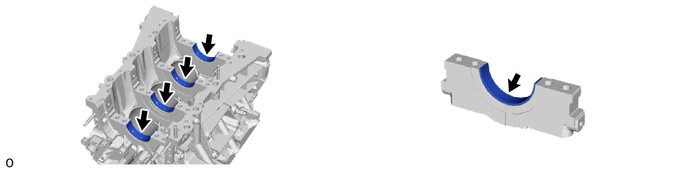
15708 13.REMOVE NO. 1 OIL NOZZLE SUB-ASSEMBLY
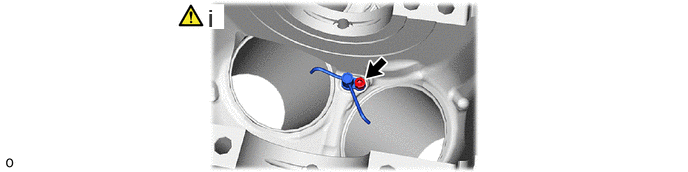
Using a 5 mm hexagon socket wrench, remove the 3 bolts and 3 No. 1 oil nozzle sub-assemblies.
14.REMOVE STUD BOLT
|
|
|
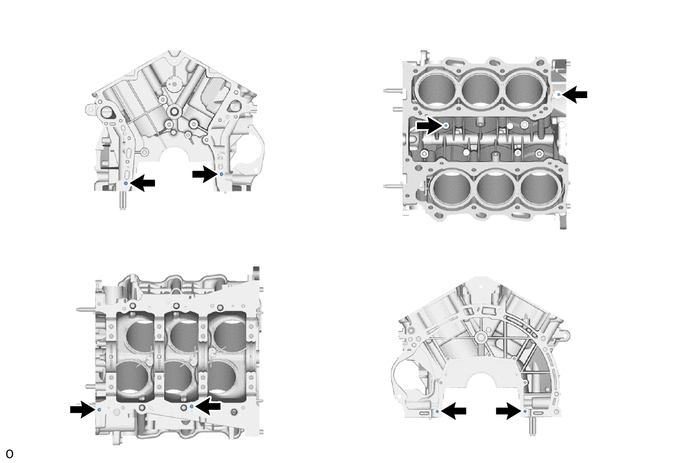
15.REMOVE STRAIGHT PIN
|
|
|