AUDIO / VIDEO RADIO ANTENNA CORD(for Floor) REMOVAL
CAUTION / NOTICE / HINT
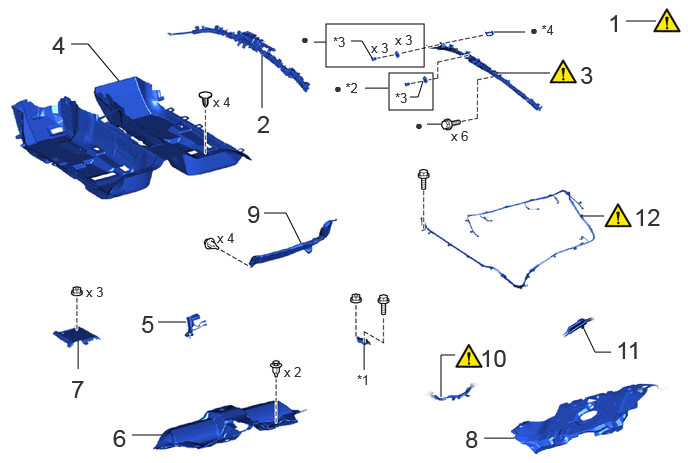
| Procedure | Part Name Code | 
|

|

|
|
|---|---|---|---|---|---|
| 1 | PRECAUTION | - | ( ) |
- | - |
| 2 | CURTAIN SHIELD AIRBAG ASSEMBLY LH | 62180A | - | - | - |
| 3 | CURTAIN SHIELD AIRBAG ASSEMBLY RH | 62170A | ()
|
- | - |
| 4 | FRONT FLOOR FRONT CARPET ASSEMBLY | 58510C | - | - | - |
| 5 | REAR SEAT INNER BELT ASSEMBLY LH | 73480A | - | - | - |
| 6 | NO. 6 FLOOR MAT | 58516A | - | - | - |
| 7 | REAR FLOOR PAD | 58579B | - | - | - |
| 8 | NO. 1 ROOM PARTITION PAD | 64273D | - | - | - |
| 9 | NO. 2 EV BATTERY INTAKE DUCT | G92D2A | - | - | - |
| 10 | UNDER FLOOR WIRE | 821H1 | ()
|
- | - |
| 11 | FLOOR WIRE | 82161 | - | - | - |
| 12 | NO. 2 ANTENNA CORD SUB-ASSEMBLY | 86101J | ()
|
- | - |
| *1 | WIRING HARNESS CLAMP BRACKET | *2 | ROOF SIDE INNER GARNISH CLIP |
| *3 | PIN | *4 | SPACER |
| ● | Non-reusable part | - | - |
CAUTION / NOTICE / HINT
The necessary procedures (adjustment, calibration, initialization or registration) that must be performed after parts are removed, installed or replaced during the No. 2 antenna cord sub-assembly removal/installation are shown below.
| Replaced Part or Performed Procedure | Necessary procedures | Effect/Inoperative Function when Necessary Procedure are not Performed | Link |
|---|---|---|---|
| Disconnect cable from negative (-) auxiliary battery terminal | Memorize steering angle neutral point | Parking assist monitor system | ()
|
| Panoramic view monitor system | ()
|
- HINT:
- ·
When the cable is disconnected/reconnected to the auxiliary battery terminal, systems temporarily stop operating. However, each system has a function that completes learning the first time the system is used.
-Learning completes when vehicle is driven
Effect/Inoperative Function When Necessary Procedures are not Performed Necessary Procedures Link Lane tracing assist system Drive the vehicle straight ahead at 35 km/h (22 mph) or more for 5 seconds or more. ( )
Pre-collision system Adaptive high beam system
-Learning completes when vehicle is operated normally
Effect/Inoperative Function When Necessary Procedures are not Performed Necessary Procedures Link Air conditioning system After the ignition switch is turned to ON, the servo motor and expansion valve standard position is recognized. -
·Use the same procedure for RHD and LHD vehicles.
·The procedure listed below is for LHD vehicles.
PROCEDURE

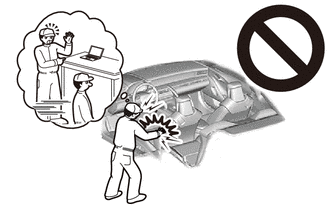
 1. PRECAUTION
|
|
|
62180A
2.REMOVE CURTAIN SHIELD AIRBAG ASSEMBLY LH
62170A
3.REMOVE CURTAIN SHIELD AIRBAG ASSEMBLY RH
|
|
|
58510C
4.REMOVE FRONT FLOOR FRONT CARPET ASSEMBLY
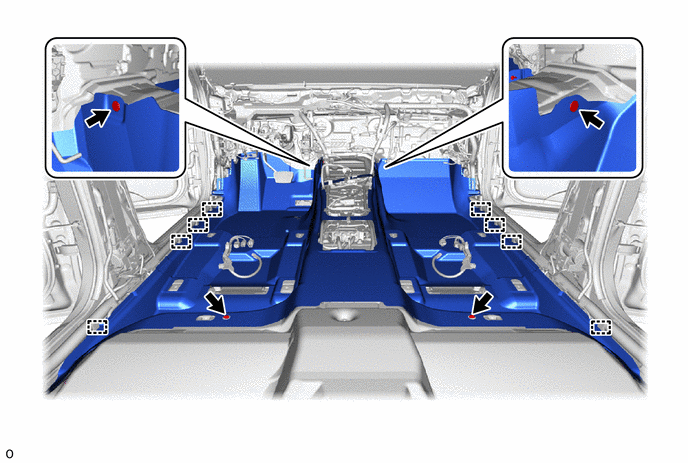
73480A
5.REMOVE REAR SEAT INNER BELT ASSEMBLY LH
58516A
6.REMOVE NO. 6 FLOOR MAT
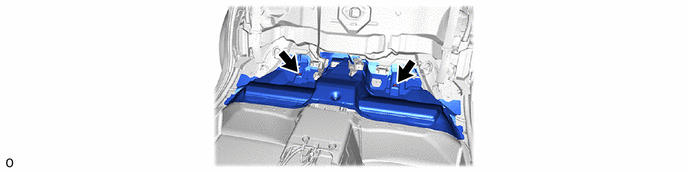
58579B
7.REMOVE REAR FLOOR PAD
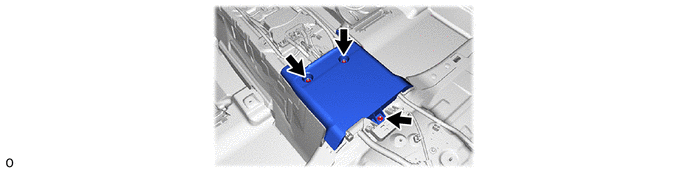
64273D
8.REMOVE NO. 1 ROOM PARTITION PAD
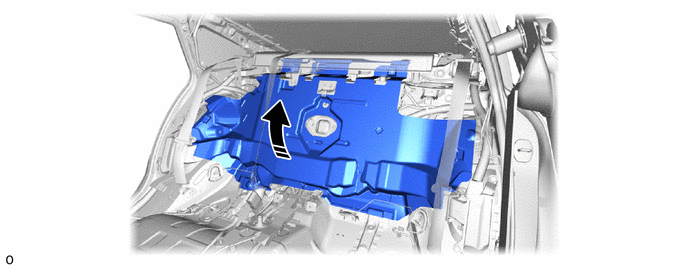

|
Remove in this Direction | - | - |
G92D2A
9.REMOVE NO. 2 EV BATTERY INTAKE DUCT
821H1
10.REMOVE UNDER FLOOR WIRE
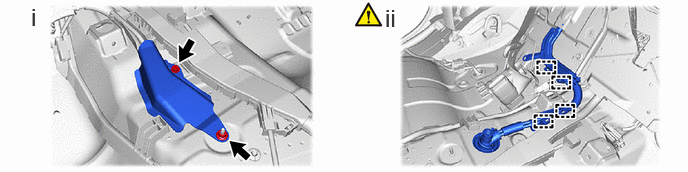
Remove the bolt and nut and wiring harness clamp bracket.
Detach the clamp and remove the under floor wire within the range shown.
82161
11.REMOVE FLOOR WIRE
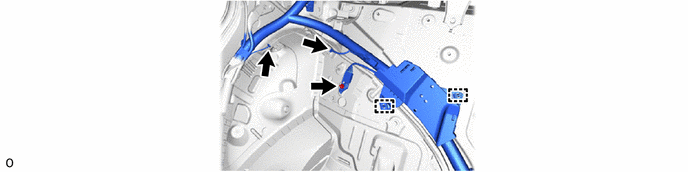
86101J
12.REMOVE NO. 2 ANTENNA CORD SUB-ASSEMBLY
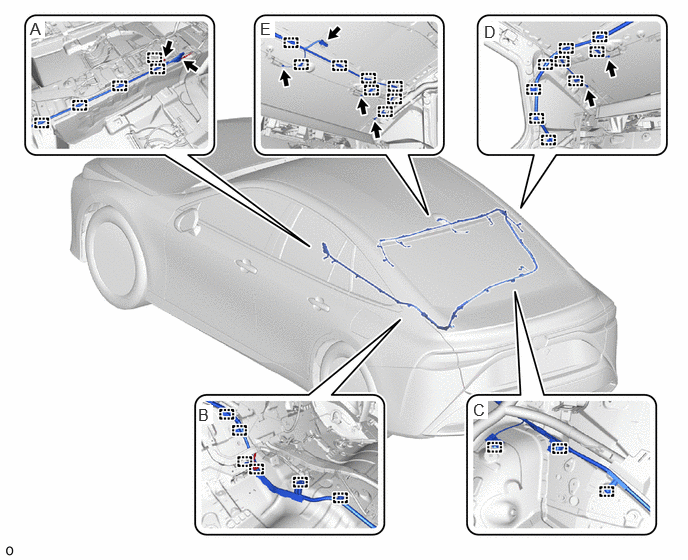
Perform the following procedure, and remove the No. 2 antenna cord sub-assembly.
1. Remove the bolt in area A shown in the illustration.
2. Disconnect the connector in area A shown in the illustration.
3. Detach the clamp and guide in area A shown in the illustration.
4. Detach the clamp in area B shown in the illustration.
5. Detach the clamp in area C shown in the illustration.
6. Disconnect the 2 connectors in area D shown in the illustration.
7. Detach the clamp in area D shown in the illustration.
8. Disconnect the 4 connectors in area E shown in the illustration.
9. Detach the clamp in area E shown in the illustration and remove the No. 2 antenna cord sub-assembly.