DOOR / HATCH HOOD LOCK CONTROL CABLE ASSEMBLY REMOVAL
PROCEDURE

 1.REMOVE FRONT WHEEL LH (for LHD)
75860A
2.REMOVE BODY ROCKER PANEL MOULDING ASSEMBLY LH (for LHD)
53876A
3.REMOVE FRONT FENDER LINER LH (for LHD)
- HINT:
-
Use the same procedure for the RH side and LH side (See page Vehicle Exterior>WIPER / WASHER>WASHER MOTOR(for Front Side)>REMOVAL).
4.REMOVE FRONT WHEEL RH (for RHD)
75850A
5.REMOVE BODY ROCKER PANEL MOULDING ASSEMBLY RH (for RHD)
- HINT:
-
Use the same procedure for the RH side and LH side (See page Vehicle Exterior>EXTERIOR PANELS / TRIM>ROCKER PANEL MOULDING>REMOVAL)
53875A
6.REMOVE FRONT FENDER LINER RH (for RHD)
67914
7.REMOVE FRONT DOOR SCUFF PLATE LH (for LHD)
62112A
8.REMOVE COWL SIDE TRIM SUB-ASSEMBLY LH (for LHD)
55606
9.REMOVE NO. 1 INSTRUMENT PANEL UNDER COVER SUB-ASSEMBLY (for LHD)
67913
10.REMOVE FRONT DOOR SCUFF PLATE RH (for RHD)
- HINT:
-
Use the same procedure for the RH side and LH side (See page Vehicle Interior>INTERIOR PANELS / TRIM>ROOF HEADLINING>REMOVAL)
62111C
11.REMOVE COWL SIDE TRIM SUB-ASSEMBLY RH (for RHD)
- HINT:
-
Use the same procedure for the RH side and LH side (See page Vehicle Interior>INTERIOR PANELS / TRIM>ROOF HEADLINING>REMOVAL)
55606
12.REMOVE NO. 1 INSTRUMENT PANEL UNDER COVER SUB-ASSEMBLY (for RHD)
- HINT:
-
Use the same procedure for the RH side and LH side (See page Vehicle Interior>INTERIOR PANELS / TRIM>LOWER INSTRUMENT PANEL>REMOVAL).
53601
13.DISCONNECT HOOD LOCK CONTROL LEVER SUB-ASSEMBLY
53601
14.REMOVE HOOD LOCK CONTROL LEVER SUB-ASSEMBLY
for Type A:
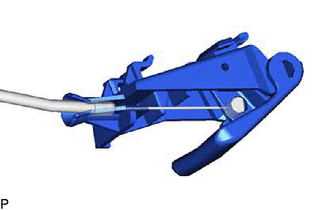
Disconnect the hood lock control cable assembly to remove the hood lock control lever sub-assembly.
- HINT:
-
When changing the hood lock control lever sub-assembly from type A to type B, the hood lock control cable assembly must also be changed to type B.
for Type B:
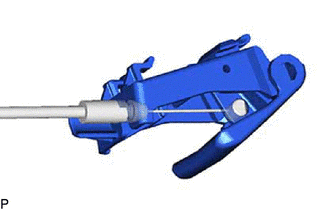
Disconnect the hood lock control cable assembly to remove the hood lock control lever sub-assembly.
- HINT:
-
When changing the hood lock control lever sub-assembly from type B to type A, the hood lock control cable assembly must also be changed to type A.
53630
15.REMOVE HOOD LOCK CONTROL CABLE ASSEMBLY (for LHD)
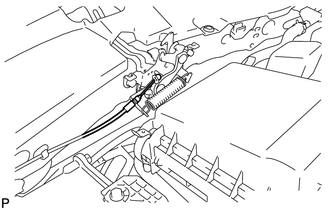
Disconnect the hood lock control cable assembly.
Using a screwdriver, disengage 6 clamps and the 2 grommets as shown in the illustration.
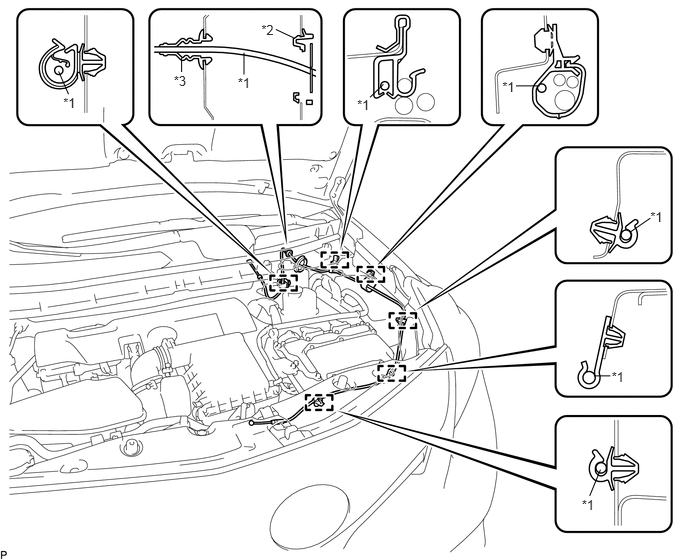
| *1 | Hood Lock Control Cable | *2 | Grommet |
| *3 | Hood Cable Grommet | - | - |
- HINT:
-
Tape the screwdriver tip before use.
Pull the hood lock control cable assembly from the engine compartment and remove it.
- HINT:
-
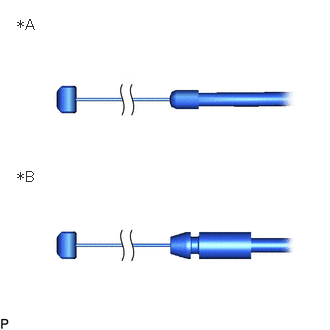 0.167,0.167 0.5,0.417 0.333,0.25 12 false *A 0.167,1.75 0.5,2 0.333,0.25 12 false *B
*A Type A *B Type B
- ·
When changing the hood lock control cable assembly from type A to type B, the hood lock control lever sub-assembly must also be changed to type B.
·When changing the hood lock control cable assembly from type B to type A, the hood lock control lever sub-assembly must also be changed to type A.
53630
16.REMOVE HOOD LOCK CONTROL CABLE ASSEMBLY (for RHD)
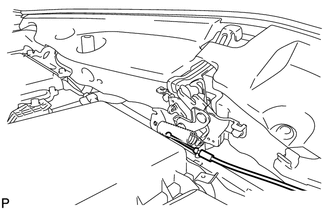
Disconnect the hood lock control cable assembly.
Using a screwdriver, disengage 5 clamps and the 2 grommets as shown in the illustration.
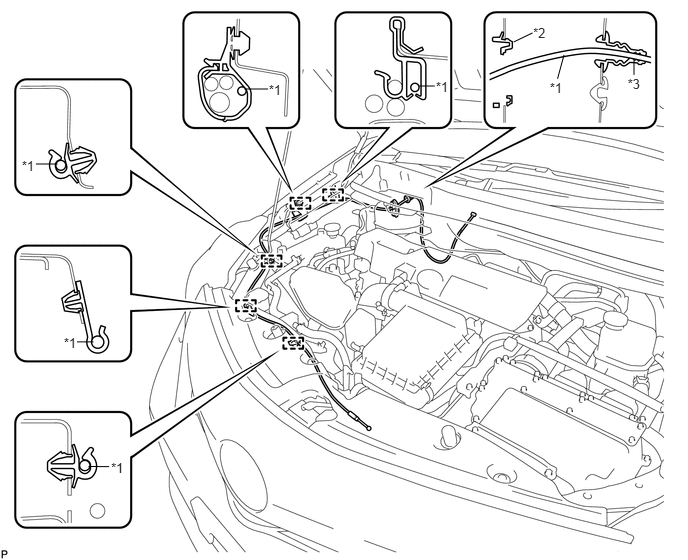
| *1 | Hood Lock Control Cable | *2 | Grommet |
| *3 | Hood Cable Grommet | - | - |
- HINT:
-
Tape the screwdriver tip before use.
Pull the hood lock control cable assembly from the engine compartment and remove it.
- HINT:
-
0.167,0.167 0.5,0.417 0.333,0.25 12 false *A 0.167,1.75 0.5,2 0.333,0.25 12 false *B
*A Type A *B Type B
- ·
When changing the hood lock control cable assembly from type A to type B, the hood lock control lever sub-assembly must also be changed to type B.
·When changing the hood lock control cable assembly from type B to type A, the hood lock control lever sub-assembly must also be changed to type A.