DOOR / HATCH BACK DOOR DISASSEMBLY
PROCEDURE

 64790B
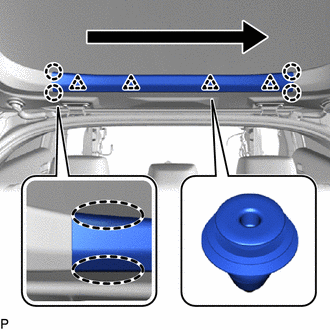
1.REMOVE BACK DOOR UPPER TRIM PANEL ASSEMBLY

|
Place Hand Here |

|
Order of Removal |
Disengage the 4 claws and 4 clips to remove the back door upper trim panel assembly as shown in the illustration.
67938A
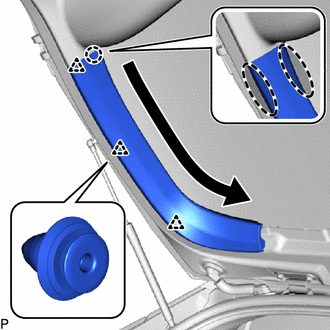
2.REMOVE BACK DOOR SIDE GARNISH LH
|
|
Place Hand Here |
|
|
Order of Removal |
Disengage the claw and 3 clips to remove the back door side garnish LH as shown in the illustration.
67937B
3.REMOVE BACK DOOR SIDE GARNISH RH
- HINT:
-
Use the same procedure as for the LH side.
74811B
4.REMOVE DOOR PULL HANDLE
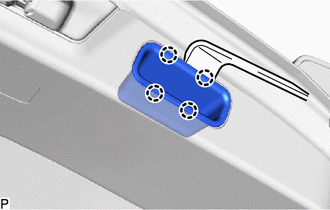
Using a moulding remover, disengage the 4 claws to remove the door pull handle.
67750
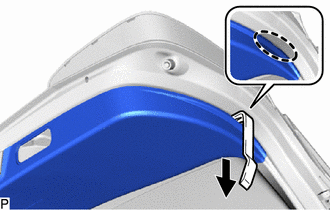
5.REMOVE BACK DOOR TRIM BOARD ASSEMBLY
|
|
Place Hand Here |
Using a moulding remover, pull the back door trim board assembly in the direction indicated by the arrow shown in the illustration until there is enough of a gap to make it possible to pull on the trim by hand.
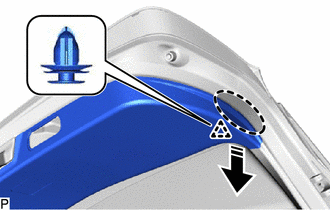
|
|
Place Hand Here |

|
Remove in this Direction |
Disengage the clip as shown in the illustration.
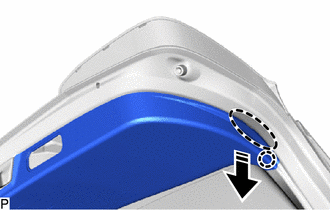
|
|
Place Hand Here |
|
|
Remove in this Direction |
Disengage the claw as shown in the illustration.
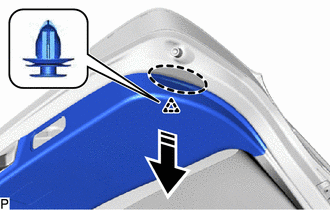
|
|
Place Hand Here |
|
|
Remove in this Direction |
Disengage the clip as shown in the illustration.
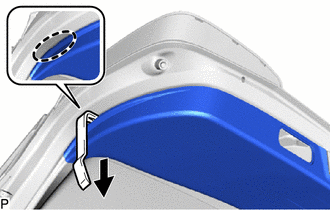
|
|
Place Hand Here |
Using a moulding remover, pull the back door trim board assembly in the direction indicated by the arrow shown in the illustration until there is enough of a gap to make it possible to pull on the trim by hand.
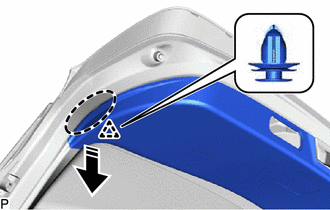
|
|
Place Hand Here |
|
|
Remove in this Direction |
Disengage the clip as shown in the illustration.
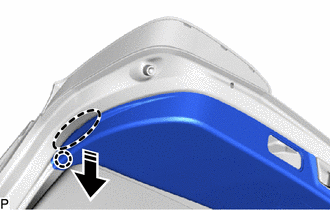
|
|
Place Hand Here |
|
|
Remove in this Direction |
Disengage the claw as shown in the illustration.
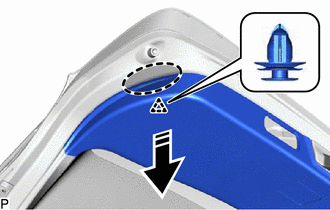
|
|
Place Hand Here |
|
|
Remove in this Direction |
Disengage the clip as shown in the illustration.
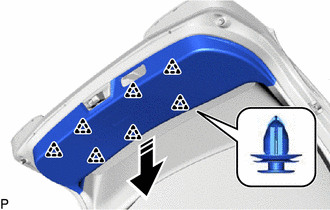
|
|
Remove in this Direction |
Disengage the 7 clips to remove the back door trim board assembly as shown in the illustration.
69321
6.REMOVE BACK DOOR LOCK COVER
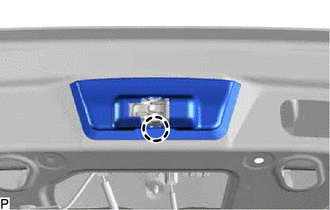
Disengage the claw to remove the back door lock cover.
67751
7.REMOVE BACK DOOR TRIM BOARD
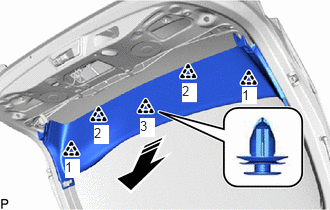
|
|
Remove in this Direction |
Disengage the 5 clips in the order shown in the illustration to remove the back door trim board.
8.REMOVE REAR WIPER ARM AND BLADE ASSEMBLY (w/ Rear Wiper)
85143R
9.REMOVE REAR WIPER MOTOR GROMMET (w/ Rear Wiper)
85110R
10.REMOVE REAR WIPER MOTOR ASSEMBLY (w/ Rear Wiper)
69350
11.REMOVE BACK DOOR LOCK ASSEMBLY
67281B
12.REMOVE BACK DOOR LOWER STOPPER
- HINT:
-
Use the same procedure for the RH side and LH side.
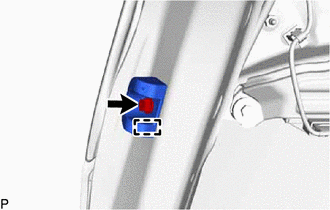
Remove the bolt.
Disengage the guide to remove the back door lower stopper.
76085
13.REMOVE REAR SPOILER SUB-ASSEMBLY
85345R
14.REMOVE REAR WASHER NOZZLE (w/ Rear Wiper)
76801
15.REMOVE BACK DOOR OUTSIDE GARNISH SUB-ASSEMBLY
84840G
16.REMOVE BACK DOOR OPENER SWITCH ASSEMBLY
81270
17.REMOVE LICENSE PLATE LIGHT ASSEMBLY
86790D
18.REMOVE REAR TELEVISION CAMERA ASSEMBLY (w/ Rear View Monitor System)
67005B
19.REMOVE BACK DOOR PANEL CUSHION
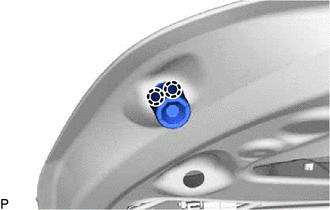
Disengage the 2 claws to remove the back door panel cushion.
- HINT:
-
Use the same procedure for the RH side and LH side.
20.REMOVE BACK DOOR DUST PROOF SEAL
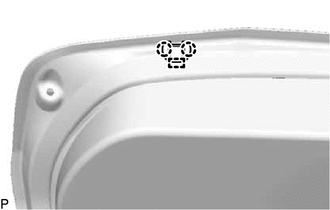
Disengage the 2 claws and guide to remove the back door dust proof seal.
- HINT:
-
Use the same procedure for the other 2 back door dust proof seals.
68960B
21.REMOVE BACK DOOR STAY ASSEMBLY LH
68950C
22.REMOVE BACK DOOR STAY ASSEMBLY RH
- HINT:
-
Use the same procedure as for the LH side.
68961
23.REMOVE BACK DOOR STAY BOLT