INSTALLATION
Removal / installation · Vehicles built from Nov 2005
| 1. INSTALL COOLER DRYER |

Using pliers, install the cooler dryer.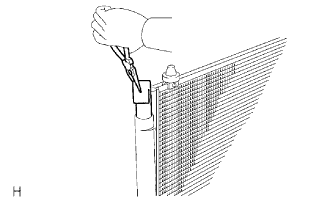

Apply a sufficient amount of compressor oil to the contact surfaces of a new O-ring and the cap.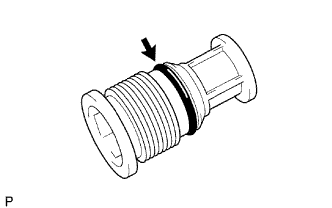
- Compressor oil:
- ND-OIL 8 or equivalent
Install the O-ring to the cap.
Using a 14 mm socket hexagon wrench, install the cap to the modulator.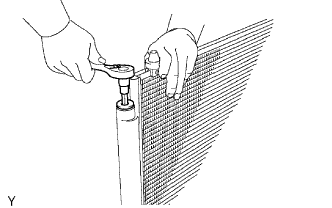
- Torque:
- 2.9 N*m{ 29 kgf*cm , 25 in.*lbf }
| 2. INSTALL COOLER CONDENSER ASSEMBLY |
Install the cooler condenser.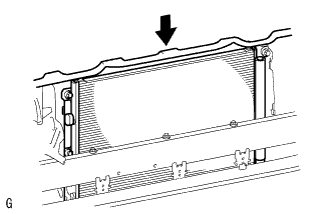
| 3. INSTALL NO. 1 RADIATOR SUPPORT (for 2AD-FTV, 2AD-FHV) |
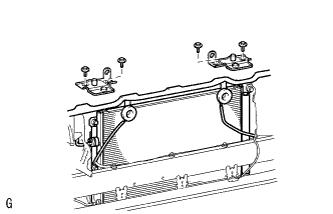 |
Install the 2 radiator supports with the 4 bolts.
- Torque:
- 5.5 N*m{ 56 kgf*cm , 49 in.*lbf }
| 4. INSTALL NO. 2 FAN SHROUD (for 1AZ-FE, 2AZ-FE) |
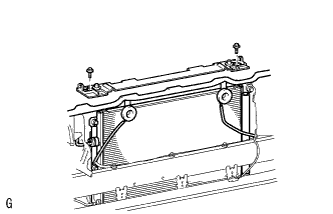 |
Install the fan shroud with the 2 bolts.
- Torque:
- 10.5 N*m{ 107 kgf*cm , 8 ft.*lbf }
| 5. INSTALL RADIATOR SUPPORT UPPER BRACKET |
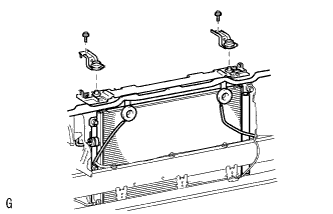 |
Install the 2 brackets with the 2 bolts.
- Torque:
- 45 N*m{ 459 kgf*cm , 33 ft.*lbf }
| 6. INSTALL COOLER REFRIGERANT LIQUID PIPE |
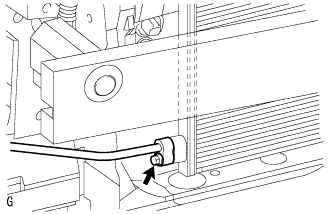 |
Remove the attached vinyl tape from the pipe and the connecting part of the cooler condenser.
Sufficiently apply compressor oil to a new O-ring and the fitting surface of the pipe joint.
- Compressor oil:
- ND-OIL 8 or equivalent
Install the O-ring on the cooler refrigerant liquid pipe.
Install the cooler refrigerant liquid pipe on the cooler condenser with the bolt.
- Torque:
- 9.8 N*m{ 100 kgf*cm , 7 ft.*lbf }
| 7. INSTALL NO. 1 COOLER REFRIGERANT DISCHARGE HOSE |
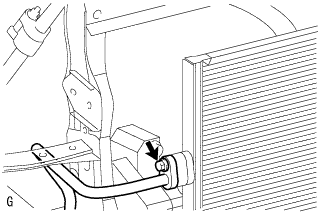 |
Remove the attached vinyl tape from the hose and the connecting part of the cooler condenser.
Sufficiently apply compressor oil to a new O-ring and the fitting surface of the hose joint.
- Compressor oil:
- ND-OIL 8 or equivalent
Install the O-ring on the cooler refrigerant discharge hose.
Install the cooler refrigerant discharge hose on the cooler condenser with the bolt.
- Torque:
- 9.8 N*m{ 100 kgf*cm , 7 ft.*lbf }
| 8. ADJUST HOOD SUB-ASSEMBLY |
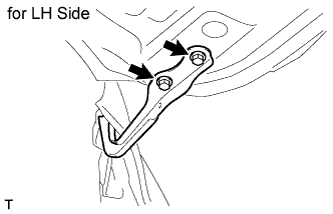 |
Install the hood with the 4 bolts.
- Torque:
- 13.0 N*m{ 133 kgf*cm , 10 ft.*lbf }
Adjust the hood position (Click here).
| 9. INSTALL FRONT BUMPER COVER |
Install the front bumper cover (Click here).
| 10. CONNECT CABLE TO NEGATIVE BATTERY TERMINAL |
| 11. CHARGE REFRIGERANT |
Perform vacuum purging using a vacuum pump.
Charge refrigerant HFC-134a (R134a).
- Standard:
- 430 +-30 g (15.2 +-1.1 oz.)
- SST
- 07110-58060
(07117-58060, 07117-58070, 07117-58080, 07117-58090, 07117-78050, 07117-88060, 07117-88070, 07117-88080)
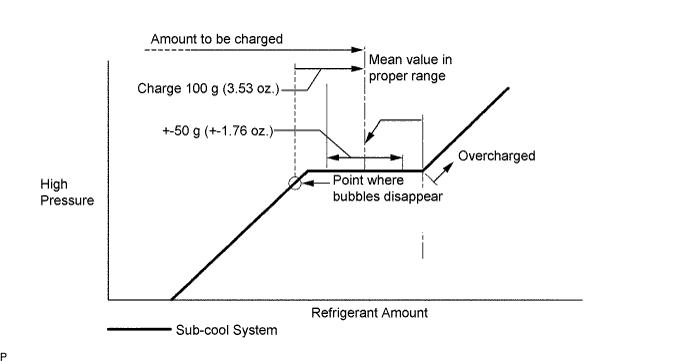
- NOTICE:
- Do not operate the cooler compressor before charging refrigerant as the cooler compressor will not work properly without any refrigerant, and will overheat.
- Approximately 100 g (3.53 oz.) of refrigerant may need to be charged after bubbles disappear. The refrigerant amount should be checked by measuring its quantity, and not with the sight glass.
- Do not operate the cooler compressor before charging refrigerant as the cooler compressor will not work properly without any refrigerant, and will overheat.
| 12. WARM UP ENGINE |
Perform vacuum purging using a vacuum pump.
Charge refrigerant HFC-134a (R134a).
- Standard:
- 430 +-30 g (15.2 +-1.1 oz.)
- SST
- 07110-58060
(07117-58060, 07117-58070, 07117-58080, 07117-58090, 07117-78050, 07117-88060, 07117-88070, 07117-88080)
- NOTICE:
- Do not operate the cooler compressor before charging refrigerant as the cooler compressor will not work properly without any refrigerant, and will overheat.
- Approximately 100 g (3.53 oz.) of refrigerant may need to be charged after bubbles disappear. The refrigerant amount should be checked by measuring its quantity, and not with the sight glass.
- Do not operate the cooler compressor before charging refrigerant as the cooler compressor will not work properly without any refrigerant, and will overheat.
| 13. CHECK FOR LEAKAGE OF REFRIGERANT |
After recharging the refrigerant gas, check for refrigerant gas leakage using a halogen leak detector.
Perform the operation under these conditions:
- Stop the engine.
- Secure good ventilation (the gas leak detector may react to volatile gases other than refrigerant, such as evaporated gasoline or exhaust gas).
- Repeat the test 2 or 3 times.
- Make sure that some refrigerant remains in the refrigeration system. When compressor is off: approximately 392 to 588 kPa (4 to 6 kgf/cm2, 57 to 85 psi)
- Stop the engine.
Using a gas leak detector, check the refrigerant line for leakage.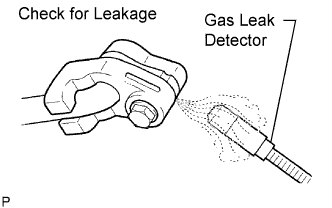
If a gas leak is not detected on the drain hose, remove the blower motor control (blower resistor) from the cooling unit. Insert the gas leak detector sensor into the unit and perform the test.
Disconnect the connector and leave the pressure switch on for approximately 20 minutes. Bring the gas leak detector close to the pressure switch and perform the test.