Home › ENGINE ยท 3ZR-FAE › COOLING › RADIATOR

RADIATOR > REMOVAL

for Preparation Click here


1. DISCHARGE REFRIGERANT FROM REFRIGERATION SYSTEM (w/ Air Conditioning System)
  1. Start the engine.

  1. Turn the A/C switch on.

  1. Operate the cooler compressor while the engine speed is approximately 1000 rpm for 5 to 6 minutes to circulate the refrigerant and collect the compressor oil remaining in each component into the cooler compressor.

  1. Stop the engine.

  1. Recover the refrigerant from the A/C system using a refrigerant recovery unit.

    SST
    09985-20010   (09985-02130, 09985-02150, 09985-02090, 09985-02110, 09985-02010, 09985-02050, 09985-02060, 09985-02070)


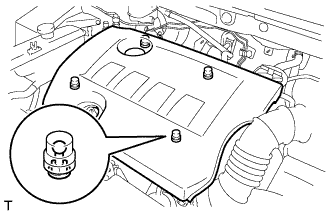
2. REMOVE NO. 2 CYLINDER HEAD COVER


    A209050
  1. Hold the rear of the cover and raise it to detach the 2 clips on the rear of the cover. Continue to raise the cover to detach the 2 clips on the front of the cover and remove the cover.

    NOTICE:
    Attempting to detach both front and rear clips at the same time may cause the cover to break.


3. DISCONNECT CABLE FROM NEGATIVE BATTERY TERMINAL

NOTICE:
w/ Navigation System (for HDD):
After the ignition switch is turned off, the HDD navigation system requires approximately a minute to record various types of memory and settings. As a result, after turning the ignition switch off, wait a minute or more before disconnecting the cable from the negative (-) battery terminal.


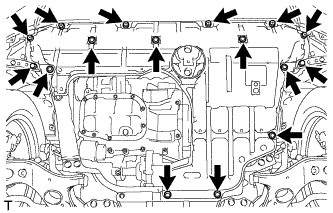
4. REMOVE NO. 1 ENGINE UNDER COVER


    A206200
  1. Remove the 6 screws, 10 clips and under cover.


5. DRAIN ENGINE COOLANT


    A195000E02
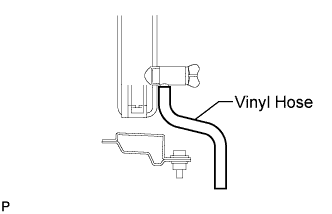
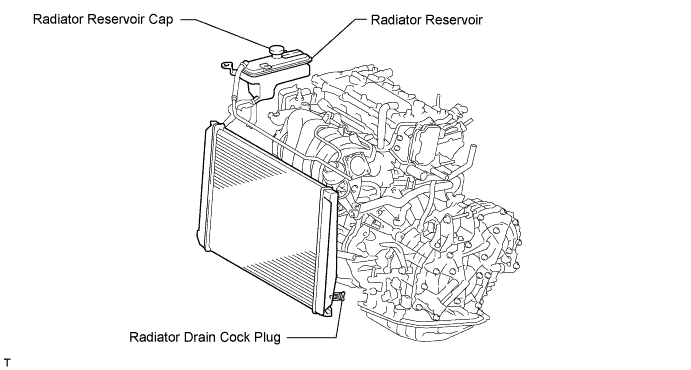
  1. Install a vinyl hose to the drain cock plug on the radiator side.


  1. Loosen the radiator drain cock plug.


    A245378E01

    HINT:
    Collect the coolant in a container and dispose of it according to the regulations in your area.

  1. Remove the radiator reservoir cap.

    CAUTION:
    Do not remove the radiator reservoir cap while the engine and radiator are still hot. Pressurized, hot engine coolant and steam may be released and cause serious burns.


6. REMOVE FRONT BUMPER COVER
  1. w/ Hood Moulding:
    Remove the front bumper cover (Click here).

  1. w/ Under Guard:
    Remove the front bumper cover (Click here).

  1. w/o Under Guard:
    Remove the front bumper cover (Click here).


7. REMOVE BATTERY CLAMP


    A210040
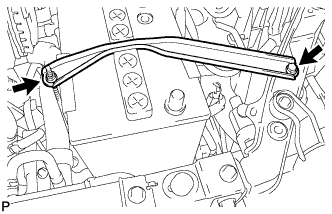
  1. Remove the bolt and loosen the nut.

  1. Detach the hook of the battery clamp from the front battery bracket, and then remove the battery clamp.


8. REMOVE BATTERY


9. REMOVE GENERATOR ASSEMBLY
  1. Remove the generator (Click here).


10. DISCONNECT NO. 1 RADIATOR HOSE


A207909
  1. Remove the 2 bolts.

  1. Disconnect the 2 radiator hoses.


11. DISCONNECT NO. 2 RADIATOR HOSE


    A207916
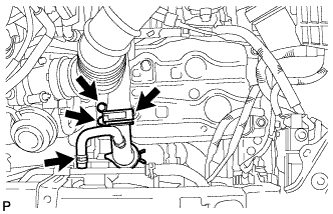
  1. Disconnect the hose from the water inlet housing.


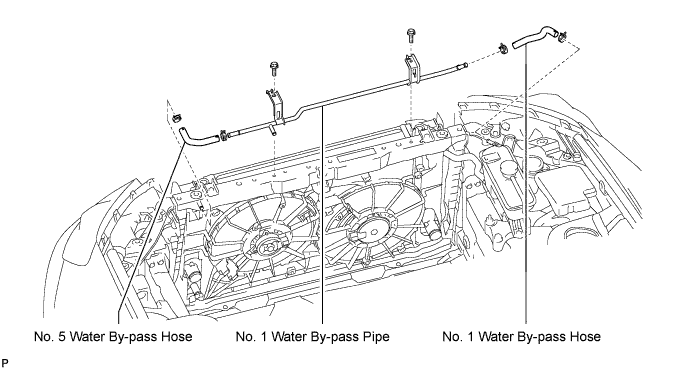
12. REMOVE NO. 1 WATER BY-PASS HOSE
  1. Remove the No. 1 water by-pass hose from the radiator reservoir and No. 1 water by-pass pipe.


13. REMOVE NO. 5 WATER BY-PASS HOSE
  1. Remove the No. 5 water by-pass hose from the radiator and No. 1 water by-pass pipe.


14. REMOVE NO. 1 WATER BY-PASS PIPE


  1. Remove the 2 bolts and pipe.


    A197693E01


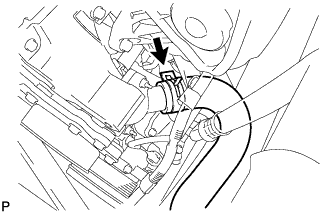
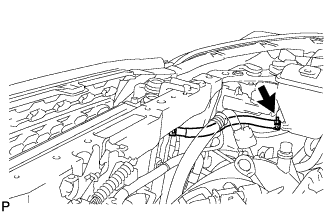
15. DISCONNECT NO. 2 WATER BY-PASS HOSE


    A207910
  1. Disconnect the No. 2 water by-pass hose from the radiator reservoir.


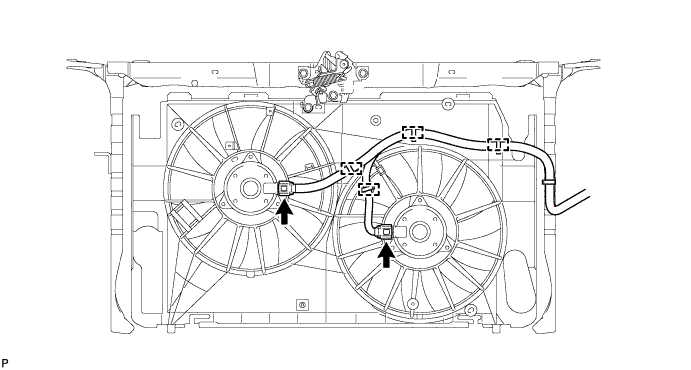
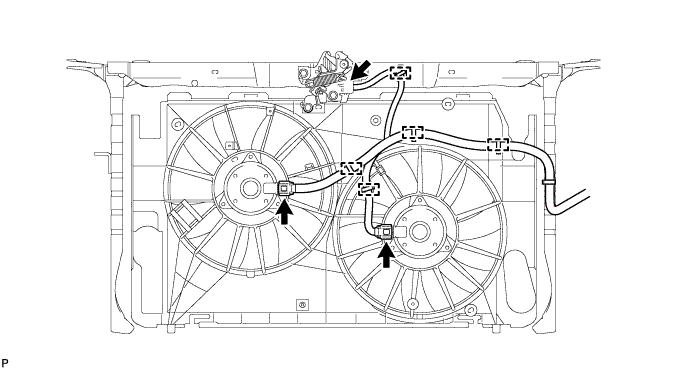
16. DISCONNECT WIRE HARNESS


  1. w/o Hood Courtesy Switch:

    1. Disconnect the 2 fan motor connectors from the 2 fan motors.


    2. Detach the 4 wire harness clamps and disconnect the wire harness.


      A197696


  1. w/ Hood Courtesy Switch:

    1. Disconnect the hood courtesy switch connector.

    2. Disconnect the 2 fan motor connectors from the 2 fan motors.


    3. Detach the 5 wire harness clamps and disconnect the wire harness.


      A210362


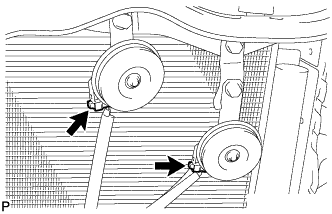
17. DISCONNECT HORN CONNECTOR


    A196194
  1. Disconnect the 2 horn connectors.


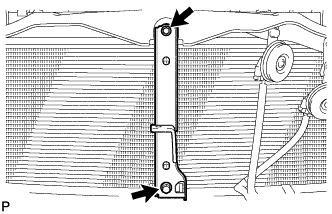
18. REMOVE FRONT BUMPER CENTER STAY SUB-ASSEMBLY


    A196195
  1. Remove the 2 bolts and stay.


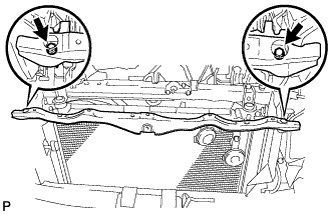
19. REMOVE FRONT BUMPER UPPER REINFORCEMENT SUB-ASSEMBLY


    A196196
  1. Remove the 2 bolts and reinforcement.


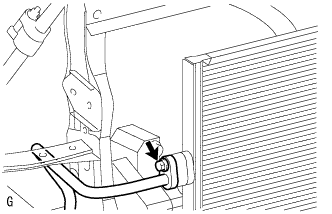
20. DISCONNECT NO. 1 COOLER REFRIGERANT DISCHARGE HOSE (w/ Air Conditioning System)


    H102042
  1. Remove the bolt and disconnect the cooler refrigerant discharge hose from the cooler condenser.

  1. Remove the O-ring from the cooler refrigerant discharge hose.

    NOTICE:
    Seal the openings of the disconnected parts using vinyl tape to prevent moisture and foreign matter from entering them.


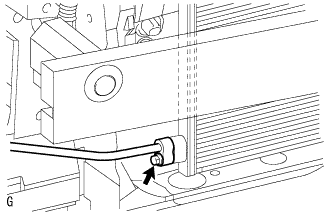
21. DISCONNECT COOLER REFRIGERANT LIQUID PIPE (w/ Air Conditioning System)


    H102043
  1. Remove the bolt and disconnect the liquid pipe sub-assembly from the cooler condenser.

  1. Remove the O-ring from the liquid pipe sub-assembly.

    NOTICE:
    Seal the openings of the disconnected parts using vinyl tape to prevent moisture and foreign matter from entering them.


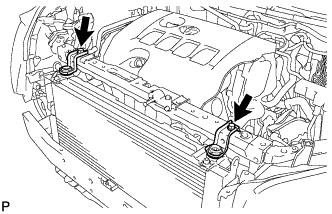
22. REMOVE UPPER RADIATOR SUPPORT BRACKET


    A207911
  1. Remove the 2 bolts and 2 upper radiator support brackets.


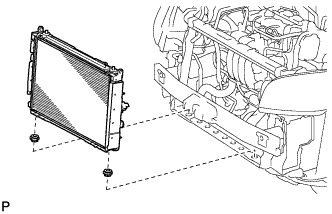
23. REMOVE RADIATOR ASSEMBLY


    A207912
  1. Remove the radiator together with the 2 lower radiator supports.

    HINT:
    After removing the radiator, make sure that both lower radiator supports are attached to the fan shroud.


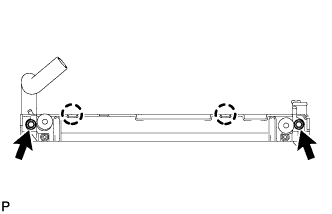
    A196991
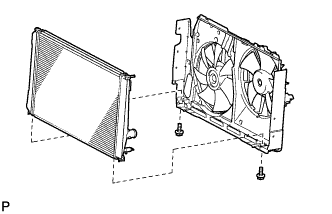
  1. Remove the 2 bolts.

  1. Detach the 2 claws and remove the No. 2 fan shroud.


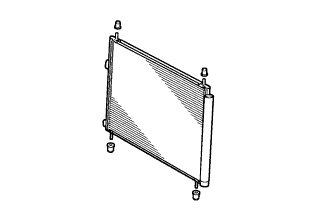
    A129787
  1. w/ Air Conditioning System:
    Remove the cooler condenser from the fan shroud with cooling fan.

    HINT:
    After removing the condenser, make sure that all 4 cooler condenser cushions are attached to the condenser.


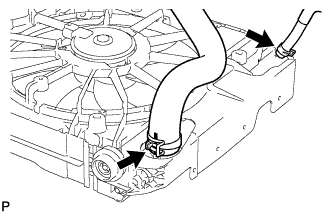
    A196201
  1. Remove the No. 2 water by-pass hose and No. 2 radiator hose from the radiator.


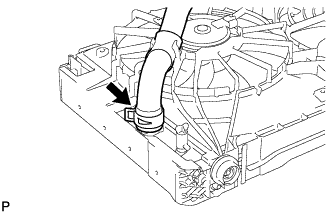
    A196202
  1. Remove the No. 1 radiator hose from the radiator.


    A114328
  1. Remove the 2 bolts and radiator from the fan shroud with cooling fan.