INTERIOR PANELS / TRIM LOWER INSTRUMENT PANEL REMOVAL
PROCEDURE

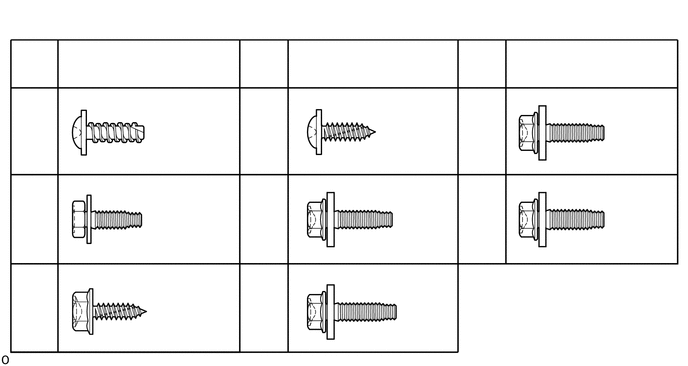
 1.TABLE OF BOLT, SCREW AND NUT
- HINT:
-
All bolts, screws and nuts relevant to installing and removing the instrument panel are shown along with their alphabet code in the table below.
2. PRECAUTION
- NOTICE:
-
After turning the ignition switch off, waiting time may be required before disconnecting the cable from the battery terminal. Therefore, make sure to read the disconnecting the cable from the battery terminal notice before proceeding with work.
-
Click hereGeneral>INTRODUCTION>REPAIR INSTRUCTION>PRECAUTION
3.DISCONNECT CABLE FROM NEGATIVE BATTERY TERMINAL
- CAUTION:
-
Wait at least 90 seconds after disconnecting the cable from the negative (-) battery terminal to disable the SRS system.
- NOTICE:
-
When disconnecting the cable, some systems need to be initialized after the cable is reconnected.
-
Click hereGeneral>INTRODUCTION>REPAIR INSTRUCTION>INITIALIZATION
4.REMOVE UPPER INSTRUMENT PANEL
5.REMOVE REAR CONSOLE BOX SUB-ASSEMBLY
6.REMOVE LOWER NO. 2 INSTRUMENT PANEL FINISH PANEL
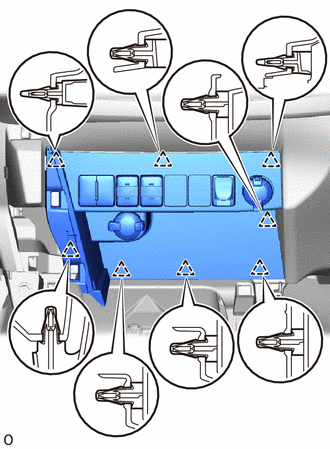
Detach the 8 clips and remove the lower No. 2 instrument panel finish panel.
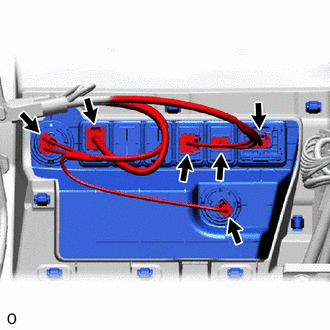
| *1 | w/ Seat Heater System |
Disconnect each connector.
7.REMOVE NO. 1 INSTRUMENT PANEL UNDER COVER SUB-ASSEMBLY
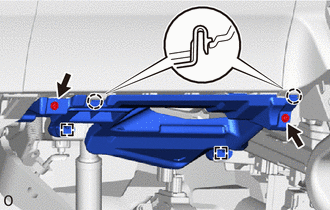
Remove the 2 screws <A> or <B>.
Detach the 2 claws and 2 guides and remove the No. 1 instrument panel under cover sub-assembly.
Disconnect the connector.
8.REMOVE FUSE BOX OPENING COVER
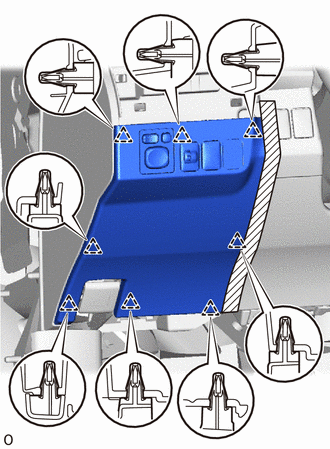

|
Protective Tape |
Apply protective tape as shown in the illustration.
Detach the 8 clips and remove the fuse box opening cover.
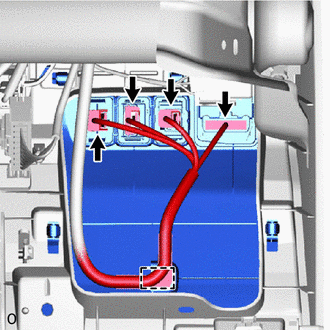
| *1 | w/ Blind Spot Monitor |
Disconnect each connector and detach the wire harness clamp.
9.REMOVE LOWER NO. 1 INSTRUMENT PANEL AIRBAG ASSEMBLY
10.REMOVE NO. 2 INSTRUMENT PANEL UNDER COVER SUB-ASSEMBLY
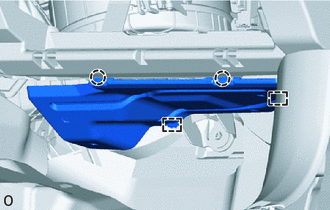
Detach the 2 claws and 2 guides and remove the No. 2 instrument panel under cover sub-assembly.
11.REMOVE FRONT DOOR SCUFF PLATE LH
12.REMOVE FRONT DOOR SCUFF PLATE RH
13.REMOVE COWL SIDE TRIM BOARD LH
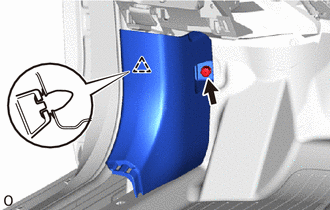
Remove the nut.
Detach the clip and remove the cowl side trim board LH.
14.REMOVE COWL SIDE TRIM BOARD RH
- HINT:
-
Use the same procedure described for the LH side.
15.REMOVE DEFROSTER NOZZLE ASSEMBLY
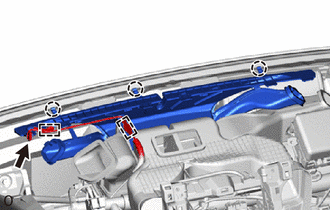
Disconnect the connector and detach the 2 wire harness clamps.
Detach the 3 claws and remove the defroster nozzle assembly.
16.REMOVE HEATER TO REGISTER DUCT ASSEMBLY
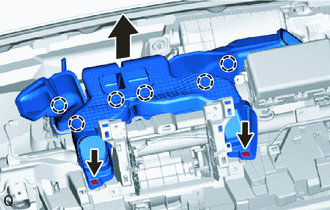
Remove the 2 clips.
Pull up the heater to register duct assembly to detach the 6 claws and remove it.
17.REMOVE LOWER INSTRUMENT PANEL
Disconnect each connector and detach each wire harness clamp.
Detach the claw and disconnect the hood lock control lever.
Detach the 2 claws and disconnect the DLC3.
Detach the 2 claws and disconnect the cooler thermistor.
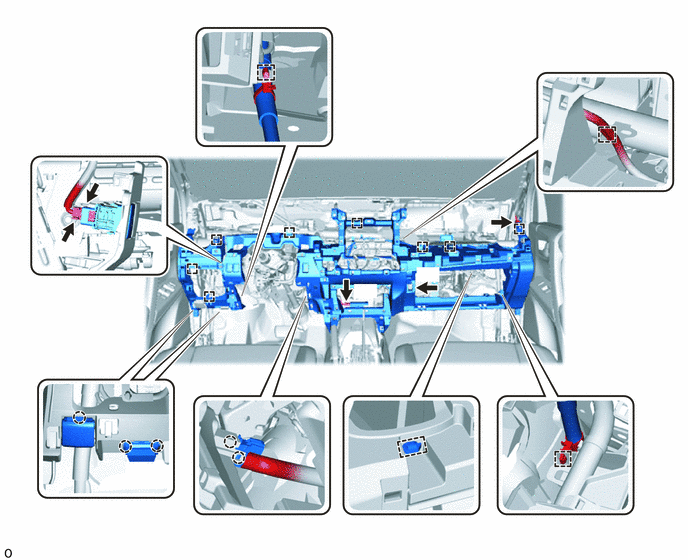
| *A | for AWD | *B | w/ Power Back Door |
| *C | w/ Smart Entry and Start System | - | - |
Remove the 6 bolts <E> or <F> and 2 bolts <C> or <D>.
Remove the bolt <G> and lower instrument panel.
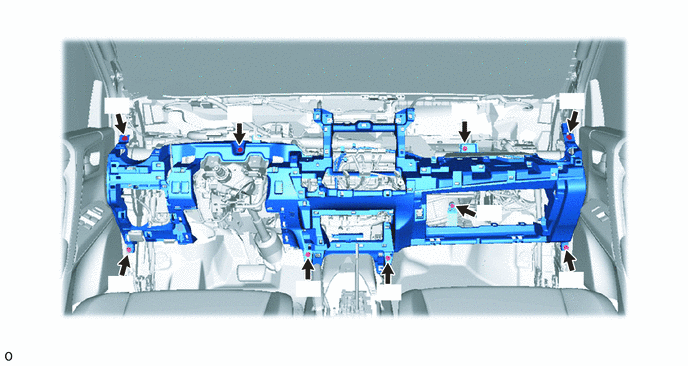
| *1 | Bolt <E> or <F> | *2 | Bolt <C> or <D> |
| *3 | Bolt <G> | - | - |