3ZR-FAE ENGINE CONTROL CONTINUOUSLY VARIABLE VALVE LIFT CONTROLLER REMOVAL
PROCEDURE

 1. PRECAUTION
- NOTICE:
-
After turning the ignition switch off, waiting time may be required before disconnecting the cable from the battery terminal. Therefore, make sure to read the disconnecting the cable from the battery terminal notice before proceeding with work.
-
Click hereGeneral>INTRODUCTION>REPAIR INSTRUCTION>PRECAUTION
2.DISCONNECT CABLE FROM NEGATIVE BATTERY TERMINAL
- NOTICE:
-
When disconnecting the cable, some systems need to be initialized after the cable is reconnected.
-
Click hereGeneral>INTRODUCTION>REPAIR INSTRUCTION>INITIALIZATION
11212
3.REMOVE NO. 2 CYLINDER HEAD COVER
17705
4.REMOVE AIR CLEANER CAP SUB-ASSEMBLY
5.REMOVE AIR CLEANER CASE SUB-ASSEMBLY
74404A
6.REMOVE BATTERY CLAMP SUB-ASSEMBLY
28800
7.REMOVE BATTERY
74431
8.REMOVE BATTERY TRAY
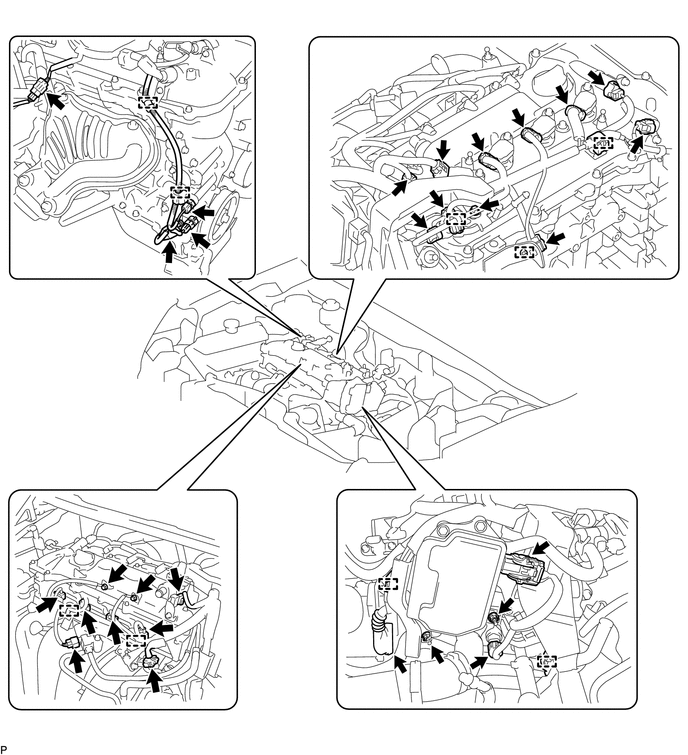
9.DISCONNECT ENGINE WIRE
Detach the 9 clamps, and then disconnect the connectors.
Remove the 3 bolts and 2 nuts, and then disconnect the engine wire.
19500
10.REMOVE IGNITION COIL ASSEMBLY
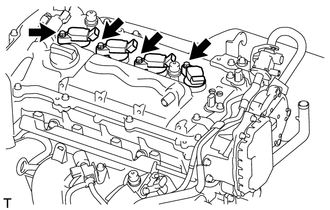
Remove the 4 bolts and 4 ignition coil assemblies.
17361M
11.REMOVE AIR TUBE
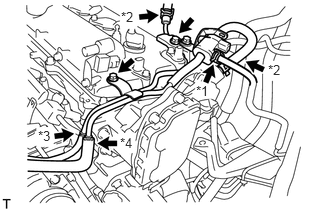
| *1 | Fuel Vapor Feed Hose |
| *2 | Union to Connector Tube Hose |
| *3 | No. 2 Air Hose |
| *4 | No. 1 Fuel Vapor Feed Hose |
Slide the clamp and disconnect the fuel vapor feed hose from the purge VSV.
Slide the 2 clamps and disconnect the 2 union to connector tube hoses.
Disconnect the No. 2 air hose and No. 1 fuel vapor feed hose.
Remove the 2 bolts and air tube.
11201
12.REMOVE CYLINDER HEAD COVER SUB-ASSEMBLY
11213
13.REMOVE CYLINDER HEAD COVER GASKET
222A0
14.REMOVE CONTINUOUSLY VARIABLE VALVE LIFT CONTROLLER ASSEMBLY
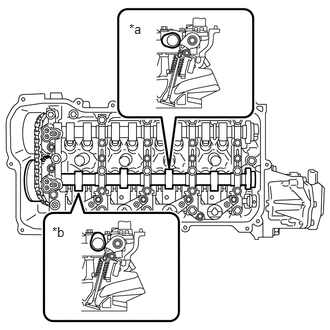
| *a | No. 3 Cylinder |
| *b | No. 1 Cylinder |
Rotate the crankshaft clockwise until the intake camshaft position at the No. 1 cylinder and No. 3 cylinder are as shown in the illustration.
- HINT:
-
If the intake camshaft position is not as shown in the illustration, rotate the intake crankshaft clockwise again so that the camshaft is aligned as shown in the illustration.
Turn the crankshaft counterclockwise approximately 10 to 15°.
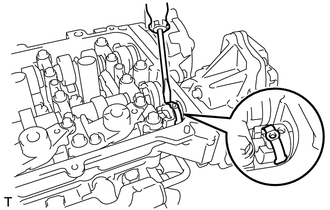
Using a screwdriver, slide the valve lift control actuator connector clip from the valve lift control actuator connector.
- NOTICE:
-
Slide only the upper part of the valve lift control actuator connector clip, as the straight pin will falls out from the bottom if the valve lift control actuator connector clip is completely removed.
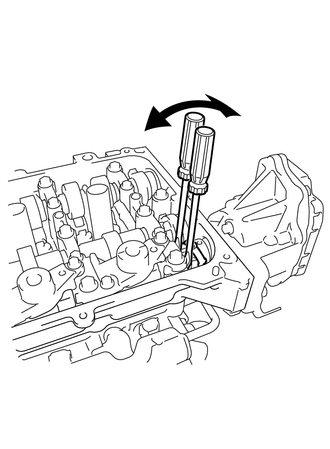
Using 2 screwdrivers, lightly pry the valve lift control actuator connector to make a space between the continuously variable valve lift controller assembly and camshaft housing sub-assembly.
- NOTICE:
- ·
Do not forcefully pry the valve lift control actuator connector.
·Do not damage the camshaft housing sub-assembly and camshaft bearing cap.
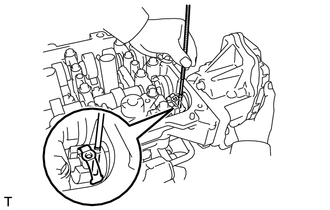
Using a magnet hand, remove the straight pin from the valve lift control actuator connector.
- NOTICE:
-
Do not drop the straight pin into the engine.
- HINT:
- ·
The straight pin can be removed by utilizing the space between the continuously variable valve lift controller assembly and camshaft housing sub-assembly to move the continuously variable valve lift controller assembly so that there is no load on the straight pin.
·If the straight pin cannot removed easily, slightly turn the crankshaft clockwise and then counter clockwise.
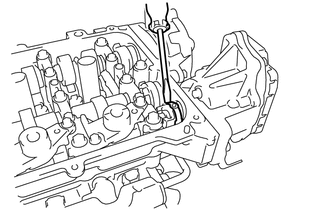
Using a screwdriver, remove the valve lift control actuator connector clip from the valve lift control actuator connector.
- NOTICE:
-
Do not drop the valve lift control actuator connector clip into the engine.
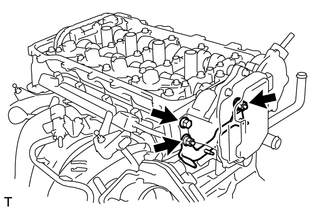
Remove the bolt, 2 nuts and wire harness clamp bracket from the continuously variable valve liftcontroller assembly.
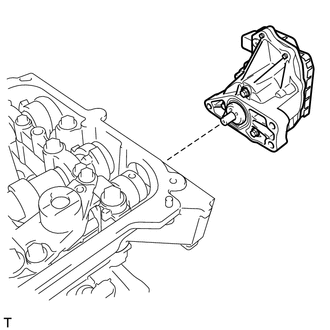
Remove the continuously variable valve lift controller assembly from the camshaft housing sub-assembly.
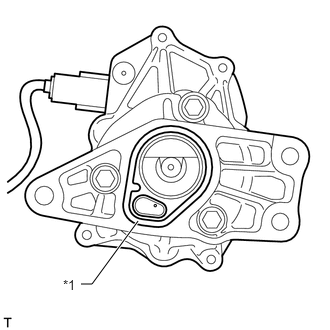
| *1 | O-Ring |
Remove the O-ring from the continuously variable valve lift controller assembly.
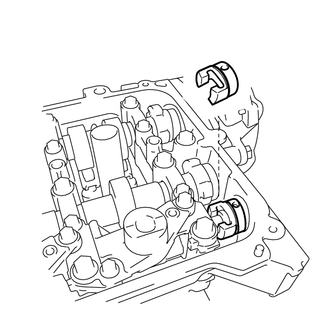
Remove the valve lift control actuator connector from the valve rocker shaft.