INTERIOR PANELS / TRIM INSTRUMENT PANEL SAFETY PAD REASSEMBLY
CAUTION / NOTICE / HINT
- HINT:
- ·
Use the same procedure for RHD and LHD vehicles.
·The procedure listed below is for LHD vehicles.
PROCEDURE

 55539D
1.INSTALL SPARE SWITCH HOLE COVER (w/o Light Control Rheostat)
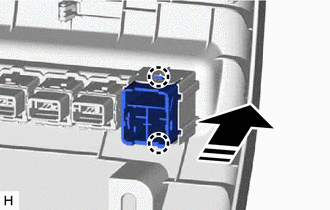

|
Install in this Direction |
Attach the claw to install the spare switch hole cover.
55548A
2.INSTALL INSTRUMENT PANEL HOLE COVER (for RHD)
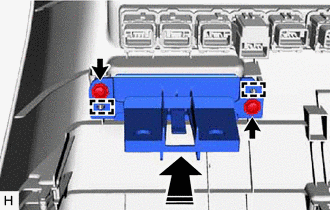

|
Screw <A> |
|
|
Install in this Direction |
Attach the guide to install the instrument panel hole cover with the 2 screws <A>.
55557A
3.INSTALL GLOVE COMPARTMENT DOOR CHECK CUSHION
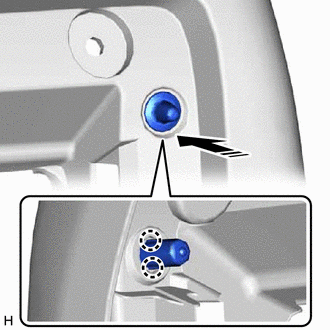
|
|
Install in this Direction |
Attach the claw to install the glove compartment door check cushion.
- HINT:
-
Use the same procedure to install the glove compartment door check cushion on the other side.
69056A
4.INSTALL GLOVE COMPARTMENT LOCK CYLINDER (w/ Lock Cylinder)
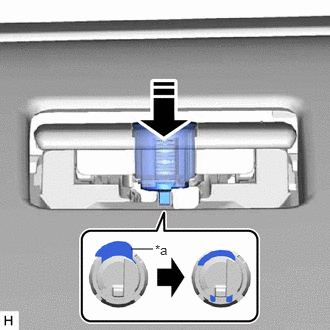
| *a | Stopper |
|
|
Install in this Direction |
Push the stopper and insert the glove compartment door lock cylinder to the glove compartment door assembly to install it.
55349A
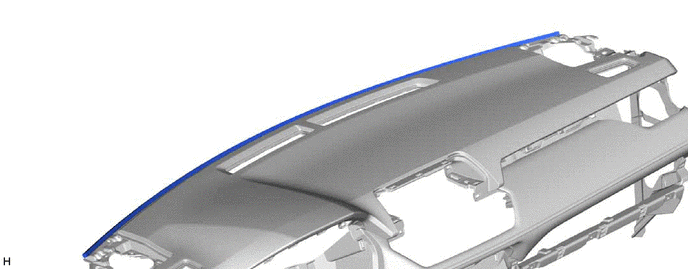
5.INSTALL INSTRUMENT PANEL CUSHION
Install a new instrument panel cushion in the location shown in the illustration.
83107A
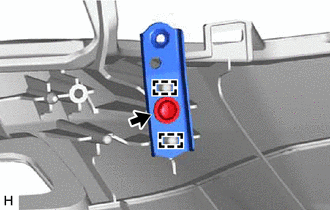
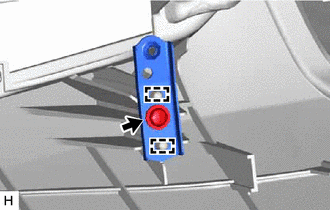
6.INSTALL NO. 1 METER BRACKET SUB-ASSEMBLY
|
|
Screw <A> |
for LH Side:
Attach the guide to install the No. 1 meter bracket sub-assembly with the screw <A>.
|
|
Screw <A> |
for RH Side:
Attach the guide to install the No. 1 meter bracket sub-assembly with the screw <A>.
55328
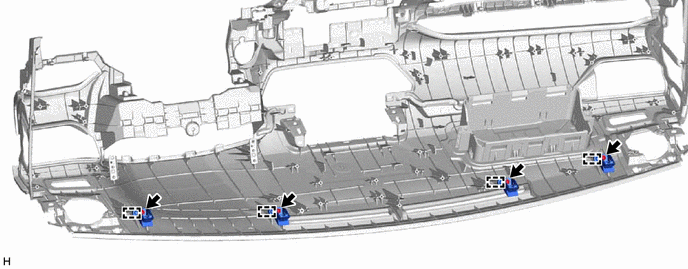
7.INSTALL NO. 1 INSTRUMENT PANEL PIN
Attach the guide.
Install the 4 No. 1 instrument panel pins with the 4 screws <A>.
|
|
Screw <A> | - | - |
55315A
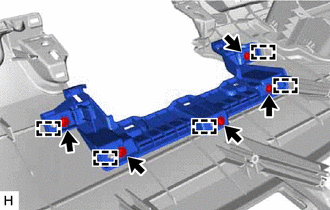
8.INSTALL NO. 1 INSTRUMENT PANEL SPACER (for Type A)
|
|
Screw <A> |
Attach the guide to install the No. 1 instrument panel spacer with the 5 screws <A>.
55982
9.INSTALL NO. 2 DEFROSTER NOZZLE GARNISH
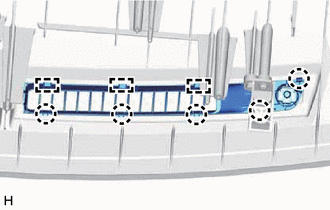
Attach the guide and claw to install the No. 2 defroster nozzle garnish.
55981
10.INSTALL NO. 1 DEFROSTER NOZZLE GARNISH
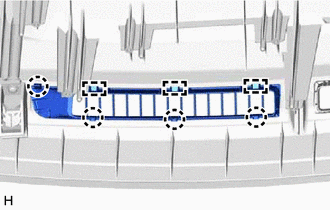
Attach the guide and claw to install the No. 1 defroster nozzle garnish.
82143
11.INSTALL NO. 3 INSTRUMENT PANEL WIRE
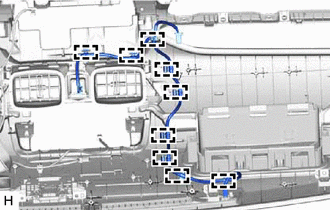
Attach the clamp to install the No. 3 instrument panel wire.
89120A
12.INSTALL AUTOMATIC LIGHT CONTROL SENSOR
55041B
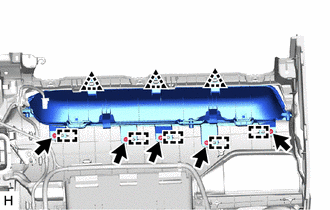
13.INSTALL NO. 1 INSTRUMENT PANEL BOX DOOR SUB-ASSEMBLY
w/ Interior Illumination:
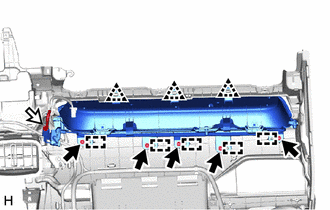
|
|
Screw <A> |

|
Connector |
Attach the guide and clip to install the No. 1 instrument panel box door sub-assembly with the 5 screws <A>.
Connect the connector.
|
|
Screw <A> |
w/o Interior Illumination:
Attach the guide and clip to install the No. 1 instrument panel box door sub-assembly with the 5 screws <A>.
55042B
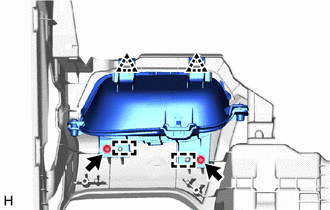
14.INSTALL NO. 2 INSTRUMENT PANEL BOX DOOR SUB-ASSEMBLY
|
|
Screw <A> |
Attach the guide and clip to install the No. 2 instrument panel box door sub-assembly with the 2 screws <A>.
55670A
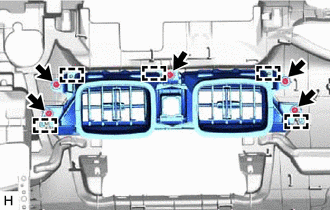
15.INSTALL CENTER INSTRUMENT PANEL REGISTER ASSEMBLY
|
|
Screw <A> |
Attach the guide to install the center instrument panel register assembly with the 5 screws <A>.
86842
16.INSTALL NO. 1 NAVIGATION WIRE (for LHD, w/ Navigation System)
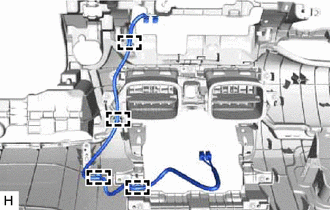
for Type A:
Attach the clamp to install the No. 1 navigation wire.
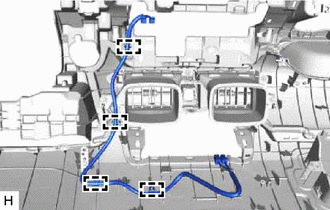
for Type B:
Attach the clamp to install the No. 1 navigation wire.
86842
17.INSTALL NO. 1 NAVIGATION WIRE (for RHD, w/ Navigation System)
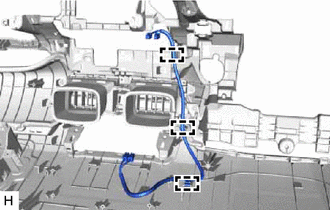
Attach the clamp to install the No. 1 navigation wire.
86101
18.INSTALL ANTENNA CORD SUB-ASSEMBLY (for LHD)
86101
19.INSTALL ANTENNA CORD SUB-ASSEMBLY (for RHD)
20.INSTALL NAVIGATION ANTENNA ASSEMBLY WITH BRACKET (w/ Navigation Antenna)
86681E
21.INSTALL ANTENNA DIVIDER (w/ Antenna Divider)
73960A
22.INSTALL INSTRUMENT PANEL PASSENGER AIRBAG ASSEMBLY
55660
23.INSTALL NO. 2 INSTRUMENT PANEL REGISTER ASSEMBLY
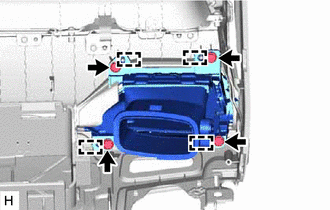
|
|
Screw <A> |
Attach the guide to install the No. 2 instrument panel register assembly with the 4 screws <A>.
55972C
24.INSTALL NO. 2 SIDE DEFROSTER NOZZLE DUCT
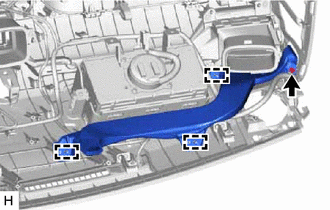
|
|
Screw <A> |
Attach the guide to install the No. 2 side defroster nozzle duct with the screw <A>.
55086
25.INSTALL NO. 3 HEATER TO REGISTER DUCT SUB-ASSEMBLY
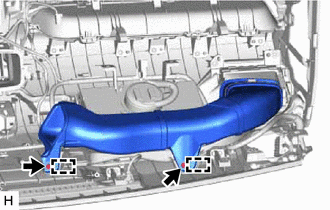
|
|
Screw <A> |
Attach the guide to install the No. 3 heater to register duct sub-assembly with the 2 screws <A>.
55962D
26.INSTALL NO. 2 SIDE DEFROSTER NOZZLE
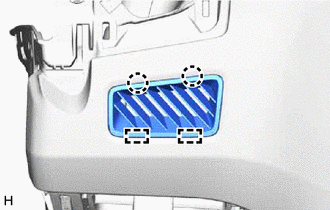
Attach the guide and claw to install a new No. 2 side defroster nozzle.
55650
27.INSTALL NO. 1 INSTRUMENT PANEL REGISTER ASSEMBLY
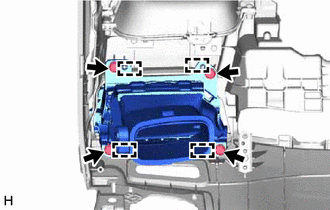
|
|
Screw <A> |
Attach the guide to install the No. 1 instrument panel register assembly with the 4 screws <A>.
55971C
28.INSTALL NO. 1 SIDE DEFROSTER NOZZLE DUCT
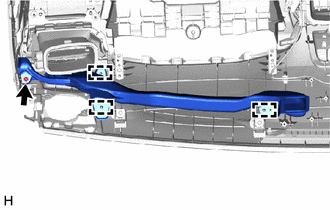
|
|
Screw <A> |
Attach the guide to install the No. 1 side defroster nozzle duct with the screw <A>.
55084E
29.INSTALL NO. 1 HEATER TO REGISTER DUCT SUB-ASSEMBLY
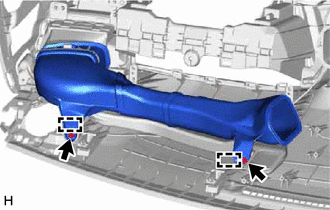
|
|
Screw <A> |
Attach the guide to install the No. 1 heater to register duct sub-assembly with the 2 screws <A>.
55961B
30.INSTALL NO. 1 SIDE DEFROSTER NOZZLE
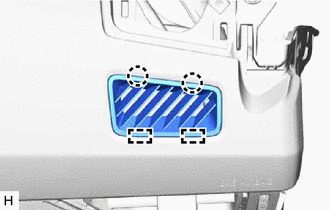
Attach the guide and claw to install a new No. 1 side defroster nozzle.
55950G
31.INSTALL DEFROSTER NOZZLE ASSEMBLY
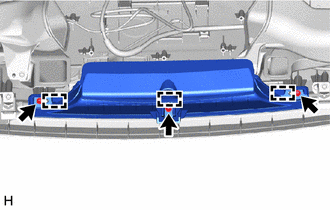
|
|
Screw <A> |
Attach the guide to install the defroster nozzle assembly with the 3 screws <A>.