M20A-FKS EMISSION CONTROL EGR VALVE REMOVAL
CAUTION / NOTICE / HINT
The necessary procedures (adjustment, calibration, initialization or registration) that must be performed after parts are removed and installed, or replaced during EGR valve assembly removal/installation are shown below.
| Replaced Part or Performed Procedure | Necessary Procedures | Effect/Inoperative Function when Necessary Procedure not Performed | Link |
|---|---|---|---|
·
Replacement of EGR valve assembly ·
Gas leak from exhaust system is repaired |
Inspection After Repair | ·
Poor idle, etc. ·
Engine start function, etc. |
( ) |
- NOTICE:
-
This procedure includes the removal of small-head bolts. Refer to Small-Head Bolts of Basic Repair Hint to identify the small-head bolts.
-
Click hereGeneral>INTRODUCTION>REPAIR INSTRUCTION>PRECAUTION
PROCEDURE

 1.DRAIN ENGINE COOLANT
12601B
2.REMOVE NO. 1 ENGINE COVER SUB-ASSEMBLY
3.REMOVE AIR CLEANER CAP WITH AIR CLEANER HOSE
25680
4.REMOVE EGR COOLER ASSEMBLY
5.DISCONNECT ENGINE WIRE
Remove the bolt and fuel delivery guard.
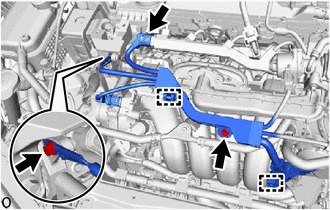
Disconnect the fuel injector connector (for Port Injection).
Remove the 2 bolts.
Disconnect the 2 wire harness clamps and disconnect the engine wire.
25601
6.REMOVE NO. 1 EGR PIPE SUB-ASSEMBLY
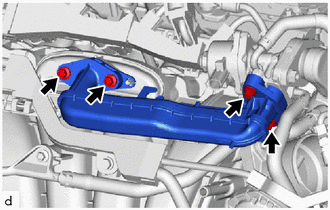
Using an 8 mm socket wrench, remove the 4 bolts and No. 1 EGR pipe sub-assembly from the intake manifold and EGR valve assembly.
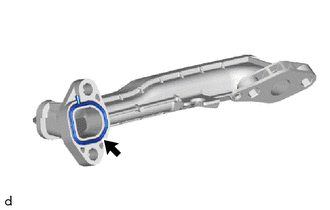
Remove the EGR valve adapter gasket from the No. 1 EGR pipe sub-assembly.
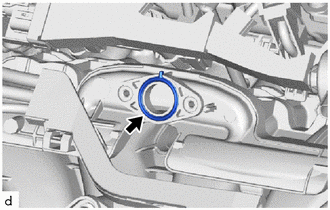
Remove the EGR inlet gasket from the intake manifold.
25620
7.REMOVE EGR VALVE ASSEMBLY
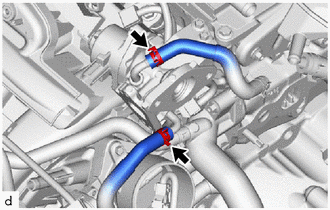
Slide the 2 clips and disconnect the No. 8 water by-pass hose and remove the No. 4 water by-pass hose from the EGR valve assembly.
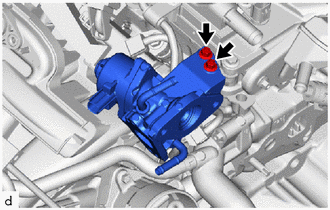
Using the 8 mm socket wrench, remove the 2 bolts.