HEATING / AIR CONDITIONING BLOWER UNIT INSTALLATION
CAUTION / NOTICE / HINT
- HINT:
- ·
Use the same procedure as for the LHD and RHD vehicles.
·The procedure listed below is for the LHD vehicles.
PROCEDURE

 87130D
1.INSTALL BLOWER ASSEMBLY
Attach the guide and claw.
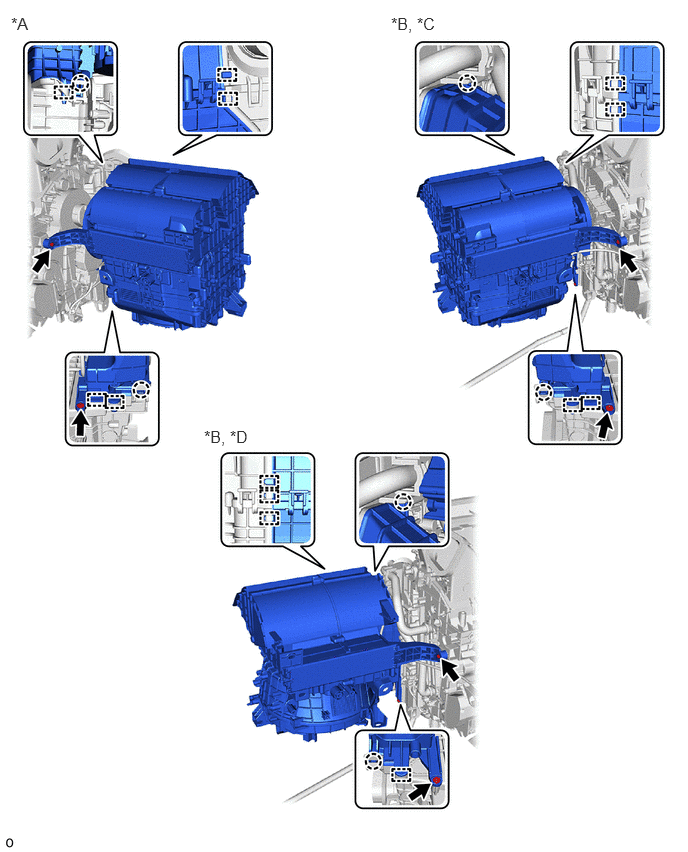
| *A | for LHD | *B | for RHD |
| *C | for Two Layer Blower Type | *D | for Single Layer Blower Type |
Install the blower assembly with the 2 screws.
Attach the clamp and guide.
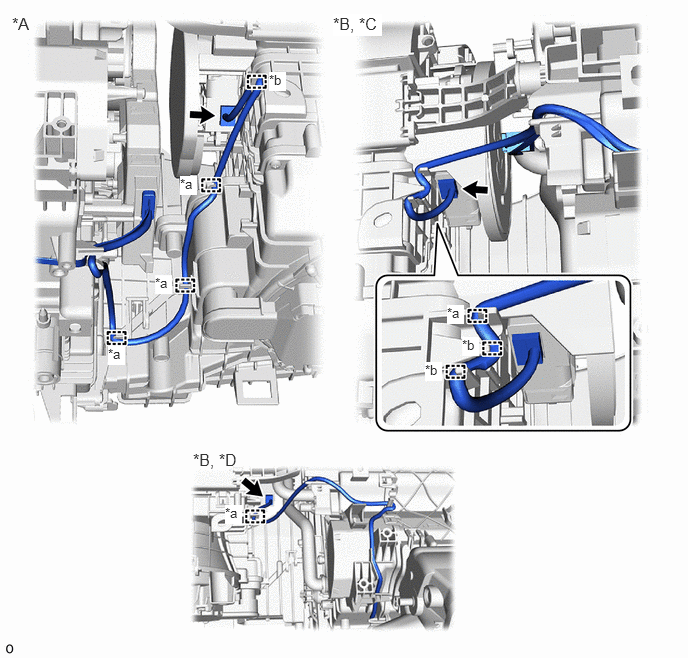
| *A | for LHD | *B | for RHD |
| *C | for Two Layer Blower Type | *D | for Single Layer Blower Type |
| *a | Clamp | *b | Guide |
Connect the connector.
87211A
2.INSTALL NO. 2 AIR DUCT (for LHD)
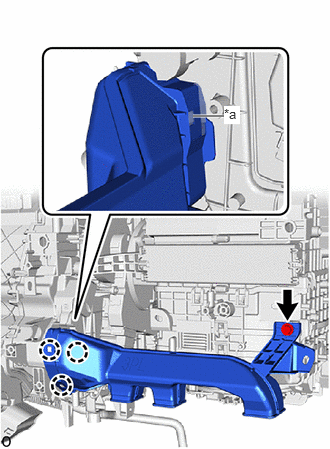
| *a | Hidden Claw |
Attach the claw.
Install the No. 2 air duct with the screw.
- NOTICE:
- ·
If the fitting part of the No. 2 air duct has been cracked or deformed during removal, make sure to replace the air duct with a new one. Failure to do so may cause the No. 2 air duct to fall off or noise to occur.
·Make sure there are no cracks in the duct.
87211
3.INSTALL NO. 1 AIR DUCT (for RHD)
- HINT:
-
Use the same procedure described as for the No. 2 air duct.
4.INSTALL AIR CONDITIONING UNIT ASSEMBLY
for A25A-FXS:
Click hereVehicle Interior>HEATING / AIR CONDITIONING>AIR CONDITIONING UNIT (for A25A-FXS)>INSTALLATION
for A25A-FKS:
Click hereVehicle Interior>HEATING / AIR CONDITIONING>AIR CONDITIONING UNIT (for A25A-FKS)>INSTALLATION
for M20A-FKS:
Click hereVehicle Interior>HEATING / AIR CONDITIONING>AIR CONDITIONING UNIT (for M20A-FKS)>INSTALLATION