HEATING / AIR CONDITIONING AIR CONDITIONING UNIT(for M20A-FKS) DISASSEMBLY
CAUTION / NOTICE / HINT
- HINT:
- ·
Use the same procedure as for the LHD and RHD vehicles.
·The procedure listed below is for the LHD vehicles.
PROCEDURE

 87130D
1.REMOVE BLOWER ASSEMBLY
87201B
2.REMOVE NO. 2 AIR DUCT SUB-ASSEMBLY
88897P
3.REMOVE ASPIRATOR (for Automatic Air Conditioning System)
88625Q
4.REMOVE COOLER THERMISTOR (ROOM TEMPERATURE SENSOR) (for Automatic Air Conditioning System)
88898D
5.REMOVE GROMMET (for Manual Air Conditioning System)
88539J
6.REMOVE DRAIN COOLER HOSE
88539C
7.REMOVE NO. 2 COOLER UNIT DRAIN HOSE (Available as Supply Part)
82210K
8.REMOVE AIR CONDITIONING HARNESS ASSEMBLY
Disconnect each connector.
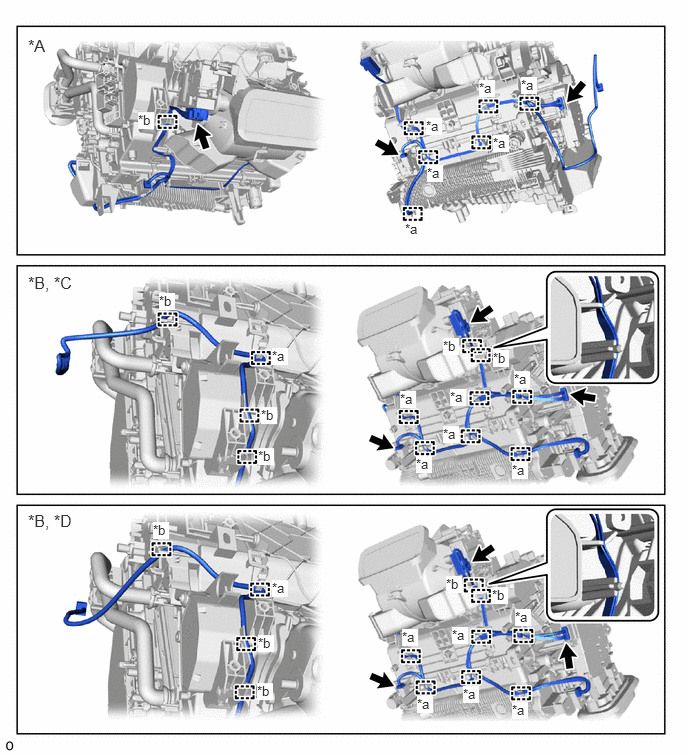
| *A | for LHD | *B | for RHD |
| *C | for Two Layer Blower Type | *D | for Single Layer Blower Type |
| *a | Clamp | *b | Guide |
Detach the clamp and guide and remove the air conditioning harness assembly.
87050C
9.REMOVE NO. 1 AIR CONDITIONING RADIATOR DAMPER SERVO SUB-ASSEMBLY
87050D
10.REMOVE NO. 2 AIR CONDITIONING RADIATOR DAMPER SERVO SUB-ASSEMBLY
88897M
11.REMOVE HEATER PIPE GROMMET
87124B
12.REMOVE HEATER CLAMP
87107A
13.REMOVE HEATER RADIATOR UNIT SUB-ASSEMBLY
88899L
14.REMOVE COOLING UNIT PARTS
88515
15.REMOVE COOLER EXPANSION VALVE
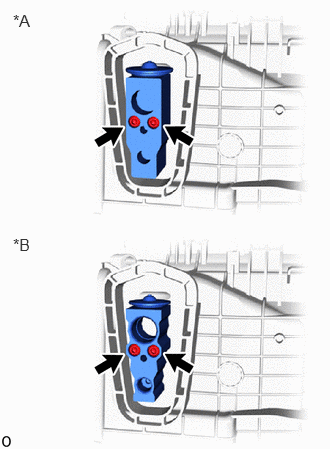
| *A | for Type A |
| *B | for Type B |
Using a 4 mm hexagon socket wrench, remove the 2 hexagon bolts and cooler expansion valve.
Remove the 2 O-rings from the No. 1 cooler evaporator sub-assembly.
- NOTICE:
-
Seal the openings of the disconnected parts using vinyl tape to prevent the entry of moisture and foreign matter.
88501
16.REMOVE NO. 1 COOLER EVAPORATOR SUB-ASSEMBLY
88625
17.REMOVE NO. 1 COOLER THERMISTOR
87114B
18.REMOVE HEATER COVER