METER / GAUGE / DISPLAY METER / GAUGE SYSTEM Oil Pressure Gauge Malfunction
DESCRIPTION
The oil pressure sender detects the oil pressure generated when the engine is started. The combination meter determines that the engine is running when the engine speed is 400 rpm or more, and determines that the engine is cranking when the engine speed is 200 rpm or less. The oil pressure receiver gauge detects and indicates the oil pressure applied to the oil pressure sender.
WIRING DIAGRAM
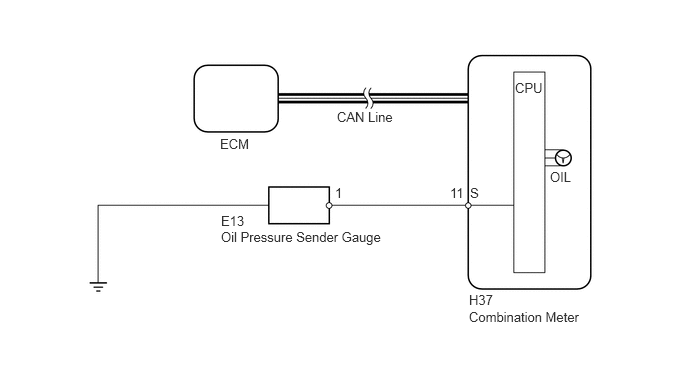
PROCEDURE
Use the Techstream to check if the CAN communication system is functioning normally (See page Vehicle Interior>METER / GAUGE / DISPLAY>METER / GAUGE SYSTEM>DTC CHECK / CLEAR).
| Result | Proceed to |
|---|---|
| CAN communication system DTC is not output | A |
| CAN communication system DTC is output | B |
A
B
Connect the Techstream to the DLC3.
Turn the ignition switch to ON.
Turn the Techstream ON.
Enter the following menus: Body Electrical / Combination Meter / Active Test.
According to the display on the Techstream, perform the Active Test.
| Tester Display | Test Part | Control Range | Diagnostic Note |
|---|---|---|---|
| Oil Pressure Meter Operation | Oil pressure receiver gauge | LOW, 1/4, 1/2, 3/4 or HIGH | Perform the test with the vehicle stopped and engine idling |
- OK:
Needle indication is normal.
OK
NG
Disconnect the E13 gauge connector.
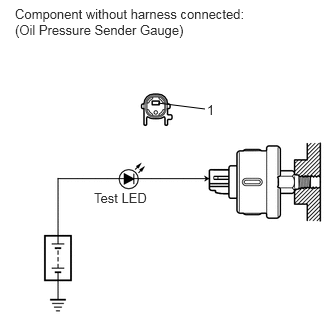
Apply battery positive (+) voltage to the sender gauge terminal through a test LED.
Check that the LED does not illuminate when the engine is stopped.
Check that the LED flashes when the engine is running. The number of flashes varies with engine speed.
- OK:
LED flashes when engine is running.
LED does not illuminate when engine is stopped.
| Result | Proceed to |
|---|---|
| LED operates correctly according to engine condition | A |
| LED does not operate correctly according to engine condition (for 3UR-FE) | B |
| LED does not operate correctly according to engine condition (for 3UR-FBE) | C |
A
B
C
Disconnect the H37 meter connector.
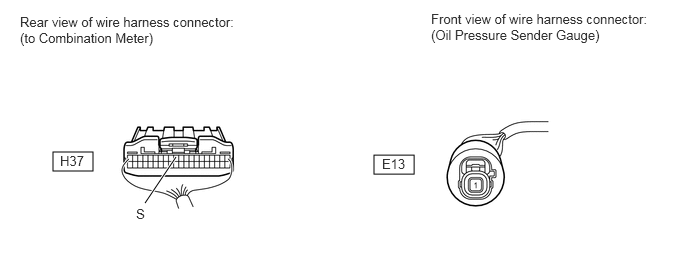
Disconnect the E13 gauge connector.
Measure the resistance according to the value(s) in the table below.
- Standard Resistance:
Tester Connection Condition Specified Condition H37-11 (S) - E13-1 Always Below 1 Ω H37-11 (S) - Body ground Always 10 kΩ or higher E13-1 - Body ground Always 10 kΩ or higher
OK
NG