B48 ENGINE MECHANICAL CHAIN TENSIONER INSTALLATION
PROCEDURE

 13540
1.INSTALL NO. 1 CHAIN TENSIONER ASSEMBLY
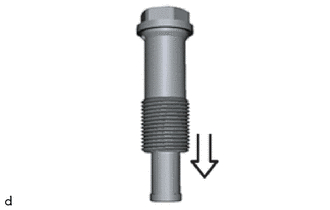
- HINT:
-
The oil chamber must be drained for reuse of the chain tensioner.
Place No. 1 chain tensioner assembly on a level support and slowly compress.
Repeat this procedure twice.
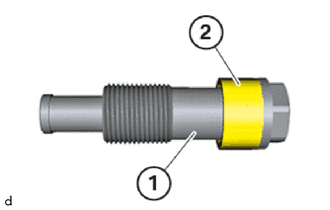
Replace the sealing sleeve (2) at the No. 1 chain tensioner assembly (1).
Insert and install the No. 1 chain tensioner assembly (1).
Tighten the No. 1 chain tensioner assembly (1).
- Torque:
- 20 N*m (204 kgf*cm, 15 ft.*lbf)
Using a digital angle torque wrench, tighten the No. 1 chain tensioner assembly an additional 40°.
- HINT:
-
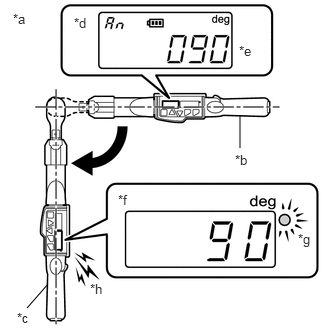 2.5,1.542 2.5,1.208 false 0.49,2.969 0.281,3.208 false 0.135,0.115 0.448,0.271 0.313,0.156 10 false *a 2.448,1.583 2.76,1.74 0.313,0.156 10 false *b 0.177,3.229 0.49,3.385 0.313,0.156 10 false *c 0.771,0.156 1.083,0.313 0.313,0.156 10 false *d 2.49,0.448 2.802,0.604 0.313,0.156 10 false *e 1.229,2 1.542,2.156 0.313,0.156 10 false *f 3.104,2.406 3.417,2.563 0.313,0.156 10 false *g 0.938,2.927 1.25,3.083 0.313,0.156 10 false *h
*a Example *b Before Tightening *c After Tightening *d Set Angle Display *e Setting the Specified Angle *f Tightening Angle Display *g LED Notification *h Buzzer Notification
- ·
When using the digital angle torquewrench, set the wrench to the specifiedtightening angle before use.
·When using the digital angle torquewrench, check the tightening angledisplay while performing the work.
·When tightening reaches the set angle,the buzzer will sound and a blue LEDwill illuminate.
25051
2.INSTALL EXHAUST MANIFOLD CONVERTER SUB-ASSEMBLY
3.ADD ENGINE OIL
12180E
4.INSTALL OIL FILLER CAP ASSEMBLY
5. CHECK ENGINE OIL LEVEL