AXLE AND DIFFERENTIAL REAR AXLE CARRIER REMOVAL
CAUTION / NOTICE / HINT
- CAUTION:
- ·
Motor vehicle may slip off the vehicle hoist if the weight is distributed unevenly.
Danger! Life-threatening injuries!
-Ensure there is a specific weight compensation on the motor vehicle.
·Vehicle may slip off the vehicle hoist if the vehicle hoist is handled incorrectly.
Danger! Life-threatening injuries!
-Observe safety information on raising the vehicle using a vehicle hoist.
-For additional information see:
Click hereGeneral>INTRODUCTION>REPAIR INSTRUCTION>VEHICLE LIFT AND SUPPORT LOCATIONS
·Effects on other persons.
Danger of injury! Risk of damage!
-Make sure that no other persons are in or around the vehicle.
- HINT:
- ·
Tighten the screw connection in the normal position.
·Use the same procedure for the RH side and LH side.
·The following procedure is for the LH side.
·During work on the rear brake, it must be ensured that the button for the electromechanical parking brake cannot be pressed.
PROCEDURE

 1.REMOVE REAR WHEEL
42340B
2.SEPARATE REAR DRIVE SHAFT ASSEMBLY
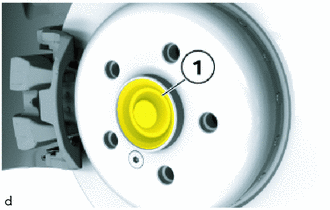
Remove the sealing cap (1).
Press brake pedal.
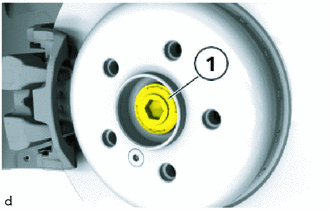
Using a 17 mm straight hexagon wrench, loosen the 17 mm hexagon bolt (1).
Separate the rear drive shaft assembly towards the center of vehicle.
3.REMOVE REAR BRAKE DISC
Click hereBrake>BRAKE (REAR)>REAR BRAKE>REMOVAL
4.REMOVE REAR DISC BRAKE DUST COVER
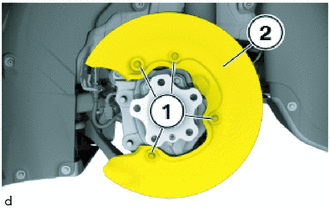
Loosen bolts (1).
Remove the rear disc brake dust cover (2).
5.REMOVE REAR COIL SPRING
42305
6.REMOVE REAR AXLE CARRIER SUB-ASSEMBLY
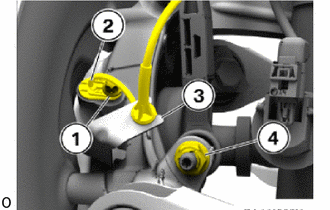
Loosen E11 bolt (1).
Remove the skid control sensor wire (2) and place to one side.
Detach the cable from the holder (3).
Loosen the 16 mm nut (4).
- HINT:
-
If necessary, counter-hold the T30 "TORX" socket wrench.
Remove the rear stabilizer link assembly from the rear axle carrier sub-assembly.
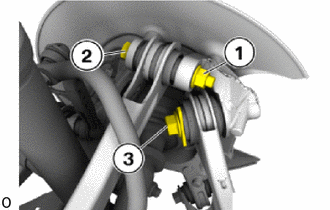
Unfasten 18 mm nut (1).
Pull out 18 mm bolt (2).
Release and remove bolt (3).
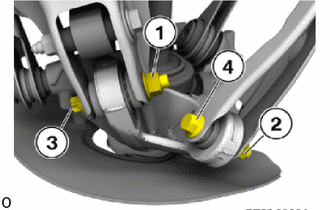
Unfasten nut (1).
Loosen 18 mm nut (2).
Pull out E20 bolt (3).
Pull out 16 mm bolt (4).
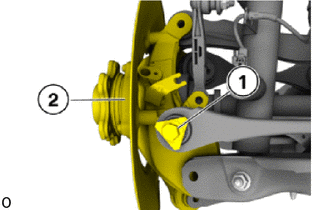
Loosen bolt (1).
Guide out and remove rear axle carrier sub-assembly (2).