 |
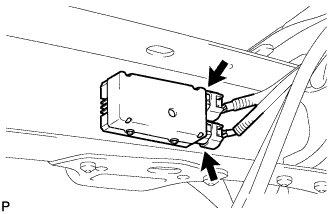
Disconnect the 2 fuel pump ECU connectors.
OIL PUMP > REMOVAL |
| 1. DISCHARGE FUEL SYSTEM PRESSURE |
Disconnect the cable from the negative (-) battery terminal.
|
Disconnect the 2 fuel pump ECU connectors.
Connect the cable to the negative (-) battery terminal.
Start the engine. After the engine has stopped on its own, turn the ignition switch OFF.
Crank the engine again, then check that the engine does not start.
Loosen the fuel tank cap, then discharge the pressure in the fuel tank completely.
Connect the 2 fuel pump ECU connectors.
| 2. DISCONNECT CABLE FROM NEGATIVE BATTERY TERMINAL |
| 3. REMOVE ENGINE ASSEMBLY |
Remove the engine assembly from the vehicle (Click here).
| 4. REMOVE TIMING BELT |
Remove the timing belt (Click here).
| 5. REMOVE CRANKSHAFT TIMING PULLEY |
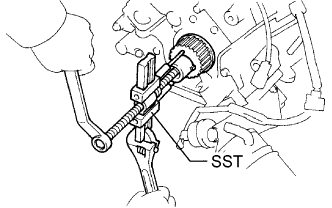 |
Using SST, remove the timing pulley.
| 6. REMOVE CRANKSHAFT POSITION SENSOR |
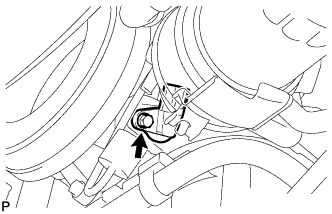 |
Disconnect the sensor connector.
Remove the bolt and sensor.
| 7. INSTALL ENGINE OIL LEVEL DIPSTICK GUIDE |
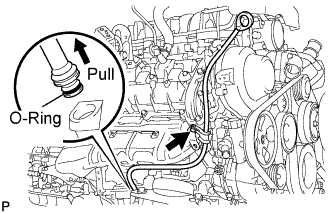 |
Remove the dipstick.
Remove the bolt and dipstick guide.
Remove the O-ring from the dipstick guide.
| 8. REMOVE OIL FILTER ASSEMBLY |
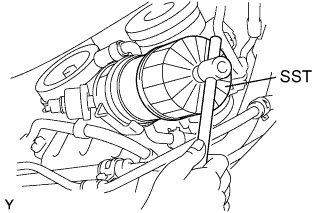 |
Using SST, remove the oil filter.
| 9. REMOVE OIL FILTER BRACKET SUB-ASSEMBLY |
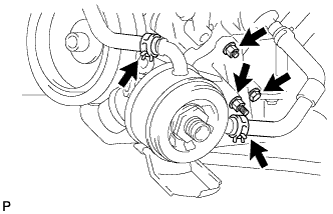 |
Disconnect the oil pressure sender gauge connector.
Disconnect the oil cooler hoses from the oil cooler.
Remove the 2 bolts, nut and oil filter bracket.
| 10. REMOVE NO. 2 OIL PAN SUB-ASSEMBLY |
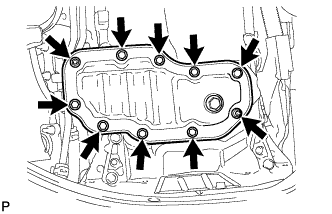 |
Remove the 8 bolts and 2 nuts.
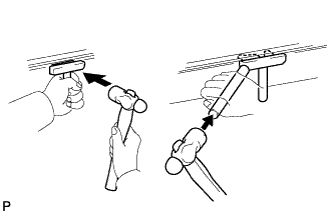 |
Insert the blade of an oil pan seal cutter between the oil pans, cut off applied sealer and remove the No. 2 oil pan.
| 11. REMOVE NO. 1 OIL PAN SUB-ASSEMBLY |
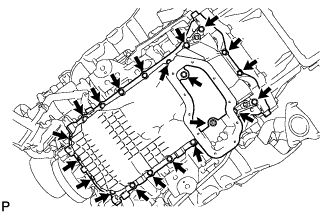 |
Remove the 19 bolts and 2 nuts.
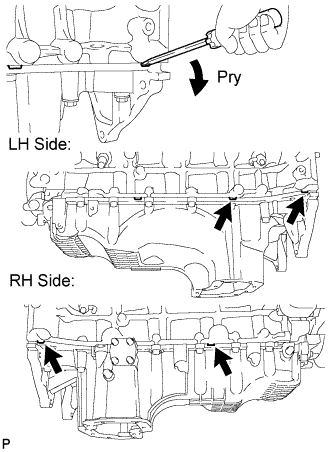 |
Using a screwdriver, remove the No. 1 oil pan by prying between the oil pan and cylinder block as shown in the illustration.
| 12. REMOVE OIL STRAINER SUB-ASSEMBLY |
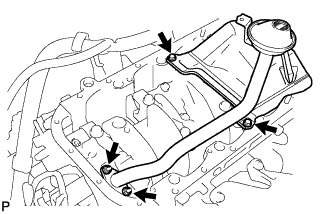 |
Remove the 2 bolt, 2 nuts, oil strainer and gasket.
| 13. REMOVE OIL PUMP ASSEMBLY |
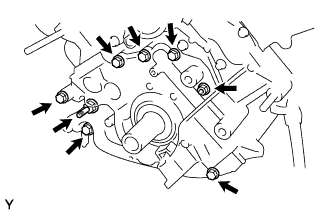 |
Remove the 7 bolts and 6 mm hexagon bolt.
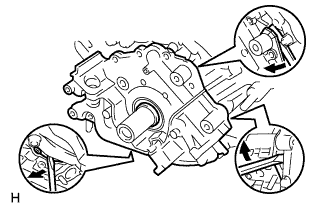 |
Using a screwdriver, remove the oil pump by prying the portions between the oil pump and cylinder block shown in the illustration.
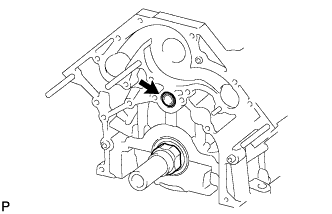 |
Remove the O-ring from the cylinder block.