Home › BODY › SLIDING ROOF › SLIDING ROOF HOUSING (for CrewMax)

SLIDING ROOF HOUSING (for CrewMax) > REMOVAL

for Preparation Click here


1. DISCONNECT CABLE FROM NEGATIVE BATTERY TERMINAL

CAUTION:
Wait at least 90 seconds after disconnecting the cable from the negative (-) battery terminal to prevent airbag and seat belt pretensioner activation.

NOTICE:
  1. Some systems need to be initialized after the cable is reconnected (Click here).
  2. After the ignition switch is turned OFF, the navigation system requires approximately 90 seconds to record various types of memory and settings. As a result, after turning the ignition switch OFF, wait 90 seconds or more before disconnecting the cable from the negative (-) battery terminal.


2. REMOVE ROOF HEADLINING ASSEMBLY
  1. Remove the roof headlining (Click here).


3. REMOVE CURTAIN SHIELD AIRBAG ASSEMBLY LH
  1. Remove the airbag (Click here).


4. REMOVE CURTAIN SHIELD AIRBAG ASSEMBLY RH

HINT:
Use the same procedures described for the LH side.


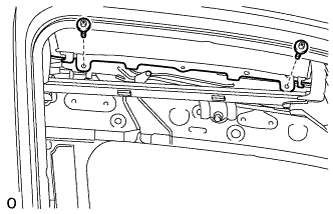
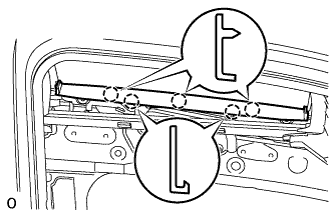
5. REMOVE SLIDING ROOF SIDE GARNISH LH


B170245
  1. Detach the 5 claws and remove the side garnish.


6. REMOVE SLIDING ROOF SIDE GARNISH RH

HINT:
Use the same procedures described for the LH side.


7. REMOVE SLIDING ROOF GLASS SUB-ASSEMBLY


B170246
  1. Using a T25 "TORX" driver, remove the 4 screws and glass.


8. REMOVE SLIDING ROOF WEATHERSTRIP
  1. Remove the sliding roof weatherstrip.


9. REMOVE SLIDING ROOF HOUSING SUB-ASSEMBLY
  1. Disconnect the 4 sliding roof drain hoses.


  1. Remove the 10 bolts, 6 nuts and housing.
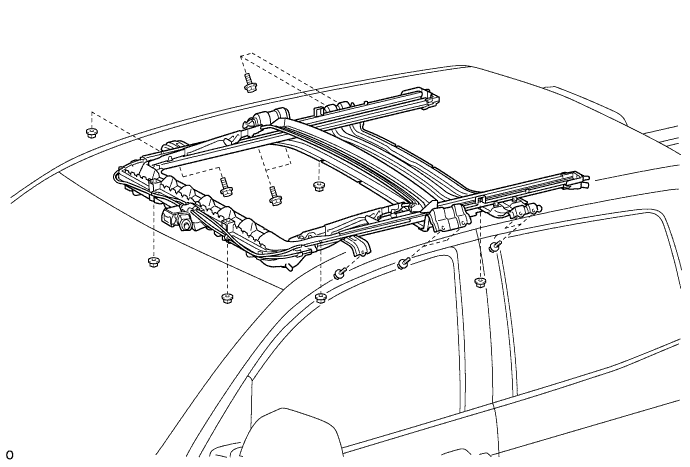

    B170247