INTERIOR PANEL INSTRUMENT PANEL SAFETY PAD(for Column Shift Type) DISASSEMBLY
PROCEDURE

 58916
1.REMOVE BOX BOTTOM MAT
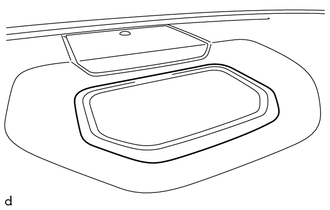
Remove the box bottom mat.
55525
2.REMOVE NO. 1 SPEAKER HOLE COVER
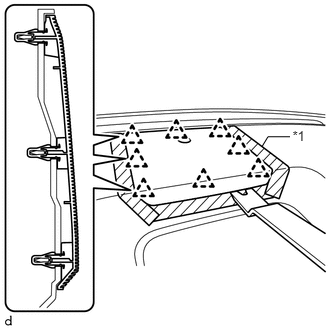
Apply protective tape as shown in the illustration.
| *1 | Protective Tape |
Using a moulding remover B, detach the 8 clips and remove the No. 1 speaker hole cover.
86160A
3.REMOVE FRONT NO. 4 SPEAKER ASSEMBLY (w/ Front Center Speaker)
55328
4.REMOVE NO. 1 INSTRUMENT PANEL PIN
- HINT:
-
Use the same procedure to remove the No. 1 instrument panel pin on the other side.
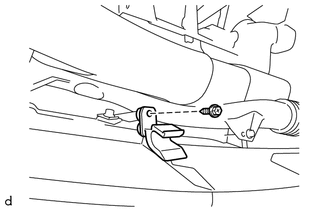
Remove the screw <E> and No. 1 instrument panel pin.
55950G
5.REMOVE DEFROSTER NOZZLE ASSEMBLY
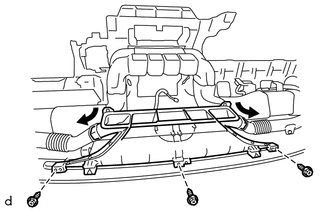
Disconnect the No. 1 side defroster nozzle duct and No. 2 side defroster nozzle duct from the defroster nozzle assembly.
Remove the 3 screws <E> and defroster nozzle assembly.
55844
6.REMOVE NO. 2 HEATER TO REGISTER DUCT
Remove the 8 screws <E> and No. 2 heater to register duct.
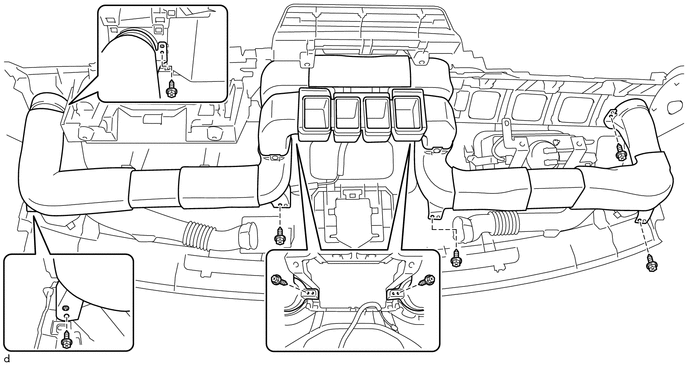
55971C
7.REMOVE NO. 1 SIDE DEFROSTER NOZZLE DUCT
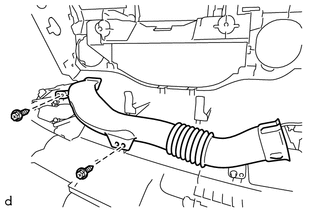
Remove the 2 screws <E> and No. 1 side defroster nozzle duct.
55972C
8.REMOVE NO. 2 SIDE DEFROSTER NOZZLE DUCT
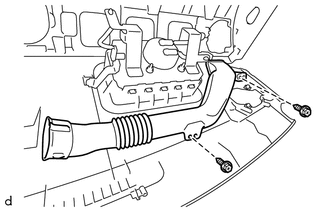
Remove the 2 screws <E> and No. 2 side defroster nozzle duct.
55425B
9.REMOVE INSTRUMENT CLUSTER FINISH PANEL REINFORCEMENT
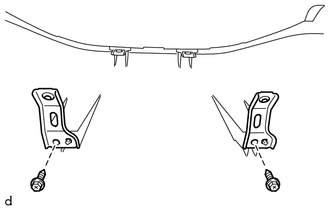
Remove the 2 screws <F> and 2 instrument cluster finish panel reinforcements.
86860
10.REMOVE NAVIGATION ANTENNA ASSEMBLY (w/ Navigation System)
73960A
11.REMOVE FRONT PASSENGER AIRBAG ASSEMBLY