HEATING / AIR CONDITIONING COMPRESSOR(for M15A-FXE) REMOVAL
CAUTION / NOTICE / HINT
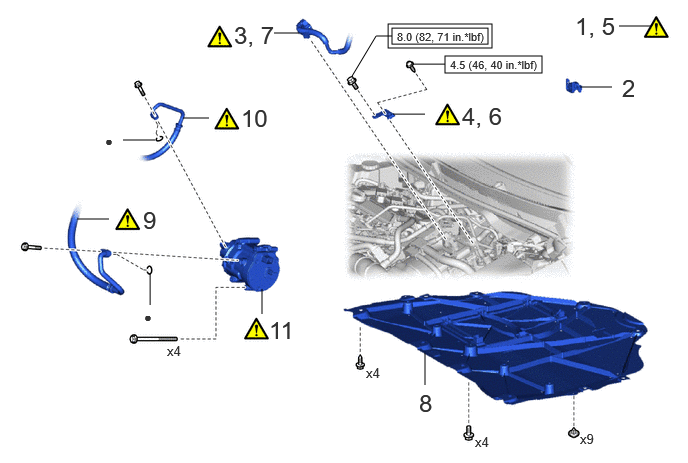
| Procedure | Part Name Code | 
|

|

|
|
|---|---|---|---|---|---|
| 1 | REFRIGERANT FROM REFRIGERATION SYSTEM | - | ( ) |
- | - |
| 2 | SERVICE PLUG GRIP | G3834 | - | - | - |
| 3 | ENGINE WIRE | 82121 | ()
|
- | - |
| 4 | CONNECTOR COVER ASSEMBLY | - | ()
|
- | - |
| 5 | CHECK TERMINAL VOLTAGE | - | ()
|
- | - |
| 6 | CONNECTOR COVER ASSEMBLY | - | ()
|
- | - |
| 7 | ENGINE WIRE | 82121 | ()
|
- | - |
| 8 | NO. 1 ENGINE UNDER COVER ASSEMBLY | 51410 | - | - | - |
| 9 | SUCTION HOSE SUB-ASSEMBLY | 88704 | ()
|
- | - |
| 10 | NO. 1 COOLER REFRIGERANT DISCHARGE HOSE | 88711 | ()
|
- | - |
| 11 | COMPRESSOR WITH MOTOR ASSEMBLY | 88370 | ()
|
- | - |

|
Tightening torque for "Major areas involving basic vehicle performance such as moving/turning/stopping": N*m (kgf*cm, ft.*lbf) | 
|
N*m (kgf*cm, ft.*lbf): Specified torque |
| ● | Non-reusable part | - | - |
CAUTION / NOTICE / HINT
- CAUTION:
- ·
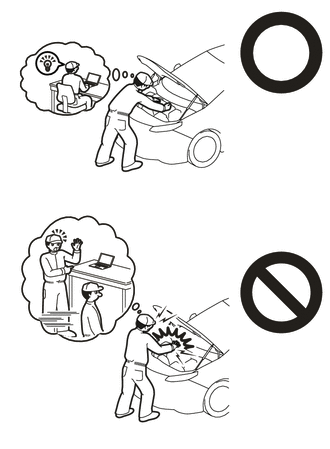
This vehicle has contains high voltage circuits standardized with orange colored wiring and connectors, so follow the instructions in this manual to perform the procedures correctly.
Click hereEngine / Hybrid System>HYBRID / BATTERY CONTROL>HYBRID CONTROL SYSTEM>PRECAUTION
·If the correct procedures are not followed according to the instructions in this manual, there is a danger of electric shock from the high voltage circuits.
·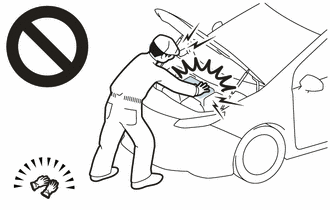
Be sure to wear insulating gloves when working on high voltage wiring or components.
·If work is performed without wearing insulating gloves, there is a danger of electric shock.
PROCEDURE

 1.RECOVER REFRIGERANT FROM REFRIGERATION SYSTEM
for HFC-134a(R134a):
Click hereVehicle Interior>HEATING / AIR CONDITIONING>REFRIGERANT (for HFC-134a(R134a))>REPLACEMENT
for HFO-1234yf(R1234yf):
Click hereVehicle Interior>HEATING / AIR CONDITIONING>REFRIGERANT (for HFO-1234yf(R1234yf))>REPLACEMENT
G3834
2.REMOVE SERVICE PLUG GRIP
82121
3.DISCONNECT ENGINE WIRE
4.REMOVE CONNECTOR COVER ASSEMBLY
5.CHECK TERMINAL VOLTAGE
6.INSTALL CONNECTOR COVER ASSEMBLY
82121
7.CONNECT ENGINE WIRE
51410
8.REMOVE NO. 1 ENGINE UNDER COVER ASSEMBLY
88704
9.DISCONNECT SUCTION HOSE SUB-ASSEMBLY
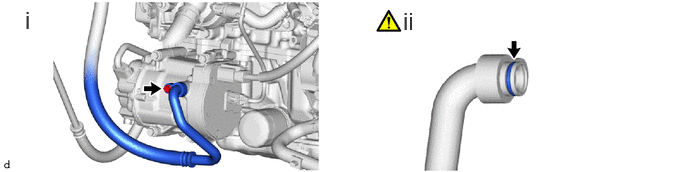
Remove the bolt to disconnect the suction hose sub-assembly from the compressor with motor assembly.
Remove the O-ring from the suction hose sub-assembly.
- NOTICE:
-
Seal the openings of the disconnected parts using vinyl tape to prevent moisture and foreign matter from entering them.
88711
10.DISCONNECT NO. 1 COOLER REFRIGERANT DISCHARGE HOSE
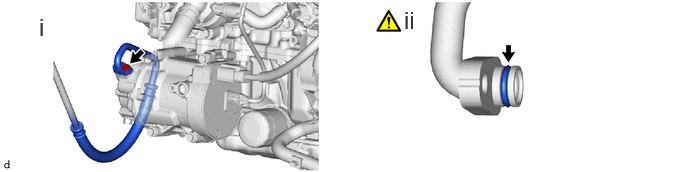
Remove the bolt and disconnect the No. 1 cooler refrigerant discharge hose from the compressor with motor assembly.
Remove the O-ring from the No. 1 cooler refrigerant discharge hose.
- NOTICE:
-
Seal the openings of the disconnected parts using vinyl tape to prevent moisture and foreign matter from entering them.
88370
11.REMOVE COMPRESSOR WITH MOTOR ASSEMBLY
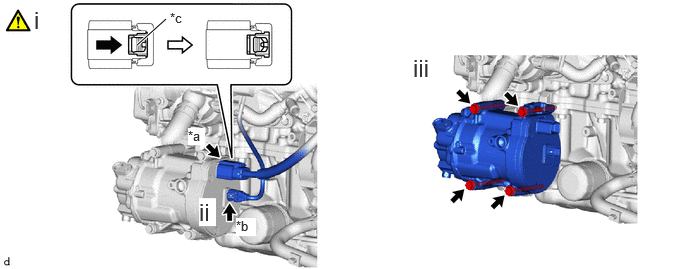
| *a | Connector A | *b | Connector B |
| *c | Green-colored Lock | - | - |

|
Slide | - | - |
Slide the green-colored lock of the connector A as shown in the illustration to release it and disconnect the connector.
- CAUTION:
-
Make sure to wear insulating gloves.
- NOTICE:
-
Insulate the disconnected terminals and connector with insulating tape.
Disconnect the connector B.
Remove the 4 bolts and compressor with motor assembly.