WINDOW / GLASS WINDOW DEFOGGER SWITCH INSTALLATION
CAUTION / NOTICE / HINT
- HINT:
- ·
Use the same procedure for LHD and RHD vehicles.
·The procedure listed below is for the LHD vehicles.
PROCEDURE

 55909C
1.INSTALL AIR MIX DAMPER CONTROL CABLE SUB-ASSEMBLY
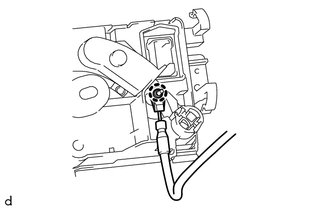
Engage the claw.
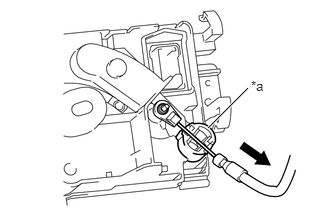
| *a | Outer Clamp Case |
Pull out the inner cable from the outer cable, and pass it through the outer clamp case.
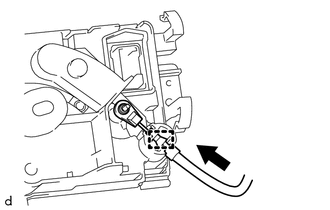
Insert the outer cable into the outer clamp case to install the air mix damper control cable sub-assembly as shown in the illustration.
55906A
2.INSTALL DEFROSTER DAMPER CONTROL CABLE SUB-ASSEMBLY
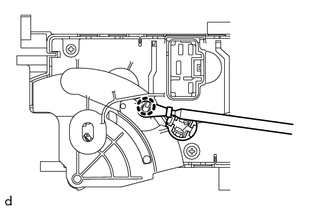
Engage the claw.
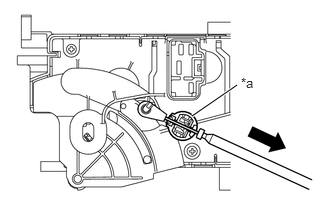
| *a | Outer Clamp Case |
Pull out the inner cable from the outer cable, and pass it through the outer clamp case.
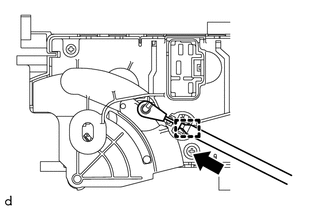
Insert the outer cable into the outer clamp case to install the defroster damper control cable sub-assembly as shown in the illustration.
55900A
3.INSTALL HEATER CONTROL AND ACCESSORY ASSEMBLY
Connect the 2 connectors and engage the 2 clamps to install the heater control and accessory assembly.
Engage the 3 claws to connect the heater control and accessory assembly.
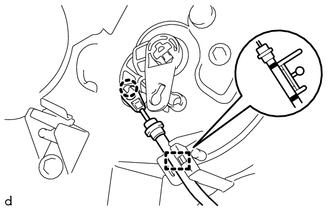
Engage the claw and clamp to connect the defroster damper control cable sub-assembly as shown in the illustration.
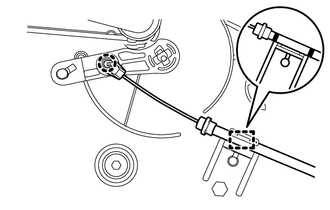
Engage the claw and clamp to connect the air mix damper control cable sub-assembly as shown in the illustration.
87211C
4.INSTALL NO. 4 AIR DUCT
45287
5.INSTALL LOWER STEERING COLUMN COVER
73900
6.INSTALL LOWER NO. 1 INSTRUMENT PANEL AIRBAG ASSEMBLY (w/ Knee Airbag)
55606
7.INSTALL NO. 1 INSTRUMENT PANEL UNDER COVER SUB-ASSEMBLY (w/o Knee Airbag)
86120
8.INSTALL RADIO RECEIVER ASSEMBLY WITH BRACKET (w/ Radio Receiver)
55412D
9.INSTALL CENTER INSTRUMENT CLUSTER FINISH PANEL (w/o Radio Receiver)
55046A
10.INSTALL LOWER INSTRUMENT PANEL FINISH PANEL SUB-ASSEMBLY LH
55045A
11.INSTALL LOWER INSTRUMENT PANEL FINISH PANEL SUB-ASSEMBLY RH
- HINT:
-
Use the same procedure as for the LH side.