Pre-heating Control Circuit
Circuit diagnosis · Vehicles built from Nov 2005
DESCRIPTION
The glow plug is mounted inside the engine combustion chamber. To ensure efficient engine starting with a cold engine, the ECM calculates a time interval of the current needs to flow through the glow plug depending on the starting engine coolant temperature when the ignition switch is turned on (IG). The ECM then turns on the glow plug relay and permits the current to flow through the glow plug based on the ECM's calculated time. The glow plug relay is then heated, and enhances fuel combustion with a cold engine.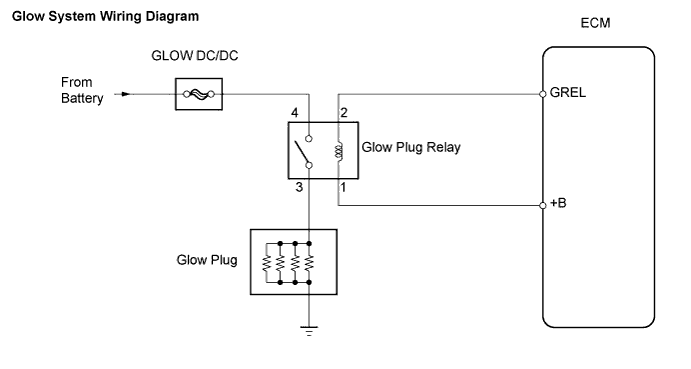

- HINT:
- These troubleshooting procedures are for: 1) difficulty starting engine in cold weather, and 2) difficulty driving/ vehicle malfunctions in cold weather immediately after the engine is started.
- After the engine is started, the ECM performs an "after-glow" for a certain period of time. In proportion to the actual engine coolant temperature, the time period varies. The after-glow reduces diesel engine knocking, white smoke emissions and engine noise when the engine is cold.
- These troubleshooting procedures are for: 1) difficulty starting engine in cold weather, and 2) difficulty driving/ vehicle malfunctions in cold weather immediately after the engine is started.
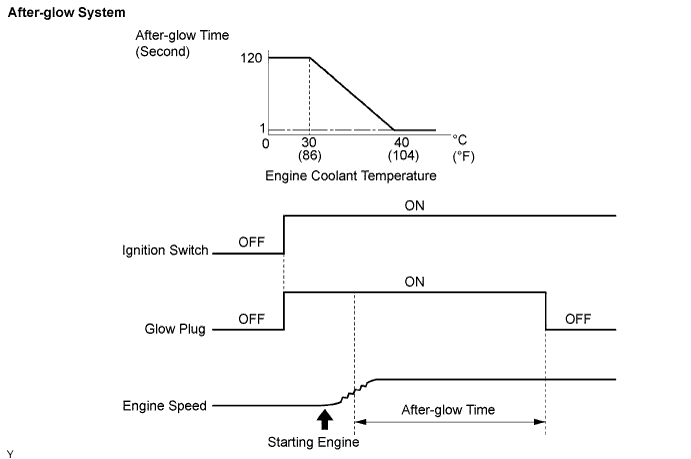
WIRING DIAGRAM
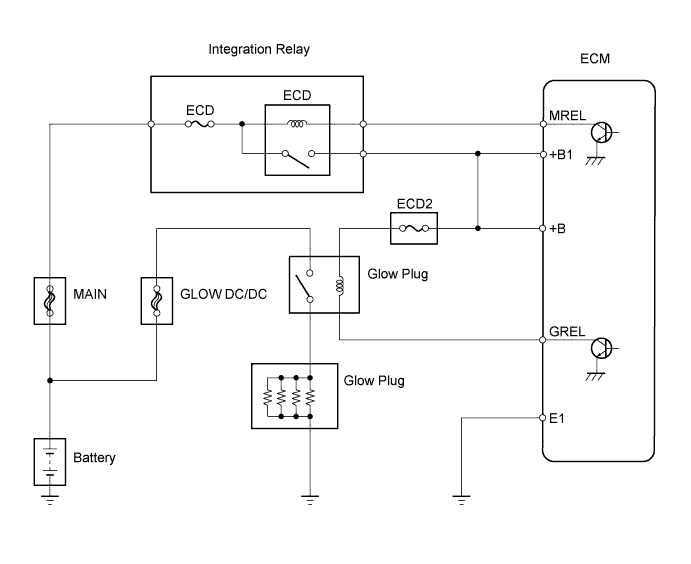
INSPECTION PROCEDURE
| 1. INSPECT GLOW DC/DC FUSE |

Remove the fusible link block.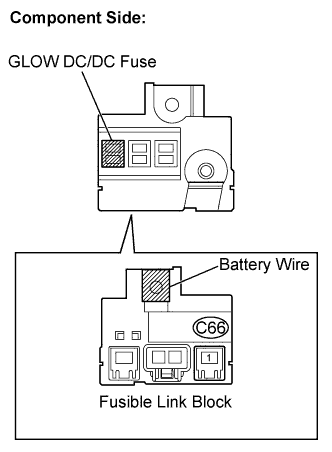
Check the resistance.
- Standard resistance:
Tester Connections
Specified Conditions
(C66-1) - Battery wire
Below 1 Ω
Reinstall the fusible link block.
|
|
||||

| OK | |
 |
| 2. INSPECT GLOW PLUG RELAY ASSEMBLY |
Disconnect the C65 glow plug relay connector.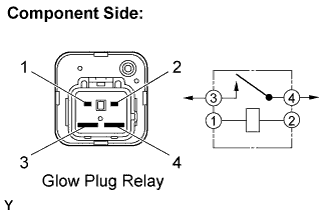
Check the glow plug relay resistance.
- Standard resistance:
Tester Connections
Specified Conditions
3 - 4
10 kΩ or higher
3 - 4
Below 1 Ω
(When battery voltage applied to terminals 1 and 2)
Reinstall the glow plug relay connector.
|
|
||||
| OK | |
|
| 3. INSPECT GLOW PLUG ASSEMBLY (RESISTANCE) |
Remove the engine cover sub-assembly No. 1 (Click here).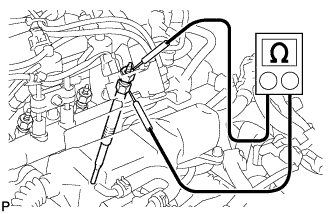
Remove the glow plug No. 1 connector (Click here).
Measure the resistance of the glow plugs.
- Standard resistance:
Tester Connections
Specified Conditions
Glow plug terminal - Body ground
Approximately 0.6 Ω at 20°C (68°F)
- HINT:
- If any of the glow plugs has an open malfunction, the engine power is insufficient only when the engine is cold.
- NOTICE:
- Exercise extreme care not to damage the glow plug pipes. Damaging them could cause an open circuit, or shorten the life of the glow plugs.
- Keep the glow plugs free of oil and fuel while cleaning.
- Wipe any oil off of the terminal and Bakelite washer with a clean, dry cloth during inspection.
- Do not apply more than 11 V to the glow plugs as it may cause an open circuit.
- Exercise extreme care not to damage the glow plug pipes. Damaging them could cause an open circuit, or shorten the life of the glow plugs.
Reinstall the glow plug No. 1 connector (Click here).
Reinstall the engine cover sub-assembly No. 1 (Click here).
|
|
||||
| OK | |
|
| 4. CHECK GLOW PLUG ASSEMBLY (INSTALLATION) |
Check the glow plug installation.
- OK:
- Glow plugs are installed securely.
- Torque:
- 13 N*m{ 127 kgf*cm , 9 ft.*lbf }
|
|
||||
| OK | |
|
| 5. CHECK FUSE (ECD2 FUSE) |
Remove the ECD2 fuse from the engine room relay block.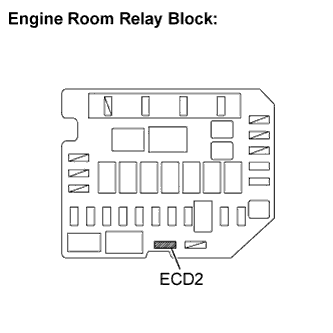
Check the ECD2 fuse resistance.
- Standard resistance:
- Below 1 Ω
Reinstall the ECD2 fuse.
|
|
||||
| OK | |
|
| 6. CHECK HARNESS AND CONNECTOR (GLOW PLUG RELAY - ECM) |
Disconnect the A49 ECM connector.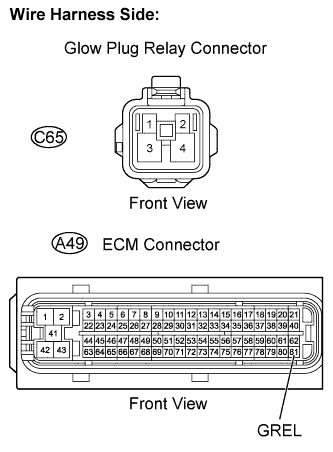
Disconnect the C65 glow plug relay connector.
Check the resistance.
- Standard resistance (Check for open):
Tester Connections
Specified Conditions
GREL (A49-21) - (C65-2)
Below 1 Ω
+B (A49-1) - (C65-1)
- Standard resistance (Check for short):
Tester Connections
Specified Conditions
GREL (A49-21) or (C65-2) - Body ground
10 kΩ or higher
+B (A49-1) or (C65-1) - Body ground
Reconnect the glow plug relay connector.
Reconnect the ECM connector.
|
|
||||
| OK | |
|
| 7. CHECK HARNESS AND CONNECTOR (GLOW PLUG - GLOW PLUG RELAY - BATTERY) |
Disconnect the C65 glow plug relay connector.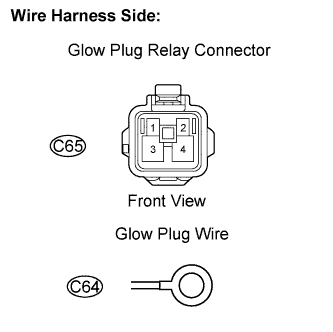
Disconnect the C64 glow plug wire.
Check the resistance.
- Standard resistance (Check for open):
Tester Connections
Specified Conditions
(C65-3) - Glow plug wire (C64)
Below 1 Ω
(C65-4) - Battery positive terminal
Disconnect the glow plug relay connector.
Reconnect the glow plug wire.
|
|
||||
| OK | ||
 |
||
| ||