INSTALLATION
Removal / installation · Vehicles built from Jan 2006
- CAUTION:
- Some of these service operations affect the SRS airbag system. Read the precautionary notices concerning the SRS airbag system before servicing (Click here).
- NOTICE:
- Always use "Torx" socket wrench E10 when installing the rear seat.
- HINT:
- The procedure described below is for the RH side. Use the same procedure for both the RH and LH sides, unless otherwise specified.
| 1. INSTALL FRONT SEAT OUTER BELT ASSEMBLY |

Check the angle of inclination required to lock the retractor.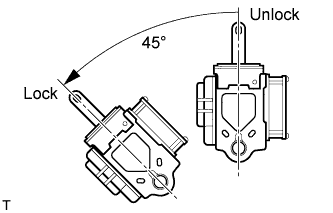

Gently incline the retractor from its initial position. Check that the belt does not lock when the retractor is inclined 15° or less in any direction. Also, check that the belt locks when the inclination of the retractor is 45° or more.
- NOTICE:
- Do not disassemble the retractor.
Hook the lower stay of the retractor onto the 2 body hooks and provisionally install the retractor with the 2 bolts.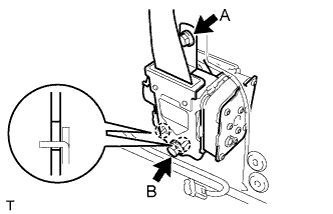
Tighten bolt A and then bolt B.
- Torque:
- 4.9 N*m{ 50 kgf*cm , 43 in.*lbf } for bolt A
- 42 N*m{ 430 kgf*cm , 31 ft.*lbf } for bolt B
Install the through anchor with the bolt.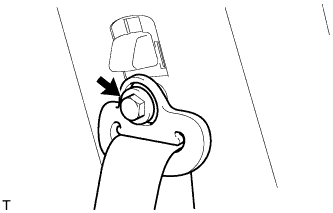
- Torque:
- 42 N*m{ 430 kgf*cm , 31 ft.*lbf }
Check that the ELR locks.
- NOTICE:
- Perform the check with the front seat outer belt installed.
With the belt installed, check that the belt locks when it is pulled out quickly.
If the operation is not as specified, replace the front seat outer belt.
Connect the pretensioner connector.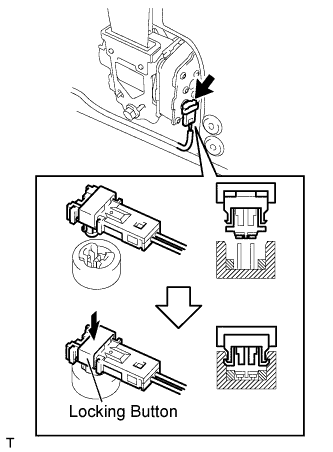
Connect the pretensioner connector.
Lock the locking button.
- NOTICE:
- Securely lock the locking button.
| 2. INSTALL SEAT BELT ANCHOR COVER CAP |
Engage the 3 claws and install the seat belt anchor cover cap.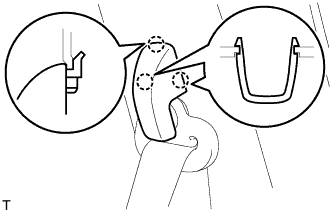
| 3. INSTALL FRONT QUARTER TRIM PANEL ASSEMBLY |
Engage the 8 clips, the retainer and the 10 claws and install the front quarter trim panel.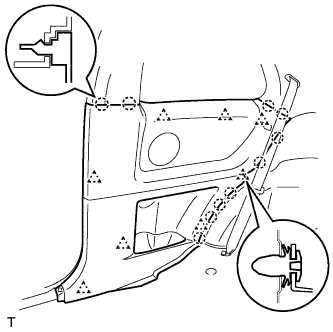
| 4. INSTALL FRONT SEAT OUTER BELT BAR SUB-ASSEMBLY |
Install the front seat outer belt bar with the 2 bolts.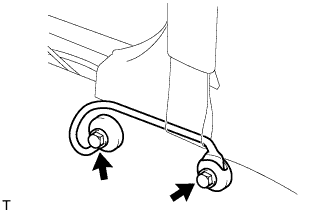
- Torque:
- 42 N*m{ 430 kgf*cm , 31 ft.*lbf }
| 5. INSTALL REAR SEAT OUTER BELT ASSEMBLY |
Install the belt.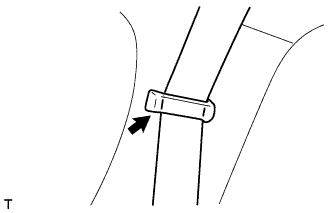
| 6. INSTALL FRONT DOOR OPENING TRIM WEATHERSTRIP |
Install the front door opening trim weatherstrip.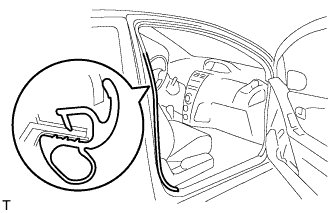
| 7. INSTALL FRONT DOOR SCUFF PLATE |
Engage the 8 claws and install the front door scuff plate.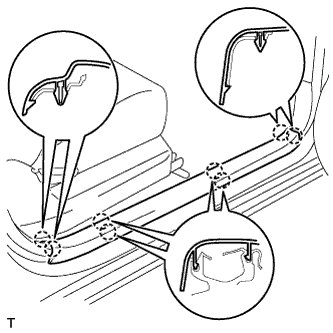
| 8. INSTALL REAR SEAT ASSEMBLY |
for RH Side:
Install the rear seat assembly (Click here).
for LH Side:
Install the rear seat assembly (Click here).
| 9. INSTALL REAR SEAT LEG COVER |
for RH Side:
Install the rear seat leg cover (Click here).
for LH Side:
Install the rear seat leg cover (Click here).
| 10. INSTALL DECK FLOOR BOX (w/ Deck Board) |
for RH Side:
Install the deck floor box (Click here).
for LH Side:
Install the deck floor box.
- HINT:
- Use the same procedure as for the RH side.
| 11. INSTALL SPARE WHEEL COVER ASSEMBLY (w/ Deck Board) |
Install the spare wheel cover.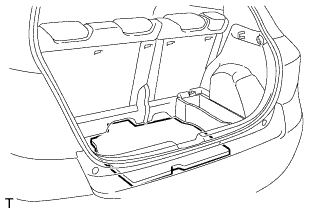
| 12. INSTALL DECK BOARD SUB-ASSEMBLY (w/ Deck Board) |
Set the deck board and lock the 2 knobs.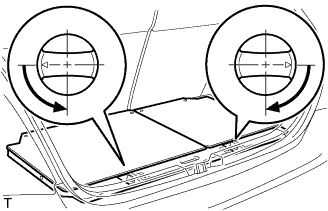
| 13. INSTALL REAR FLOOR CARPET ASSEMBLY (w/o Deck Board) |
Install the rear floor carpet.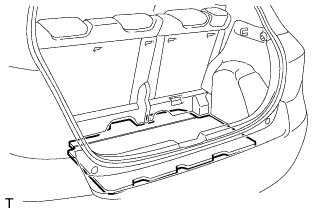
| 14. INSTALL PACKAGE TRAY TRIM PANEL ASSEMBLY (w/ Package Tray Trim) |
Engage the 2 claws and install the package tray trim panel.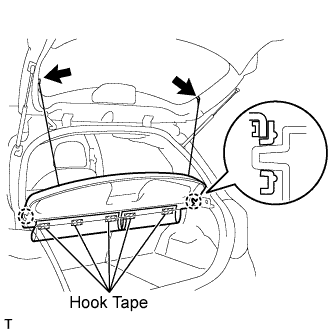
Install the 5 pieces of hook tape.
Install the 2 package tray trim suspenders.
| 15. CONNECT CABLE TO NEGATIVE BATTERY TERMINAL |
- Torque:
- 5.4 N*m{ 55 kgf*cm , 48 in.*lbf }
| 16. INSPECT SRS WARNING LIGHT |