FENDER
REMOVAL
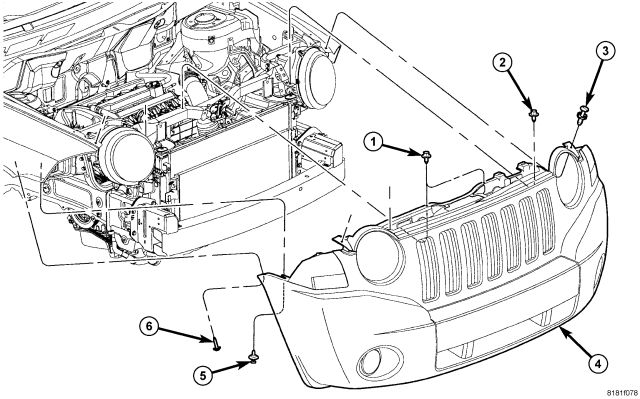
1. Remove the radiator closure panel, (Refer to 23 - BODY/EXTERIOR/CLOSURE PANEL-UPPER RADIATOR - REMOVAL).
2. Remove the wheelhouse splash shield, (Refer to 23 - BODY/EXTERIOR/SPLASH SHIELD-FRONT WHEELHOUSE - REMOVAL).
3. Remove the radio antenna, if equipped, (Refer to 8 - ELECTRICAL/AUDIO/ANTENNA BODY & CABLE - REMOVAL).
4. Remove the fender to fascia fasteners (5 and 6).
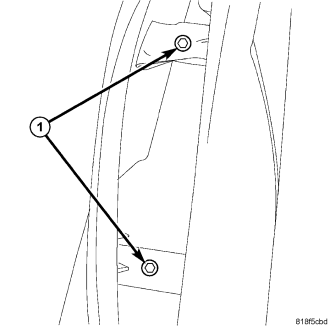
5. Remove the two inner bolts (1) at the rear of the wheel well.
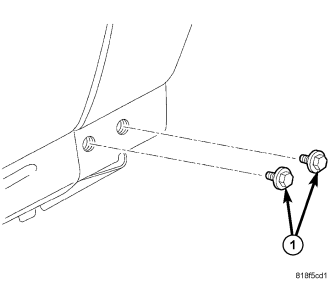
6. Remove the two lower bolts (1) next to the door sill.
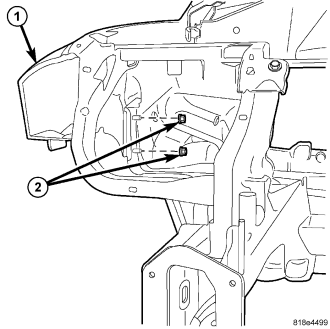
7. Remove the two inner nuts (2).
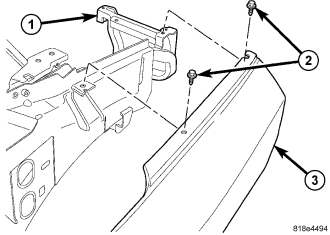
8. Remove the two upper bolts (2) and remove the fender (3).
INSTALLATION
NOTE: Tighten the fender fasteners only after all fasteners are installed loosely and the fender is adjusted for gap and flush, (Refer to 23 - BODY/BODY STRUCTURE/GAP AND FLUSH - SPECIFICATIONS).
1. Loosely install the two upper bolts (2).
2. Install the two inner nuts (2) loosely.
3. Install the two lower bolts (1) next to the door, loosely.
4. Loosely install the two inner bolts (1) at the rear of the wheel well and adjust the fender to the correct gap and flush dimensions, (Refer to 23 - BODY/BODY STRUCTURE/GAP AND FLUSH - SPECIFICATIONS).
5. After correct fender gap and flush specifications are met, tighten all the fender fasteners to 14 N·m (10.5 ft. lbs.).
6. Install the fender to fascia fasteners (5 and 6).
7. Install the radio antenna, if equipped, (Refer to 8 - ELECTRICAL/AUDIO/ANTENNA BODY & CABLE - INSTALLATION).
8. Install the wheelhouse splash shield, (Refer to 23 - BODY/EXTERIOR/SPLASH SHIELD-FRONT WHEELHOUSE - INSTALLATION).
9. Install the radiator closure panel, (Refer to 23 - BODY/EXTERIOR/CLOSURE PANEL-UPPER RADIATOR - INSTALLATION).