19 - Steering
- DESCRIPTION
- OPERATION
- STEERING SYSTEM DIAGNOSIS CHARTS
- HYDRAULIC FLOW AND PRESSURE
- STANDARD PROCEDURE - POWER STEERING SYSTEM BLEEDING
- SPECIAL TOOLS
DESCRIPTION
DESCRIPTION
MOPAR® ATF+4 is to be used in
the power steering system. No other power steering or automatic transmission
fluid is to be used in the system. Damage may result to the power
steering pump and system if any other fluid is used, and do not overfill.
CAUTION:
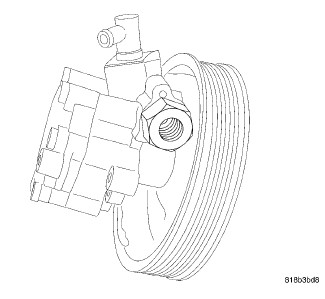 |
The power steering system has a hydraulic pump. The pump is a droop flow rate and displacement vane-type pump. The pump reservoir is remote located by the air box AND headlamp.
The steering gear used is a straight ratio recirculating ball type gear.
OPERATION
OPERATION
The gear acts as a rolling thread between the worm shaft and rack piston. The worm shaft is supported by a thrust bearing at the upper end. When the worm shaft is turned from input from the steering column the rack piston moves. The rack piston teeth mesh with the pitman shaft. Turning the worm shaft turns the pitman shaft, which turns the steering linkage.
STEERING SYSTEM DIAGNOSIS CHARTS
STEERING SYSTEM DIAGNOSIS CHARTS
| NOTE: |
There are four diagnosis charts following that cover VIBRATION (SHIMMY) ABOVE 50 MPH (80 KMH), NOISE, VIBRATION AND HARSHNESS (NVH) ISSUES, PERFORMANCE ISSUES, and FLUID ISSUES. |
VIBRATION (SHIMMY) ABOVE 50 MPH (80 KMH)
Vehicles equipped with a solid front axle can be susceptible to steering shimmy. Often this condition is due to modifications to the vehicle that may involve aftermarket equipment that may not be compatible with the vehicle architecture or is not intended for on-road use. For original equipment, this condition can be corrected with routine inspection for properly maintained wheels and tires and replacement of damaged or worn components.| NOTE: | This Diagnosis and Testing covers a self-sustaining vibration (shimmy) of the vehicle and steering wheel while driving at speeds typically above 50 MPH (80 KMH) |
| NOTE: | This applies to vehicles equipped with a solid front axle only. |
-
Test drive the
vehicle to verify customer complaint.
NOTE: It may be necessary to drive the vehicle in the environment (i.e., same type of terrain, such as uneven pavement, railroad tracks, etc.) that the customer experienced the condition in order to properly diagnose the condition and confirm that the repairs corrected the concern. -
Is the vehicle
equipped with aftermarket components or other modifications (e.g.
lift kits, wheels, suspension components or tires) that can affect
the performance of or wear upon steering components?
- Yes: notify the owner and document in the repair order that: i. the express limited warranties do not cover conditions or damage caused by the use of aftermarket components, improper maintenance, or impact damage; and ii. the use of aftermarket components, improper maintenance, and impact damage can cause steering shimmy or otherwise accelerate the wear of steering components that cause steering shimmy; and iii. the dealership will inspect steering components that were supplied by the manufacturer for defects in material, workmanship and factory preparation and determine if necessary repairs are covered under the terms of the warranties applicable to the vehicle. With customer authorization, proceed to Step #3.
- No: Proceed to Step #3.
- Inspect the vehicle steering components for any damage.
- Was any visible damage present?
- Are the tires on the vehicle properly inflated to the correct pressure?
- Do the tires exhibit a condition of excessive wear, cupping or damage?
- Verify proper wheel and tire balance. (Refer to 22 - Tires and Wheels/Standard Procedure)
- Does the vehicle still exhibit the condition?
- Recommend the replacement of the steering damper. Refer to steering damper in Section 19 for service procedures.
- Does the vehicle still exhibit the condition?
-
Does the track
bar show signs of excessive wear or damage?
NOTE: Refer to the proper diagnosing and testing procedures indicated in the service information.
- Recommend the replacement of the track bar. Refer to the service procedures in Section 2 - Front Suspension.
- Does the vehicle still exhibit the condition?
- Do the tie rods show signs of excessive wear or damage?
- Recommend the replacement of worn tie rods. Refer to the service procedures in Section 19.
- Does the drag link show signs of excessive wear or damage?
- Recommend the replacement of the worn drag link. Refer to the service procedures in Section 19.
- Verify vehicle wheel alignment is within specification and adjust accordingly. Refer to Section 2 – Front Suspension, Wheel Alignment.
- Does the vehicle still exhibit the condition?
- Do the ball joints show signs of excessive wear or damage?
- Recommend the replacement of worn ball joints. Refer to the service procedures in 2 – Front Suspension.
- Does the vehicle still exhibit the condition?
NOISE, VIBRATION AND HARSHNESS (NVH) ISSUES
|
CONDITION |
POSSIBLE CAUSES |
EVALUATION/CORRECTION |
|---|---|---|
|
OBJECTIONABLE HISS OR WHISTLE WHILE TURNING STEERING WHEEL WHEN STATIONARY OR MOVING SLOWLY* |
1. Damaged or mispositioned steering column shaft/coupling dash boot seal. |
1. Check to ensure boot is properly installed and seals against sheet metal. Reposition or replace steering column shaft/coupling dash boot seal as necessary. |
|
2. Mis-routed power steering hose. |
2. Check routing of power steering hoses. Ensure hoses do not come in unwanted contact with other components and objects. |
|
|
3. Restriction in pressure or return hose. |
3. Using an electronic listening tool, determine if noise is coming from either pressure or return hose. Replace hose that noise is present within. |
|
|
4. Noisy valve in power steering gear. |
4. For evaluation and correction, (Refer to 19 - Steering/Linkage/END, Tie Rod - Diagnosis and Testing) . |
|
|
RATTLE OR EXCESSIVE CLUNK** |
1. Power steering gear loose on engine cradle/crossmember. |
1. Check fastener torque and tighten to specifications. Replace as necessary. Check steering wheel center following repair. |
|
2. Loose strut assembly mounting fasteners at tower or knuckle. |
2. Check fastener torque and tighten to specifications. |
|
|
3. Excessive play in outer tie rod. |
3. For evaluation and correction (Refer to 19 - Steering/Linkage/END, Tie Rod - Diagnosis and Testing) . |
|
|
4. Engine cradle/crossmember mounting fasteners loose at frame or bushings worn. |
4. Check fastener torque and tighten to specifications. Inspect bushings and repair as necessary. |
|
|
5. Wheel Mounting (Lug) nuts loose. |
5. Inspect wheel mounting (Lug) nuts and studs and repair as necessary. Tighten nuts to specifications. |
|
|
6. Power steering hose touching the body or frame of vehicle. |
6. For evaluation and correction (Refer to 19 - Steering/Pump - Diagnosis and Testing) . |
|
|
7. Stabilizer bar link joints worn (occurs with steering input only when moving, not stationary). |
7. At park, jounce only one side of vehicle front to exercise stabilizer bar. Replace stabilizer bar link. |
|
|
8. Loose lower control arm mounting bolts at engine cradle, frame or crossmember (occurs with steering input only when moving, not stationary). |
8. Check control arm mounting bolts and tighten to specified torque. |
|
|
9. Loose intermediate shaft or column. |
9. Rotate intermediate (steering) shaft in relationship to gear, checking for free-play. Check column fasteners and tighten to specifications as necessary. |
|
|
10. Lower control arm pivot bushing worn (occurs with steering input only when moving, not stationary). |
10. Inspect bushings for wear and replace lower control arm as necessary. |
|
|
11. Internal power steering gear noise. |
11. Drive vehicle on rough road, then steer rapidly back and forth when stopped. Replace power steering gear as necessary. |
|
|
12. Loose inner tie rod. |
12. For evaluation and correction (Refer to 19 - Steering/Linkage/END, Tie Rod - Diagnosis and Testing) . |
|
|
13. Damaged engine cradle/crossmember. |
13. Inspect the cradle/crossmember for cracks or other damage. Replace as necessary. |
|
|
POPPING NOISE |
1. Loose steering gear mounting fasteners. |
1. Check fasteners for proper torque and retighten as necessary. |
|
2. Loose outer tie rod mounting nut or jam nut. |
2. Check fastener torque. Replace nuts as necessary and tighten to specifications. |
|
|
3. Loose intermediate (steering) shaft coupling at gear input shaft. |
3. Make sure coupling is fully seated on gear input shaft. Retighten or re-seat as necessary. |
|
|
4. Worn tie rod (outer or inner). |
4. For evaluation and correction, (Refer to 19 - Steering/Linkage/END, Tie Rod - Diagnosis and Testing) . |
|
|
5. Worn axle half-shaft. |
5. For evaluation and correction, (Refer to 03 - Differential and Driveline/Front Axle - 186FBI - Diagnosis and Testing) . |
|
|
CHIRP OR SQUEAL (POWER STEERING PUMP) |
1. Loose power steering pump drive belt. |
1. Inspect belt. Replace belt if worn or glazed. Tighten/adjust power steering pump drive belt if equipped with a manual tensioner. |
|
2. Pulley alignment incorrect. |
2. Realign accessory drives. |
|
|
3. Malfunctioning belt auto-tensioner |
3. Verify belt tension. Replace belt auto-tensioner. |
|
|
4. Power steering pump noisy (worn bearing/bushing noise). |
4. Using an electronic listening tool, determine if noise is coming from pump. Replace power steering pump as required. |
|
|
5. Generator or water pump noisy. |
5. Using an electronic listening tool, determine if noise is coming from Generator or water pump. Replace faulty component. |
|
|
WHINE, GROWL, MOAN OR GROAN (POWER STEERING PUMP)*** |
1. Low power steering fluid level. |
1. Fill power steering fluid reservoir to proper level and check for leaks (make sure all air is bled from the system fluid). |
|
2. Air in power steering fluid. |
2. Inspect for excessive air bubbles in fluid (fluid will appear foamy and lighter in color). Inspect hoses for leaks and replace as necessary. Bleed air from fluid (Refer to 19 - Steering - Standard Procedure) |
|
|
3. Power steering hose touching body or frame of vehicle. |
3. For evaluation and correction, (Refer to 19 - Steering/Pump - Diagnosis and Testing) . |
|
|
4. Wear of power steering pump internal components. |
4. For evaluation and correction, (Refer to 19 - Steering/Pump - Diagnosis and Testing) . |
|
|
COLD START WHINE OR MOAN (POWER STEERING PUMP)*** |
1. Low power steering fluid level. |
1. Fill power steering fluid reservoir to proper level and check for leaks (make sure all air is bled from the system fluid). |
|
2. Extremely low ambient temperature (near 0 F° (-18 C°) or below) |
2. Some noise is expected as pump attempts to pull cold, thick fluid. Noise should go away as vehicle warms up. Acceptable levels of excessive noise are one second at 0 F° (-18 C°) and 15 seconds at -20 F° (-29 C°). If noise is excessive, look for poor sealing on the return hose or a possible fluid leak. |
|
|
SQUEAKING OR RUBBING SOUND |
1. Steering column shroud or shaft rubbing. |
1. While turning the steering wheel, listen down column to locate. Check interference between moving components. Move or realign shrouds or shaft as necessary. Replace components if this does not correct problem. |
|
2. Clockspring inside steering column noisy. |
2. Remove clockspring and reinstall steering wheel for testing. If noise is gone, replace clockspring. |
|
|
3. Boot/dash seal lubrication inadequate. |
3. Remove boot seal and recheck for noise. Lubricate seal as necessary. |
|
|
4. Steering gear outer tie rod noisy. |
4. While a helper turns the steering wheel, use an electronic listening tool to determine if noise is coming from either outer tie rod. Replace outer tie rods as necessary. |
|
|
5. Steering gear internally noisy. |
5. Remove dash seal boot, then exercise the steering wheel. If noise is still present at gear, replace steering gear. |
|
|
SCRUBBING OR KNOCKING SOUND. |
1. Incorrect tire or wheel size. |
1. Replace incorrect size tire or wheel with original equipment size. |
|
2. Worn motor or transmission mount. |
2. Drive vehicle, moving accelerator pedal rapidly up and down attempting to locate noise. Try in both forward and reverse. Replace mounts as necessary. |
|
|
3. Tires contacting wheel well. |
3. Make sure wheel house is properly positioned. If not, reposition as necessary. If steering wheel is properly centered, check steering gear travel left to right by rotating the steering wheel to each stop. Steering wheel should rotate the same amount in both directions from center. If not, replace steering gear. |
|
|
4. Interference between moving steering components and other components. |
4. Check for bent or misaligned components. Correct or replace as necessary. |
|
|
5. Accessory drive pulley rubbing against another component. |
5. Check pulleys for wear. Check for worn engine or transmission mount. Reposition components or replace mounts as necessary. |
| NOTE: |
* There is some noise in all power steering systems. One of the most common is a hissing sound evident when turning the steering wheel when at a standstill or when parking and the steering wheel is at the end of its travel. Hiss is a very high frequency noise similar to that experienced while slowly closing a water tap. The noise is present in every valve and results when high velocity fluid passes valve orifice edges. There is no relationship between this noise and the performance of the steering system. |
| NOTE: |
** A light clunk may be felt or heard during steering wheel reversal while vehicle is stationary. This results from internal steering gear rack movement at the bushings and in no way affects the performance of the steering system. This movement may be felt in the steering components during steering wheel reversal. |
| NOTE: |
*** Power steering pump growl/moan/groan results from the development of high pressure fluid flow. Normally this noise level should not be high enough to be objectionable. |
PERFORMANCE ISSUES
|
CONDITION |
POSSIBLE CAUSES |
EVALUATION/CORRECTION |
|---|---|---|
|
STEERING WHEEL OR COLUMN HAS FREEPLAY/LASH/LOOSENESS (CLUNKING OR RATTLING) |
1. Loose coupling pinch bolt at gear input shaft. |
1. Check pinch bolt torque. Replace pinch bolt if equipped with thread locker patch and tighten to specifications. |
|
2. Power steering gear loose on cradle/crossmember. |
2. Inspect gear mounting bolts. Replace if necessary and tighten to specifications. |
|
|
3. Excessive freeplay or noise from steering column bearings. |
3. Replace steering column. |
|
|
4. Excessive intermediate (steering) shaft coupling u-joint free-play. |
4. Rotate steering wheel back-and-forth while watching coupling. Observe for free-play. Replace intermediate shaft as necessary. |
|
|
5. Loose or worn outer tie rod. |
5. For evaluation and correction, (Refer to 19 - Steering/Linkage/END, Tie Rod - Diagnosis and Testing) . |
|
|
6. Lack of lubrication in lower ball joint or ball joint is damaged. |
6. Lubricate ball joint if equipped with a zerk fitting and check for function. If not equipped with a zerk fitting, test and replace ball joint as necessary. |
|
|
7. Excessive lash inside steering gear. |
7. Disconnect intermediate shaft and turn steering gear input shaft. Observe for any movement without a corresponding tire movement. Replace steering gear as necessary. |
|
|
STEERING WHEEL HAS FORE AND AFT LOOSENESS. |
1. Steering wheel retaining bolt loose. |
1. Check steering wheel retaining bolt torque and tighten to specifications as necessary. |
|
2. Loose steering column to instrument panel fasteners. |
2. Check steering column to instrument panel fastener torque and tighten to specifications as necessary. |
|
|
3. Steering column lower bearing spring retainer slipped on steering column shaft. |
3. Pull steering wheel fore-and-aft while observing movement. Replace steering column as necessary. |
|
|
STEERING WHEEL, DASH OR VEHICLE VIBRATES DURING STEERING MANEUVERS (ESPECIALLY AT LOW SPEED OR STANDSTILL). |
1. Air in power steering fluid. |
1. Inspect for excessive air bubbles in fluid (fluid will appear foamy and lighter in color). Inspect hoses for leaks and replace as necessary. Bleed air from fluid (Refer to 19 - Steering - Standard Procedure) |
|
2. Tire(s) not properly inflated. |
2. Check and inflate tires to the specified pressure. |
|
|
3. Excessive engine vibration. |
3. Ensure that the engine is tuned properly. |
|
|
4. Loose tie rod end jam nut. |
4. Check torque and tighten the inner to outer tie rod jam nut to specifications. |
|
|
5. Overcharged air conditioning (A/C) system. |
5. Turn A/C off and verify issue goes away. Repair A/C as necessary. |
|
|
6. Grounded, damaged or loose engine mount. |
6. Visually inspect for damaged or misaligned mounts. Check fastener torque. Replace, realign or retighten as necessary. |
|
|
7. Loose or worn outer tie rod. |
7. For evaluation and correction, (Refer to 19 - Steering/Linkage/END, Tie Rod - Diagnosis and Testing) . |
|
|
8. Steering gear noisy. |
8. During a parking event at 0 mph, verify there is vibration only with steering. Steer in both directions and verify that the noise follows the steering input. Check TSB’s for any known issues. Replace steering gear as necessary. |
|
|
STEERING CATCHES, SURGES OR STICKS IN CERTAIN POSITIONS OR IS DIFFICULT TO TURN. |
1. Low power steering fluid level. |
1. Check fluid level and fill to proper level as necessary. Check for leaks. Make sure all air is bled from system. |
|
2. Tire(s) not properly inflated. |
2. Check and inflate tires to the specified pressure. |
|
|
3. Loose or slipping power steering/accessory drive belt. |
3. Verify belt tension. Replace belt auto-tensioner and belt as necessary. |
|
|
4. Lack of lubrication in lower ball joint or ball joint is damaged. |
4. Lubricate ball joint if equipped with a zerk fitting and check for function. If not equipped with a zerk fitting, test and replace ball joint as necessary. |
|
|
5. Lack of lubrication in steering gear outer tie rod end(s). |
5. For evaluation and correction, (Refer to 19 - Steering/Linkage/END, Tie Rod - Diagnosis and Testing) . |
|
|
6. Faulty power steering pump. |
6. Perform Power Steering Flow and Pressure Test (Refer to 19 - Steering - Diagnosis and Testing) . Look for low or erratic flow or pressure. Replace power steering pump as necessary. |
|
|
7. Excessive friction in intermediate shaft/coupler joint. |
7. Disconnect intermediate shaft/coupler at steering gear and check joint for smooth operation in all directions. Replace intermediate shaft/coupler joint. |
|
|
8. Excessive friction in steering column. |
8. Disconnect intermediate shaft/coupler at steering gear. Turn steering wheel two revolutions in either direction from on center and check for smooth operation. DO NOT turn past two revolutions. Damage to the clockspring may occur. Replace steering column as necessary. |
|
|
9. Worn or binding seat and bearing in front strut assembly. |
9. Disconnect outer tie rod ends from knuckles, then turn tire and wheel assembly checking for smooth operation. Replace front strut assembly seat and bearing. |
|
|
10. Faulty steering gear. |
10. With vehicle on hoist, tires unsupported and engine off, steer gear throughout travel and check for smooth operation. Replace steering gear (only after all previous components have been checked). |
|
|
STEERING WHEEL DOES NOT RETURN TO CENTER POSITION. |
1. Tire(s) not properly inflated. |
1. Check and inflate tires to the specified pressure. |
|
2. Improper front wheel alignment. |
2. Check and adjust wheel alignment as necessary. |
|
|
3. Lack of lubrication in lower ball joint or ball joint is damaged. |
3. Lubricate ball joint if equipped with a zerk fitting and check for function. If not equipped with a zerk fitting, test and replace ball joint as necessary. |
|
|
4. Excessive friction in intermediate shaft/coupler joint. |
4. Disconnect intermediate shaft/coupler at steering gear and check joint for smooth operation in all directions. Replace intermediate shaft/coupler joint. |
|
|
5. Excessive friction in steering column. |
5. Disconnect intermediate shaft/coupler at steering gear. Turn steering wheel two revolutions in either direction from on center and check for smooth operation. DO NOT turn past two revolutions. Damage to the clockspring may occur. Replace steering column as necessary. |
|
|
6. Worn or binding seat and bearing in front strut assembly. |
6. Disconnect steering gear outer tie rod ends at knuckles, then turn tire and wheel assembly in and out checking for smooth operation. Replace seat and bearing as necessary. |
|
|
7. Excessive friction in power steering gear. |
7. With vehicle on hoist, tires unsupported and engine off, steer gear throughout travel and check for smooth operation. Replace steering gear (only after all previous components have been checked). |
|
|
EXCESSIVE STEERING WHEEL KICKBACK FROM ROAD INPUTS |
1. Air in power steering fluid. |
1. Inspect for excessive air bubbles in fluid (fluid will appear foamy and lighter in color). Inspect hoses for leaks and replace as necessary. Bleed air from fluid (Refer to 19 - Steering - Standard Procedure) |
|
2. Power steering gear loose on cradle/crossmember. |
2. Inspect gear mounting bolts. Replace if necessary and tighten to specifications. |
|
|
3. Steering column, coupling or intermediate shaft worn or loose. |
3. Rotate steering wheel back-and-forth while inspecting intermediate shaft going into steering gear. Look for excessive free-play. Retighten if loose bolt is found. Replace steering column, coupling or intermediate shaft if necessary. |
|
|
4. Power steering pump flow is too low. |
4. Perform Power Steering Flow and Pressure Test (Refer to 19 - Steering - Diagnosis and Testing) . Look for low or erratic flow or pressure. Replace power steering pump as necessary. |
FLUID ISSUES
|
CONDITION |
POSSIBLE CAUSES |
EVALUATION/CORRECTION |
|---|---|---|
|
LOW FLUID LEVEL WITH VISIBLE LEAK. |
1. Loose power steering hose fittings or connections. |
1. Check torque on all tube nuts (at gear and pump). Inspect clamps at all rubber hose connections for correct position, damage and tension. Tighten tube nuts as required. Reposition or replace clamps at hose connections. Clean joints and reinspect for leaks. |
|
2. Damaged or missing O-ring at power steering hose tube nuts. |
2. Remove tube nut and inspect O-ring. If damaged or missing, replace O-ring. Clean joints and reinspect for leaks. |
|
|
3. Power steering line or hose failure. |
3. Clean fluid from around suspect areas. Run vehicle and inspect for leaks. Look inside reservoir to see if air is being ingested. Replace hoses as necessary. |
|
|
4. Power steering component leaking (reservoir, pump, gear). |
4. Clean fluid from around suspect areas. Run vehicle and inspect for leaks. Look inside reservoir to see if air is being ingested. Replace power steering component as necessary. |
|
|
AERATED FLUID.* |
1. Low power steering fluid level. |
1. Check fluid level and fill to proper level as necessary. Check for leaks. Make sure all air is bled from system. |
|
2. Air leak at power steering supply hose, reservoir or pump. |
2. Inspect components. Put a hand vacuum pump on the reservoir and verify that the system can keep a vacuum. System should not lose more than 1 psi in 2 minutes (make sure vacuum pump is sealed well to the reservoir). |
|
|
3. Air leak at power steering supply hose, reservoir or pump. |
3. Inspect components. Place a hand vacuum pump with Adapter 9688 on reservoir and verify that system can sustain vacuum. System should not lose more than 1 psi in 2 minutes (make sure vacuum pump is sealed well to the reservoir). Replace steering component as necessary. |
|
|
RESERVOIR FLUID OVERFLOW OR FLUID THAT IS MILKY IN COLOR |
1. Water contamination of power steering fluid. |
1. Inspect fluid for milky appearance. Completely drain power steering fluid. Refill and bleed system. (Refer to 19 - Steering - Standard Procedure) |
| NOTE: |
Extremely cold temperatures may cause power steering fluid aeration. The air should work its way out of the system as the fluid warms. |
HYDRAULIC FLOW AND PRESSURE
HYDRAULIC FLOW AND PRESSURE
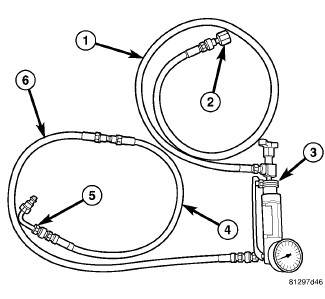 |
The following procedure is used to test the operation of the power steering system on the vehicle. This test will provide the gallons per minute (GPM) or flow rate of the power steering pump along with the maximum relief pressure. Perform test any time a power steering system problem is present. This test will determine if the power steering pump or power steering gear is not functioning properly. The following pressure and flow test is performed using 6815 (3) and 6893A .
FLOW AND PRESSURE TEST
- Check the power steering belt to ensure it is in good condition and adjusted properly.
- Connect Adapter, Power Steering (Truck) 6844 (5) to the hose on the pressure gauge side of the analyzer (3).
- Connect 6826 (2) to hose on the test valve side of the analyzer (3).
- Disconnect the high pressure hose from the power steering pump and connect to the test valve side of the analyzer (3).
- Connect the pressure gauge side of the analyzer (3) to the pump fitting.
- Open the test valve completely.
- Start the engine and idle long enough to circulate power steering fluid through the flow/pressure test gauge and to get air out of the fluid, then shut off engine.
- Check the fluid level, add fluid as necessary. Start the engine again and idle.
-
The gauge should read below 20682 kPa (300 psi). If above, inspect the hoses for restrictions and repair as necessary.
CAUTION: The following test procedure involves testing maximum pump pressure output and flow control valve operation. Do not leave the valve closed for more than three seconds as the pump could be damaged.
- Increase the engine speed to 1500 RPM and read the flow meter. If the flow rate (GPM) is below specification, (refer to pump specification chart for GPM) the pump should be replaced.
-
Close valve fully three times and record highest pressure indicated each time. All three readings must be above minimum specifications and within 345 kPa (50 psi) of each other.
- Pressures above specifications but not within 345 kPa (50 psi) of each other, replace pump.
- Pressures within 345 kPa (50 psi) of each other but below specifications, replace pump.
CAUTION: Do not force the pump to operate against the stops for more than 2 to 3 seconds at a time because, pump damage will result.
- Open the test valve and turn the steering wheel to the extreme left and right positions three times against the stops. Record the highest pressure reading at each position. Compare readings to the pump specifications chart. If pressures readings are not within 50 psi of each other, the gear is leaking internally and must be replaced.
PUMP SPECIFICATION
|
SYSTEM |
RELIEF PRESSURE ± 50 |
FLOW RATE (GPM) AT 1500 RPM |
|---|---|---|
|
Recirculating Ball |
9949 kPa (1443 psi) |
2.0 - 2.75 GPM |
STANDARD PROCEDURE - POWER STEERING SYSTEM BLEEDING
STANDARD PROCEDURE - POWER STEERING SYSTEM BLEEDING
Fluid level should be checked with
the engine OFF to prevent personal injury from moving parts and to
assure an accurate fluid level reading.
WARNING:
Mopar® Power Steering Fluid +
4 or Mopar® ATF+4 Automatic Transmission Fluid is to be used in the
power steering system. Both Fluids have the same material standard
specifications (MS-9602). No other power steering or automatic transmission
fluid is to be used in the system. Damage may result to the power
steering pump and system if another fluid is used. Do not overfill
the system.
CAUTION:
If the air is not purged from
the power steering system correctly, pump failure could result.
CAUTION:
| NOTE: |
Be sure the vacuum tool used in the following procedure is clean and free of any fluids. |
 |
-
Check the fluid level. The power steering fluid level can be viewed through the side of the power steering fluid reservoir. Compare the fluid level to the markings on the side of the reservoir. When the fluid is at normal ambient temperature, approximately 21° - 27° C (70° - 80° F), the fluid level should read between the MAX and MIN markings. When the fluid is hot, fluid level is allowed to read up to the MAX line.
CAUTION: Do not fill fluid beyond the MAX mark. Check cap seal for damage and replace if needed.
- Remove the cap from the fluid reservoir and fill the power steering fluid reservoir up to the MAX marking with Mopar® Power Steering Fluid + 4 or Mopar® ATF+4 Automatic Transmission Fluid.
-
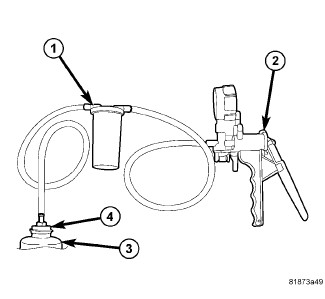
Tightly insert Power Steering Cap Adapter (4), Special Tool 9688A , into the mouth of the reservoir (3).
CAUTION: Failure to use a vacuum pump reservoir (1) may allow power steering fluid to be sucked into the hand vacuum pump.
-
Attach Hand Vacuum Pump (2), Special Tool C-4207-A or equivalent, with reservoir (1) attached, to the Power Steering Cap Adapter (4).
CAUTION: Do not run the vehicle while vacuum is applied to the power steering system. Damage to the power steering pump can occur.
NOTE: When performing the following step make sure the vacuum level is maintained during the entire time period.
- Using Hand Vacuum Pump (2), apply 68-85 kPa (20-25 in. Hg) of vacuum to the system for a minimum of three minutes.
- Slowly release the vacuum and remove the special tools.
-
Adjust the fluid level as necessary. Refer to Step #1.
- Repeat Step #1 through Step #7 until the fluid no longer drops when vacuum is applied.
-
Start the engine and cycle the steering wheel lock-to-lock three times.
NOTE: Do not hold the steering wheel at the stops.
- Stop the engine and check for leaks at all connections.
-
Check for any signs of air in the reservoir and check the fluid level. If air is present, repeat the procedure as necessary.
SPECIAL TOOLS
SPECIAL TOOLS
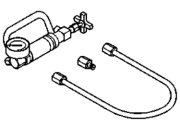 |
6815 - Kit, Power Steering Originally Shipped In Kit Number(s) 6784, 6809, 6898. |
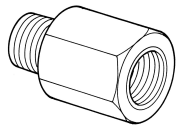 |
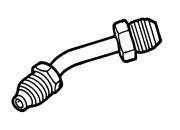
6826 - Adapter, LH P/S Tester Originally Shipped In Kit Number(s) 6893A, 6894, 6895, 6897, 6898. |
 |
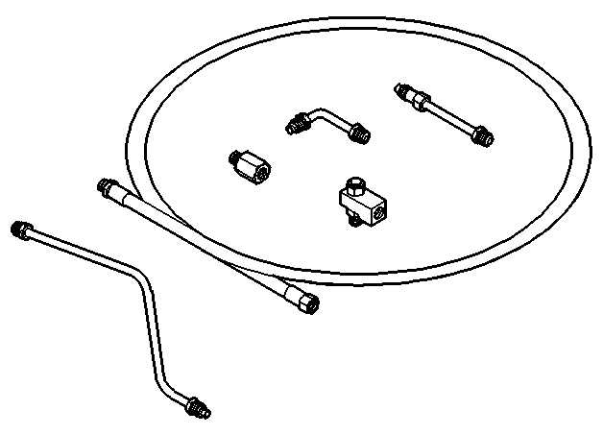
6844 - Adapter, Power Steering (Truck) Originally Shipped In Kit Number(s) 6896. |
 |
6893A - Kit, Power Steering Originally Shipped In Kit Number(s) 6896. |
 |
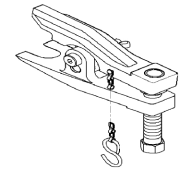
8343 - Wrench Originally Shipped In Kit Number(s) 8283, 8283CC, 8527, 8527CC. |
 |
Primary Tool Number/Name - 9360 - Remover, Ball Joint Alternate Tool Number/Name - 1871000700 - Extractor Originally Shipped In Kit Number(s) 9329, 9515, 9516, 9516-CAN, 9517, 9517-CAN, 9518, 9519, 9540, 9541. |
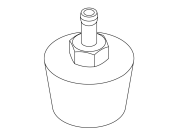 |
9688A - Cap Adapter, Power Steering Pump Originally Shipped In Kit Number(s) 10075A-DOD, 10075-CHRYSLER, 10075-DODGE. |
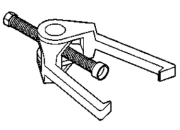 |
C-3894-A - Puller, Tie Rod Originally Shipped In Kit Number(s) 9202, 9202A-CAN, 9202CC, 9299, 9299CC, 9299CC, 9300A-CAN. |
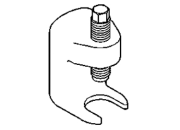 |
C-4150A - Press, Ball Joint Originally Shipped In Kit Number(s) 6672, 6745. |
 |
C-4207-A - Vacuum Pump, Hand |
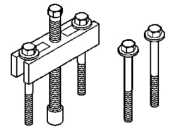 |
L-4407A - Puller, Gear |