Camshaft, Tappet and Shim Removal and Installation
Precautions: General safety (00)
Removal
1)Remove timing chain. 
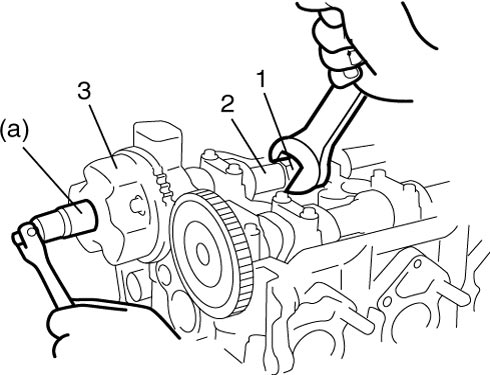
2)With hexagonal section (1) of intake camshaft (2) held stationary with spanner or the like, loosen bolt of VVT actuator (3) and remove it.
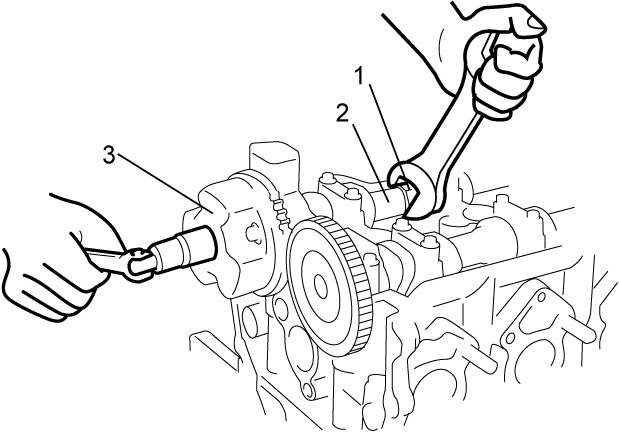

NOTICE:
The VVT actuator will lose its original performance if it has been disassembled and reassembled.
Do not disassemble and repair the VVT actuator. If any faulty condition is found, replace the VVT actuator with a new one.
3)Loosen camshaft housing bolts in numerical order (“1” – “21”) as shown in figure evenly and gradually.
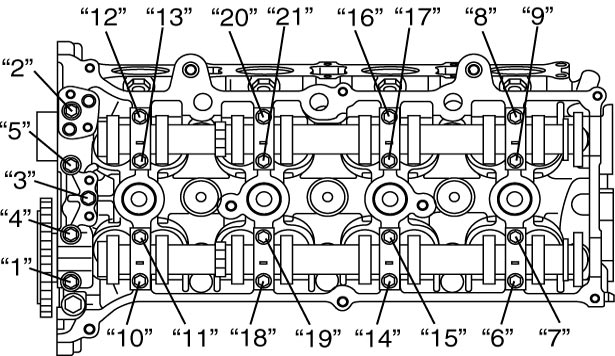
4)Remove camshaft housings.
5)Remove intake and exhaust camshafts.
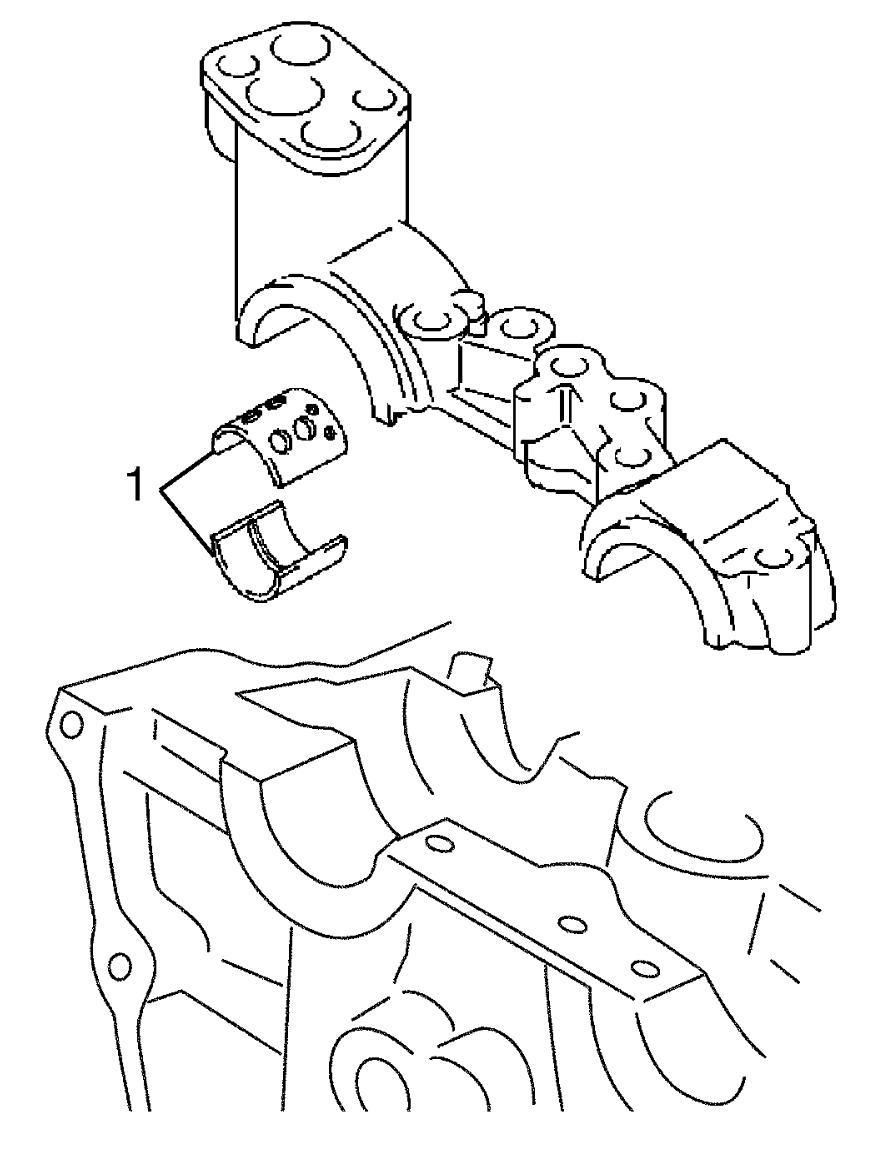
6)Remove camshaft bearings (1).
7)Remove each tappet (2) and shim (1) together.
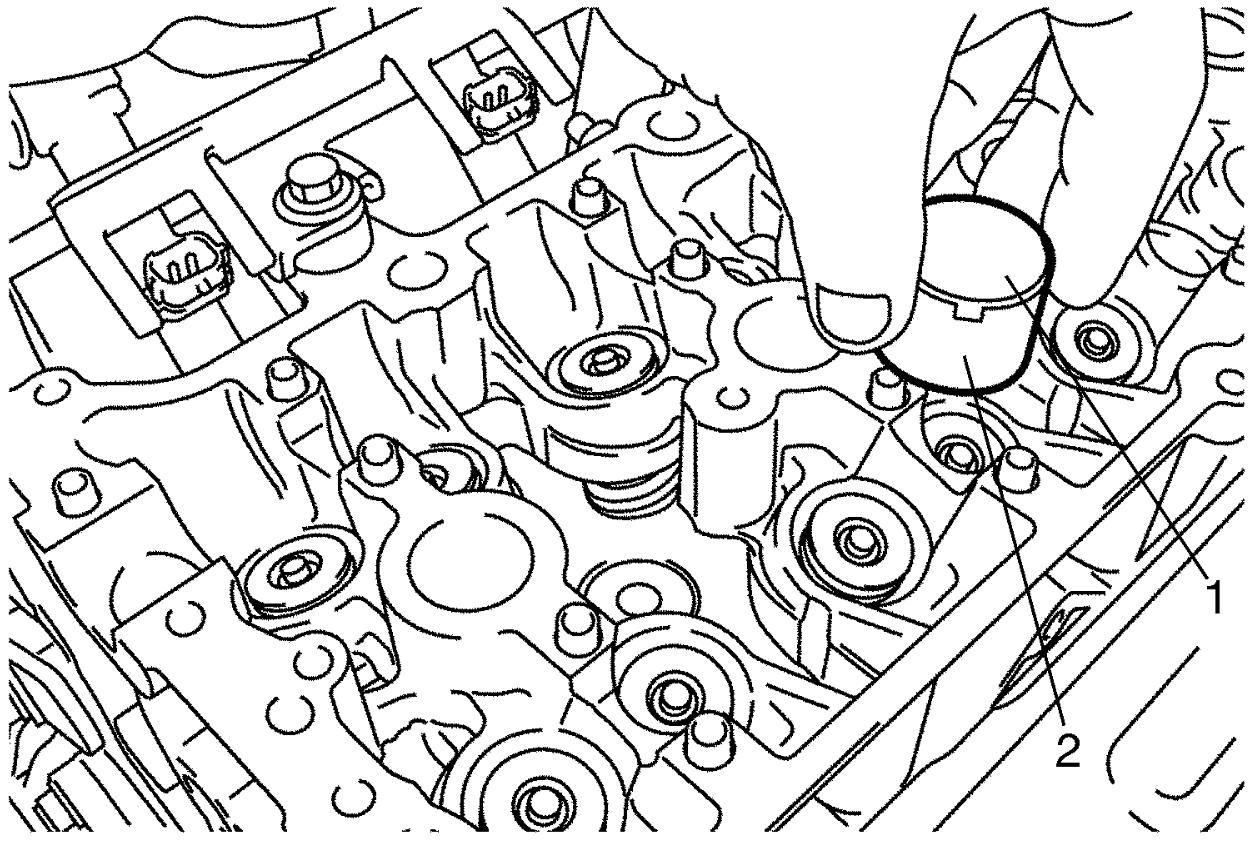
Installation
1)Install tappets and shims to cylinder head.
Apply engine oil around tappet and then install it to cylinder head.
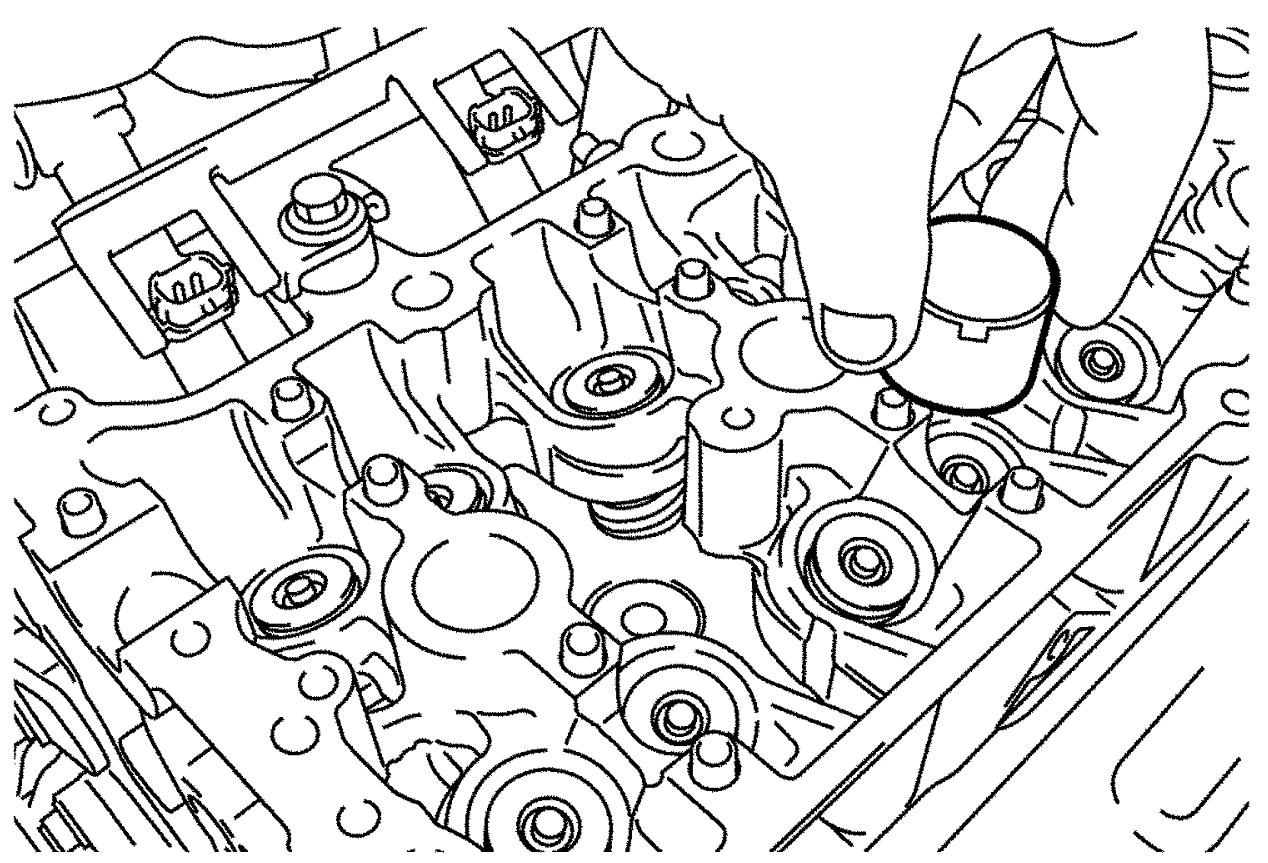
Apply engine oil around tappet and then install it to cylinder head.
2)Install camshaft bearings (1) to cylinder head (2) and camshaft housing (3).
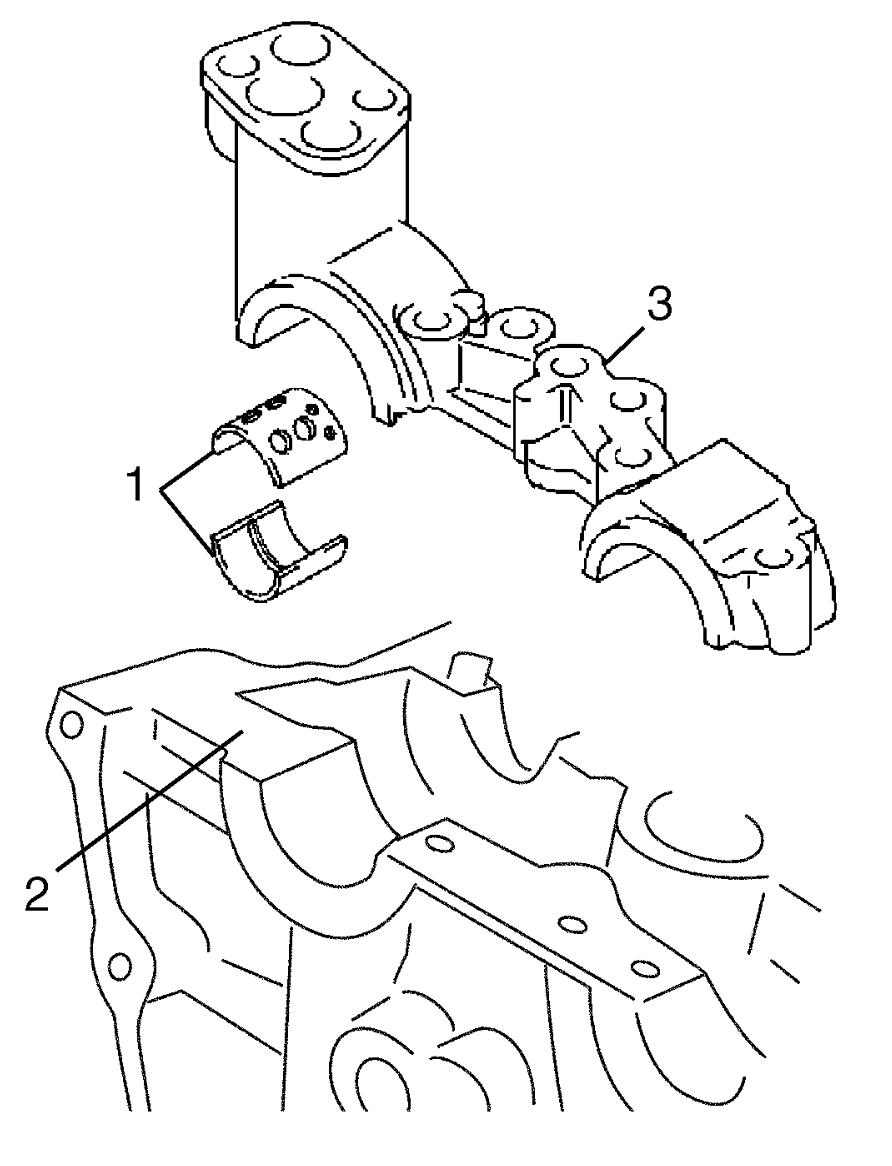
NOTICE:
If oil is present between the bearing’s outside surface and the camshaft housing / cylinder head surface, the bearing could heat up to very high temperature, resulting in seizure.
Thoroughly wipe off any trace of oil that is present between the bearing’s outside surface and the camshaft housing / cylinder head surface.
3)Install intake camshaft (1) and exhaust camshaft (2).
Align knock pin (3) and matchmark (4) with notches (5) as shown in figure.
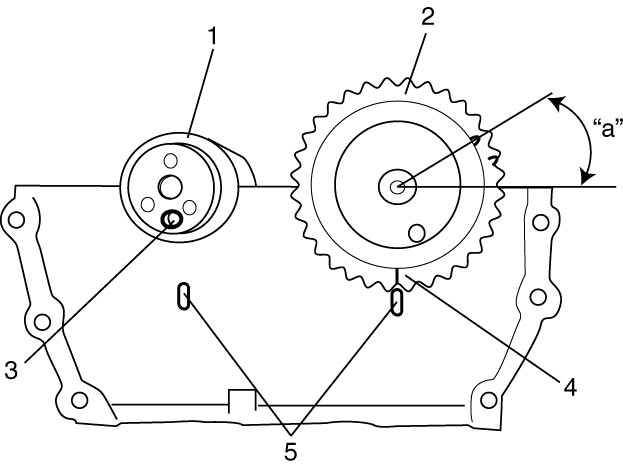
Align knock pin (3) and matchmark (4) with notches (5) as shown in figure.
NOTE:
Before installing camshafts, turn crankshaft until key faces upward.
| “a”: | Approx. 30° |
4)Apply engine oil to sliding surface of each camshaft and camshaft journal, and then install them as shown in figure.
5)Install camshaft housing pins (1).
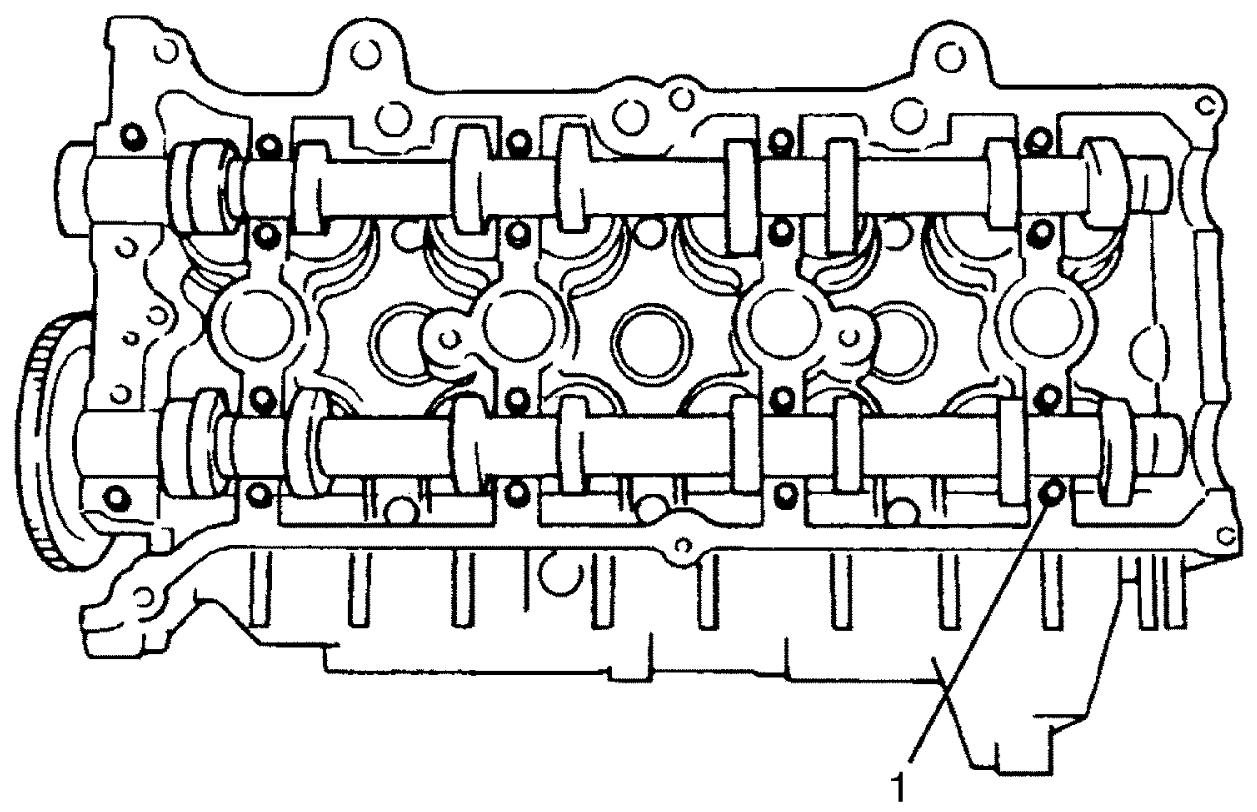
6)Check position of camshaft housings.
Embossed marks are provided on each camshaft housing, indicating position and direction for installation. Install housings as indicated by these marks.
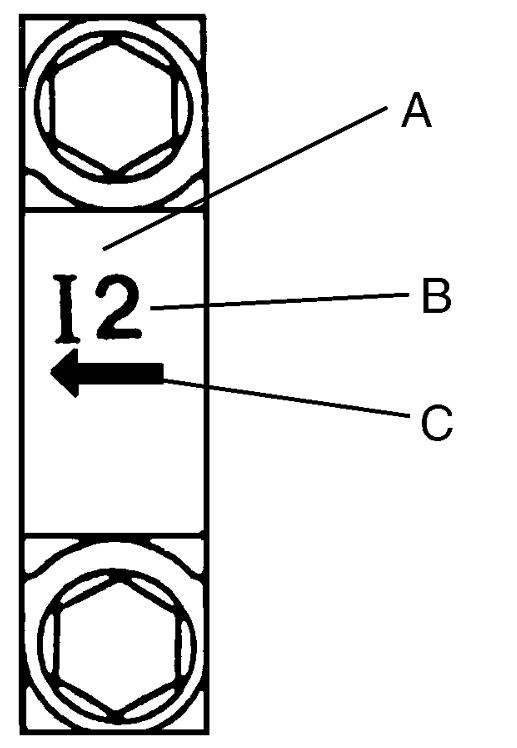
Embossed marks are provided on each camshaft housing, indicating position and direction for installation. Install housings as indicated by these marks.
| A: | I: Intake side or E: Exhaust side |
| B: | Position from timing chain side |
| C: | Pointing to timing chain side |
7)Install camshaft housings.
8)Tighten camshaft housing bolts as follows.
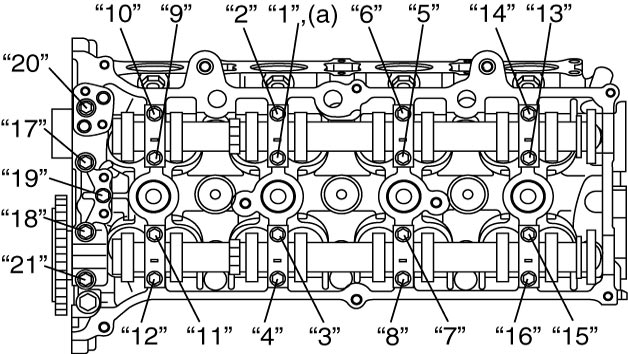
a)Tighten camshaft housing bolts by hand.
b)Tighten camshaft housing bolts to 5.0 N·m (0.51 kgf-m, 4.0 lbf-ft) in numerical order (“1” – “21”) as shown in figure.
c)Retighten them to 11 N·m (1.1 kgf-m, 8.5 lbf-ft) in the same manner as in Step b).
9)With hexagonal section (1) of intake camshaft (2) held stationary with spanner or the like, tighten bolt of VVT actuator (3) to specified torque.
10)Install timing chain.
11)Install timing chain cover.
12)Check valve clearance.
13)Perform Step 10) – 18) of “Installation” of Timing Chain Cover Removal and Installation:M16A.