Timing Chain and Chain Tensioner Removal and Installation
Precautions: General safety (00)
Removal
NOTICE:
After the timing chain has been removed, independently turning the camshaft or crankshaft beyond the allowable angle ranges shown in figure will cause interference between pistons and valves or between the valves themselves, which will cause damage to these parts.
Avoid turning each of the camshaft or crankshaft alone beyond the angle ranges shown in figure.
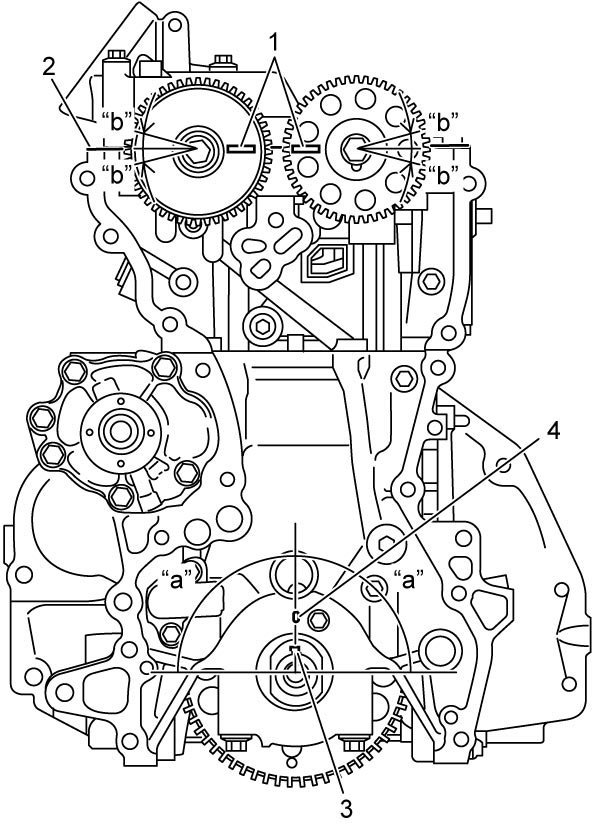
| “a”: | 90° |
| “b”: | 15° |
| 1. | Matchmark on VVT actuator and exhaust camshaft timing sprocket |
| 2. | Top surface on cylinder head |
| 3. | Key |
| 4. | Matchmark on cylinder block |
NOTE:
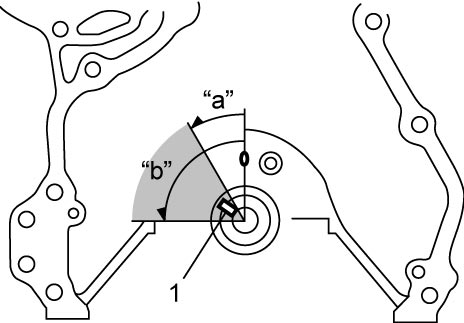

If it is necessary to rotate the camshaft with the timing chain removed, rotate the camshaft after turning crankshaft counterclockwise 30 – 90° as shown in figure.
| “a”: | 30° | 1. | Key |
| “b”: | 90° |
1)Remove timing chain cover. 
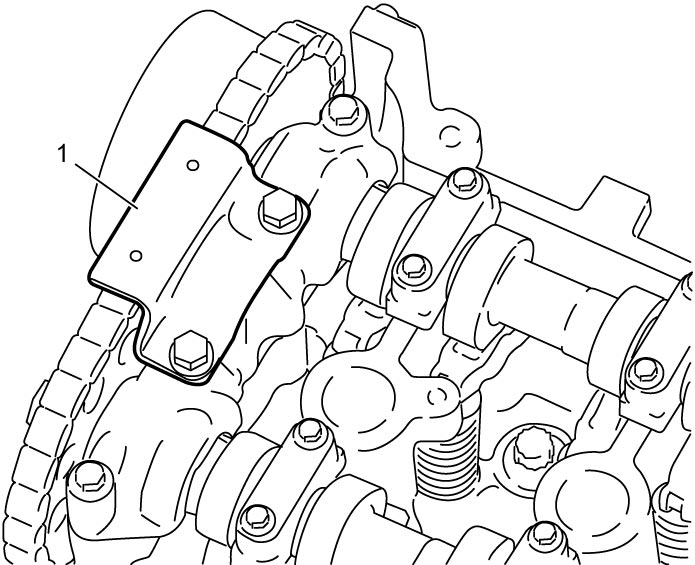
2)Remove timing chain guide No.2 (1).
3)By turning crankshaft, align camshafts and crankshaft at specific position as follows.
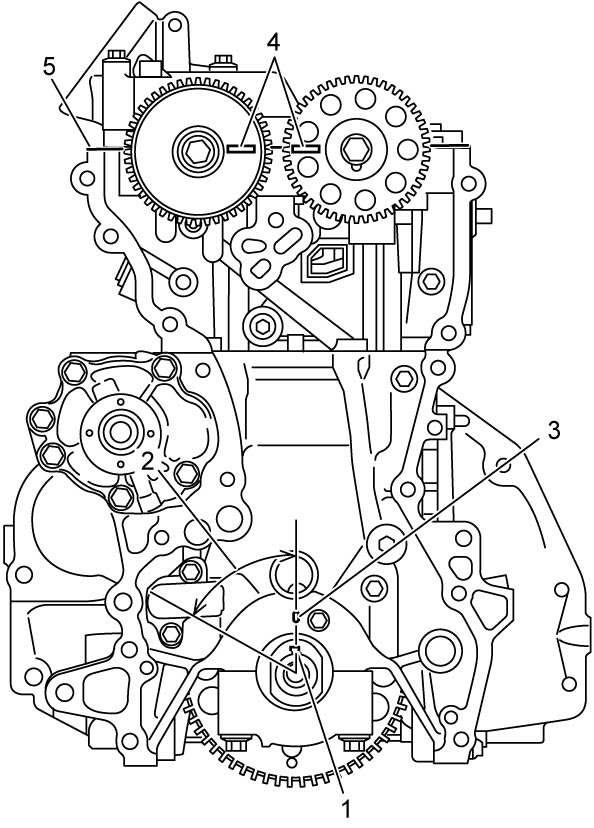
a)Align timing marks (1) on VVT actuator and exhaust camshaft timing sprocket with top surface of cylinder head (2).
b)Check crankshaft sprocket key (3) is aligned with matchmark (4) on cylinder block.
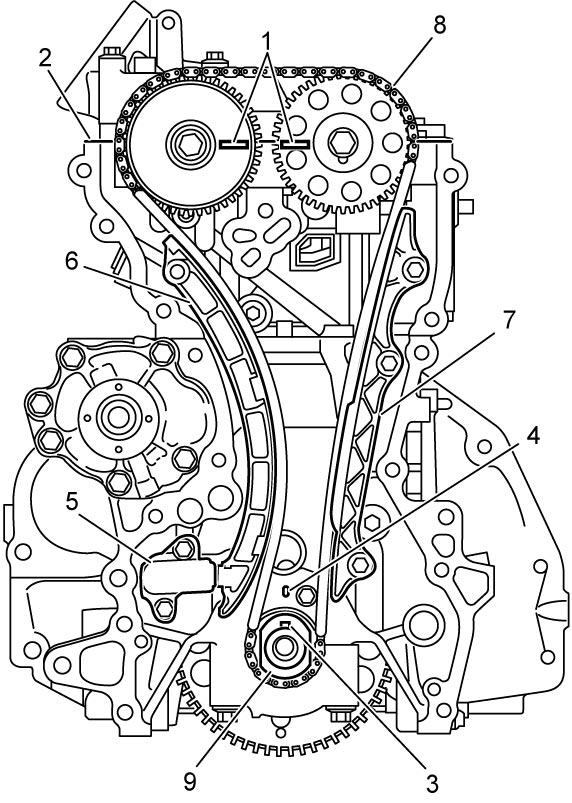
4)Remove timing chain tensioner adjuster (5).
5)Remove timing chain tensioner (6).
6)Remove timing chain guide No.1 (7).
7)Remove timing chain (8), crankshaft timing sprocket (9) and crankshaft sprocket key.
Installation
1)Position crankshaft sprocket key (1) within a 30° – 90° range (2) counterclockwise from matchmark (3) on cylinder block.
2)Align timing marks (4) on VVT actuator and exhaust camshaft timing sprocket with top surface of cylinder head (5).
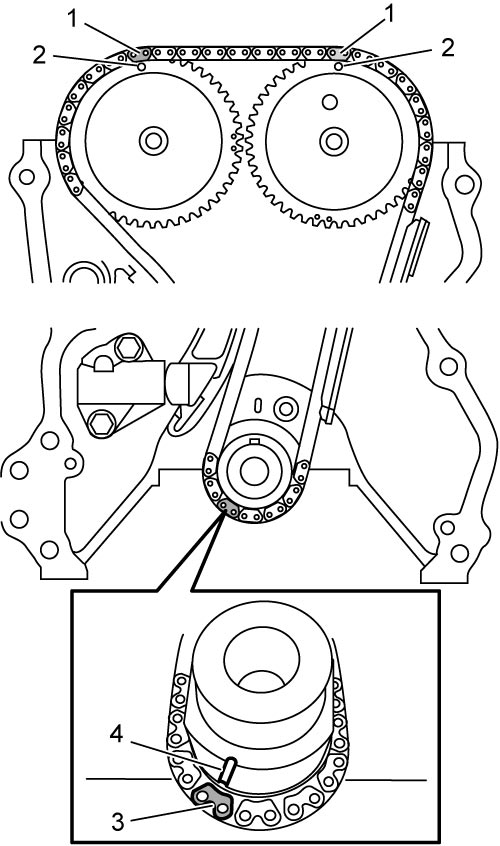
3)Set timing chain while aligning two colored marks (1) of timing chain with timing marks (2) on VVT actuator and exhaust camshaft timing sprocket.
4)Set crankshaft sprocket key and align it with matchmark on cylinder block by turning crankshaft.
5)Install crankshaft timing sprocket.
6)Install timing chain while aligning colored mark (3) of timing chain with groove (4) of crankshaft timing sprocket.
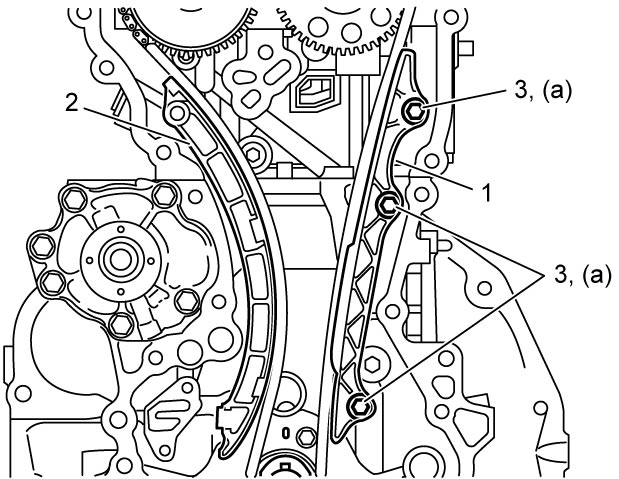
7)Apply engine oil to sliding surface of timing chain guide No.1 (1) and timing chain tensioner (2).
8)Tighten timing chain guide No.1 bolts (3) to specified torque.
9)Install timing chain tensioner.
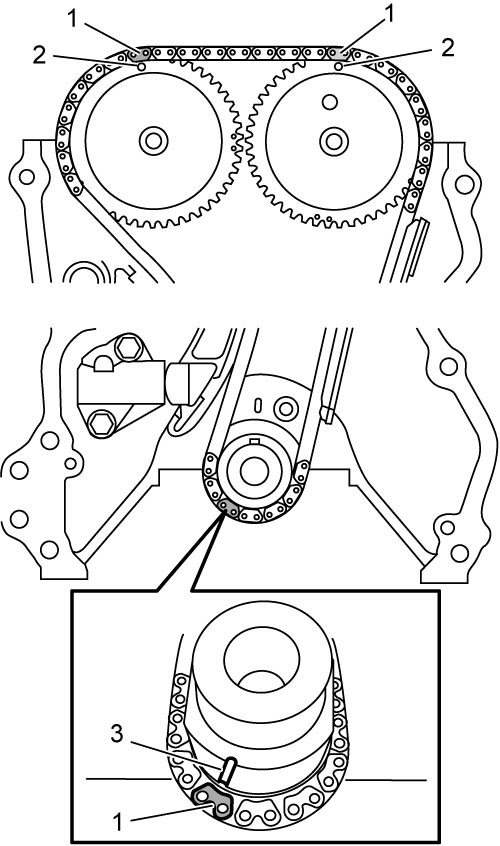
10)Check that all colored marks (1) of timing chain are aligned with timing marks (2) on VVT actuator and exhaust camshaft timing sprocket, and groove (3) of timing sprocket.
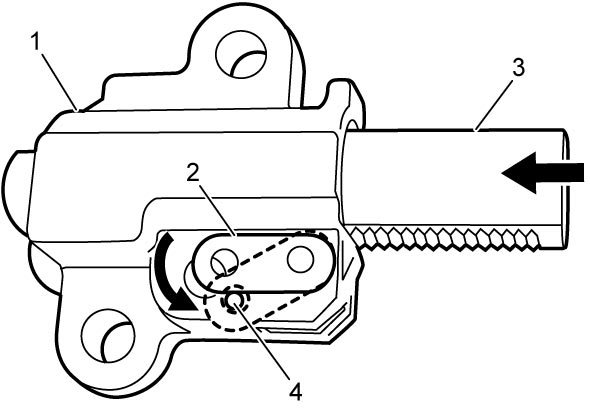
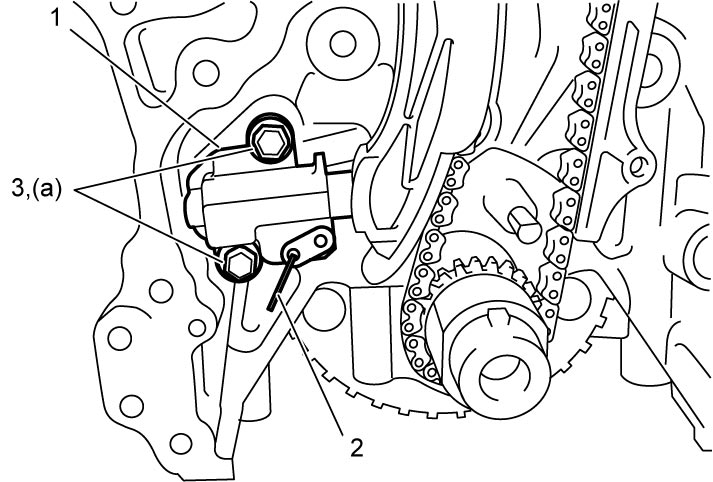
11)Install timing chain tensioner adjuster (1) as follows.
a)Release lock cam moving link plate (2) in arrow direction and push in plunger (3) fully.
b)Insert a retainer (1.4 mm (0.055 in.) diameter wire or the like) to hole (4) and hold plunger in place.
12)Apply engine oil to timing chain, and then turn crankshaft clockwise 720°, and check that the following conditions are satisfied:
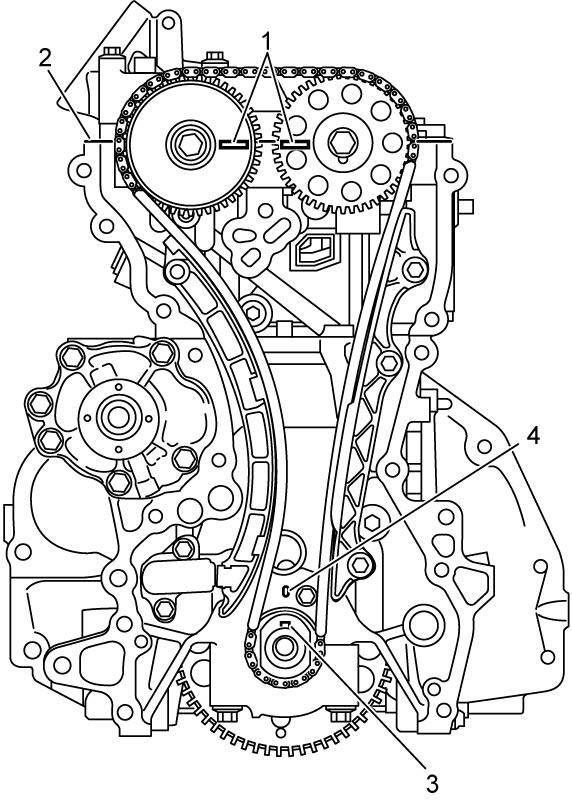
•Timing marks (1) of VVT actuator and exhaust camshaft timing sprocket are aligned with top surface of cylinder head (2).
•Crankshaft sprocket key (3) is aligned with matchmark (4) on cylinder block.
•Crankshaft sprocket key (3) is aligned with matchmark (4) on cylinder block.
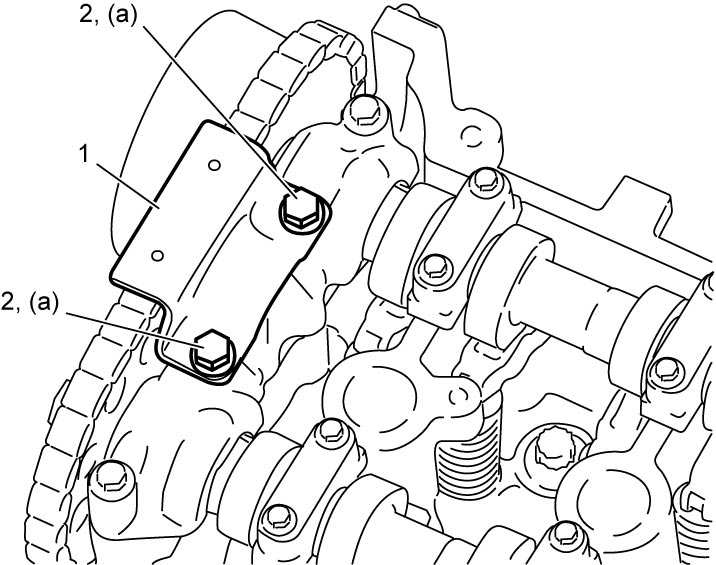
13)Install timing chain guide No.2 (1) and tighten timing chain No.2 guide bolts (2) to specified torque.
14)Install timing chain cover and crankshaft pulley.
15)Install water pump pulley.
16)Install cylinder head cover.
17)Install oil pan.
18)Install engine assembly to vehicle.