Rear Brake Caliper Removal and Installation
Precautions: Precautions for Brakes · General safety (00)
 WARNING:
Remove rear brake flexible hose gasket cannot assure adequate sealing. If the gasket is reused, brake fluid may leak, which could result an accident.
Always use new flexible hose gasket when reinstalling the flexible hose.
NOTICE:
Failure to take proper precautions during rear brake caliper removal may cause damage to the rear brake flexible hose and/or the brake piston.
•Be careful not to twist the rear brake flexible hose during rear brake caliper removal.
•Avoid depressing the brake pedal during the rear brake caliper removal procedure to prevent the brake piston from being forced out of the cylinder.
•Avoid depressing the brake pedal during the rear brake caliper removal procedure to prevent the brake piston from being forced out of the cylinder.
Removal
1)Release parking brake.
2)Loosen parking brake adjusting nut. 
3)Hoist vehicle and remove rear wheel.
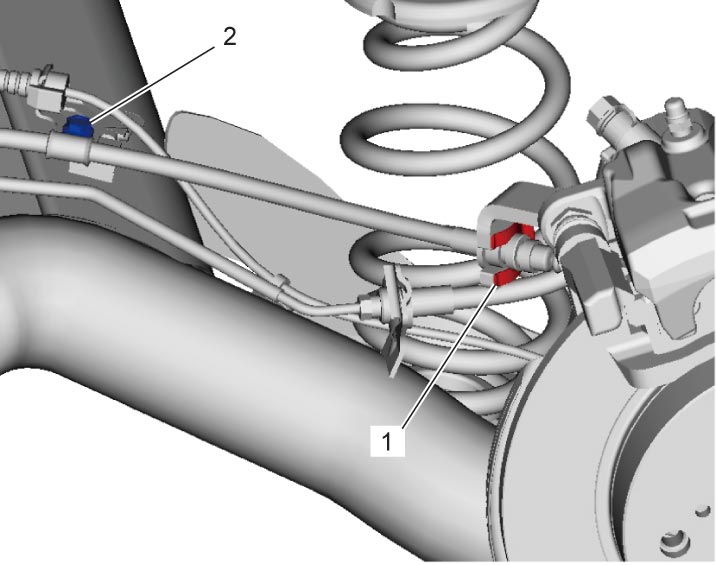
4)Remove E-ring (1) and parking brake cable clamp bolt (2).

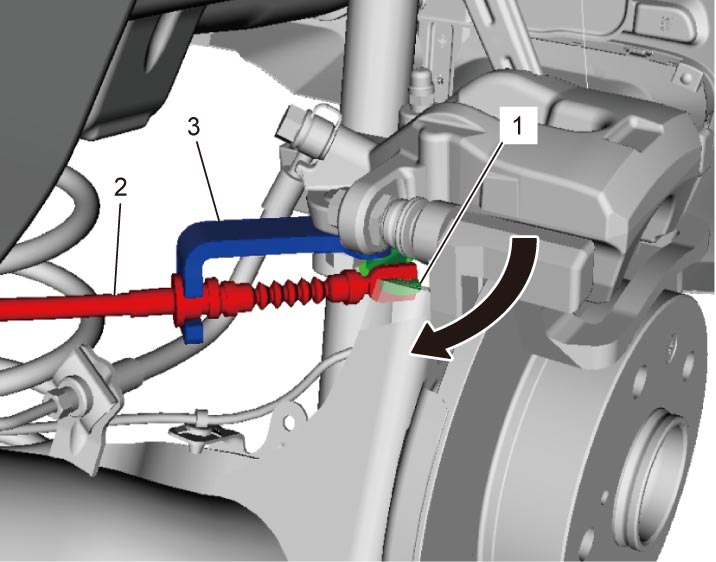
5)Turn lever (1) in arrow direction and remove parking brake cable (2) from lever and bracket (3).
6)Place a container to catch brake fluid from disconnected rear brake flexible hose (3) below rear brake caliper (2).
7)Remove flexible hose joint bolt (1) from rear brake caliper (2).
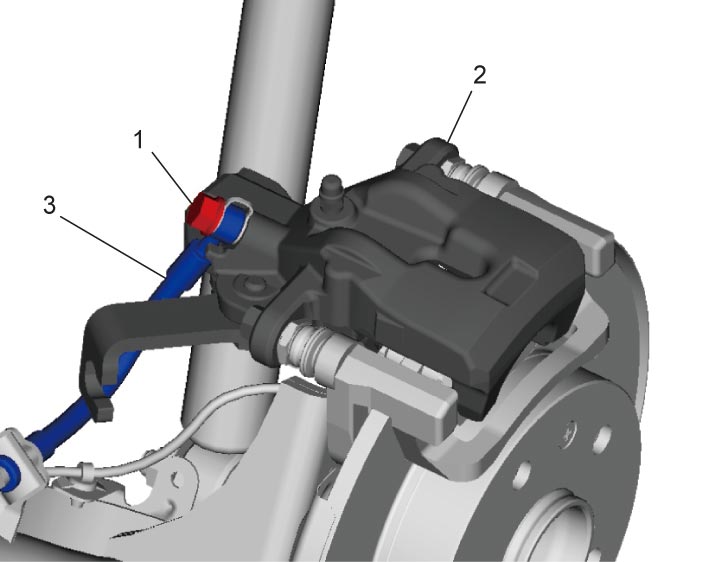
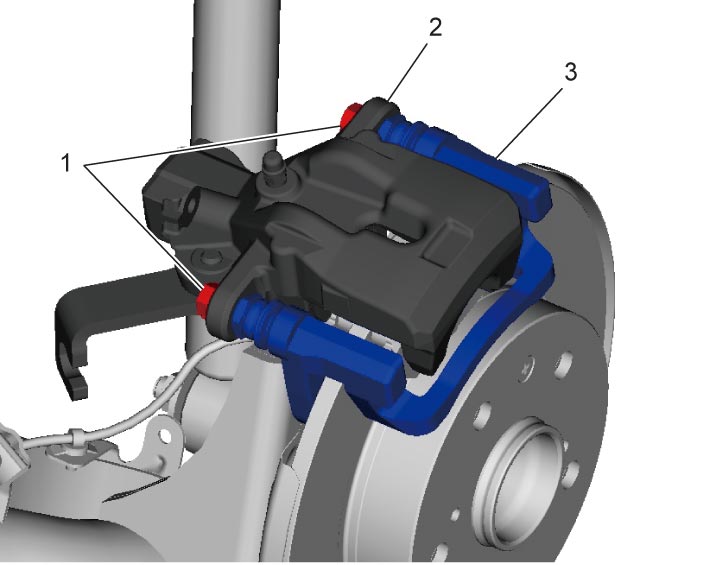
8)Remove rear brake caliper pin bolts (1).
9)Remove rear brake caliper (2) from rear brake caliper carrier (3).
10)Remove rear brake pads.
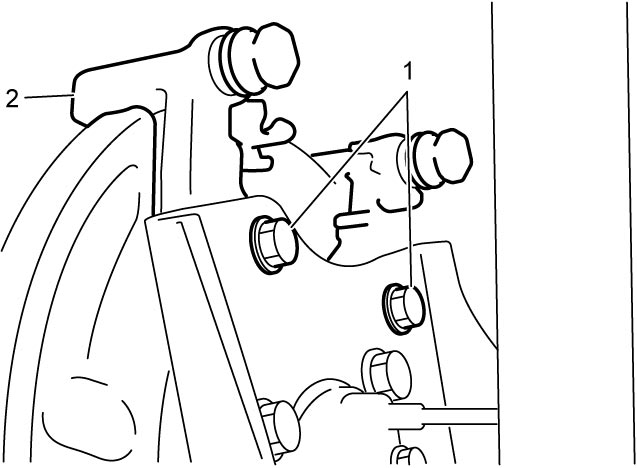
11)Remove rear brake caliper carrier bolts (1) and remove rear brake caliper carrier (2) from rear axle.
Installation
NOTICE:
If the rear brake flexible hose is twisted, the hose will be damaged.
If the rear brake flexible hose is twisted, reinstall rear brake caliper being careful not to let rear brake flexible hose get twisted.
1)Install rear brake caliper carrier (1) to rear axle and tighten rear brake caliper carrier bolts to specified torque.
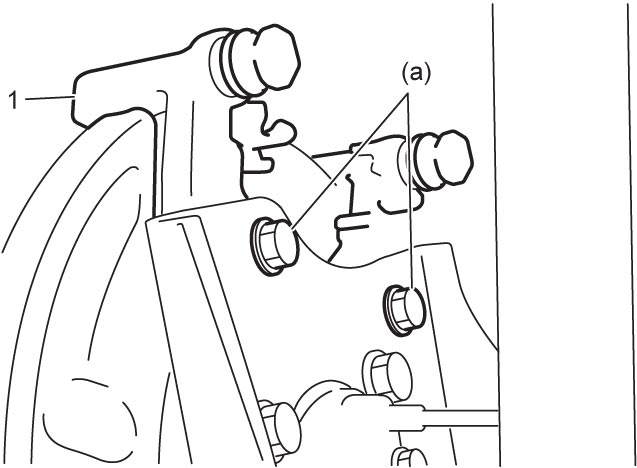
2)Install rear brake pads.
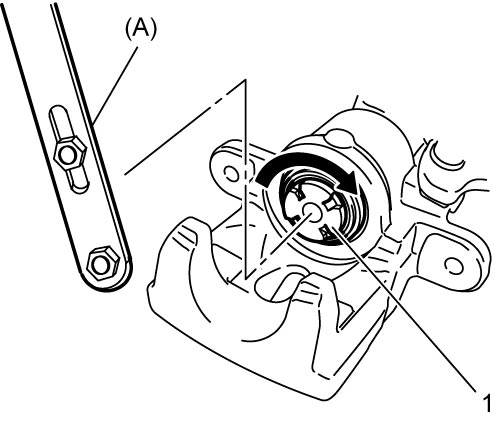
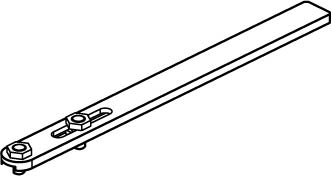
3)Turn piston (1) in arrow direction by quarter to half turn using special tool to screw piston into caliper cylinder.
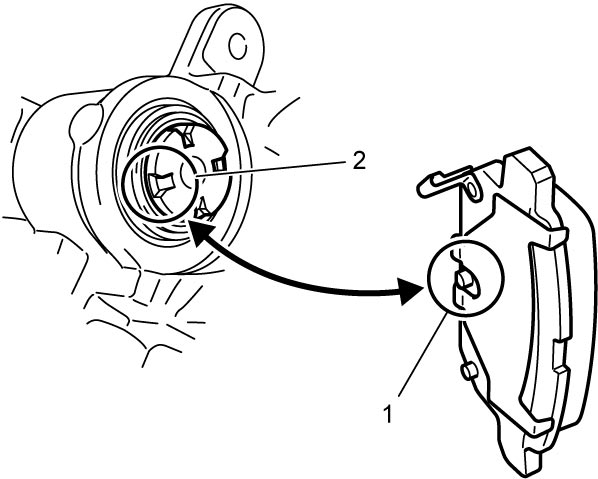
4)Install rear brake caliper while aligning slot (2) of piston with protrusion (1) at back of inner brake pad.
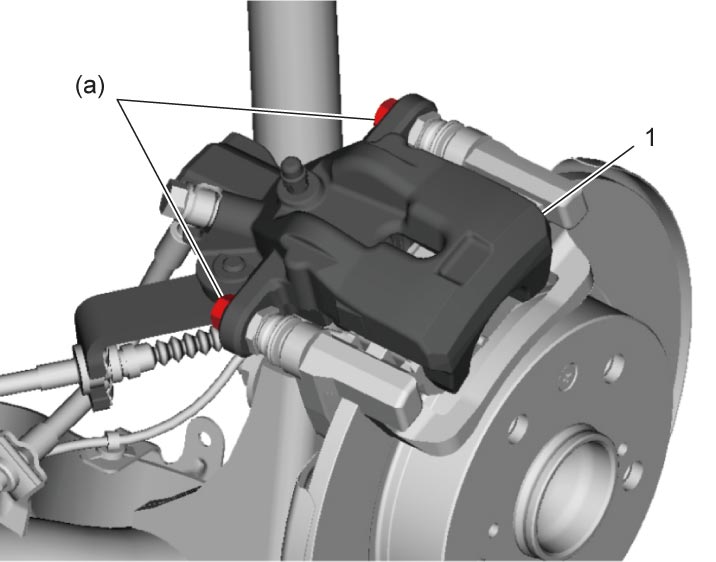
5)Install caliper (1) to rear brake caliper carrier and tighten rear brake caliper pin bolts to specified torque.
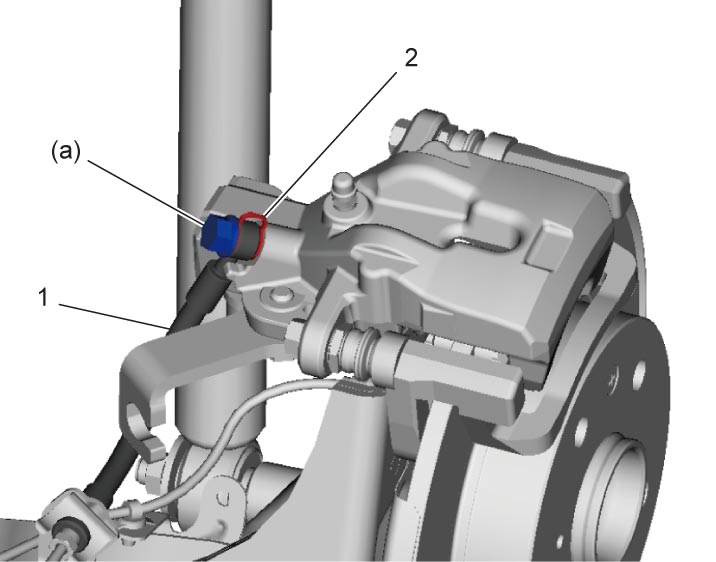
6)Install rear brake flexible hose (1) to rear brake caliper with new flexible hose gasket (2) and tighten flexible hose joint bolt to specified torque.
7)Pass parking brake cable through bracket.
8)Align positions of parking brake cable (2) and bracket (3). Turn lever (1) in arrow direction and install cable (2) to lever (1).
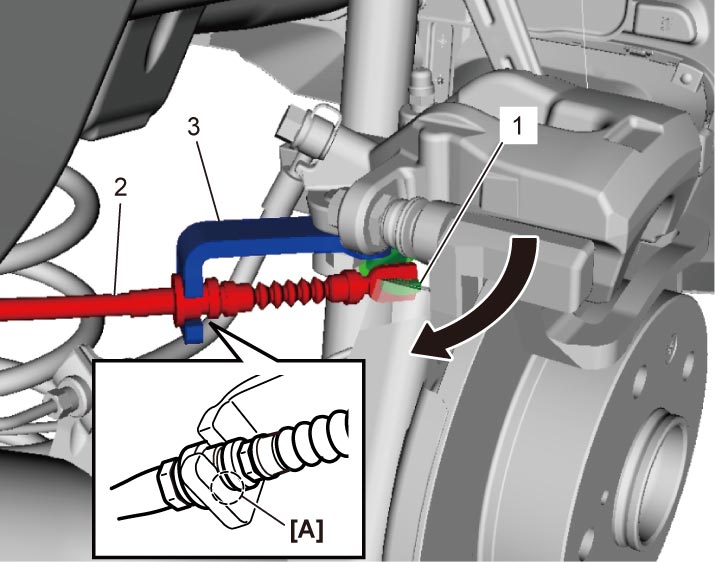
| [A]: | Positioning part |
9)Install E-ring (1) to hold parking brake cable (2) and then tighten parking brake cable clamp bolt to specified torque.
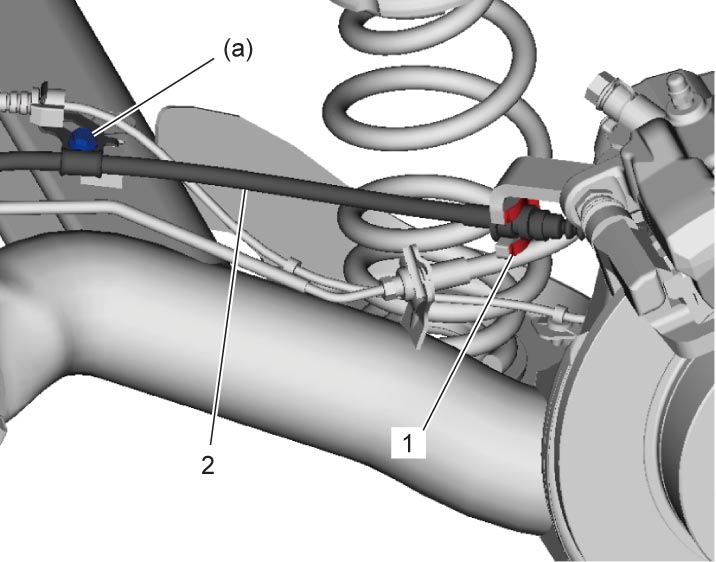
NOTICE:
Tightening parking brake cable clamp bolt before installing E-ring may cause brake dragging.
Tighten parking brake cable clamp bolt after installing E-ring.
10)Fill reservoir with brake fluid and bleed brake system.
11)Check that there is no leakage of brake fluid.
12)Depress brake pedal three times or more with engine running to activate pad clearance adjustment mechanism so that clearance between rear brake disc and brake pads will become appropriate.
13)Adjust parking brake cable.
14)Check that brakes are not dragging and that appropriate braking force can be obtained.
15)Install rear wheel and check that parking brake produces proper braking force.