Key Interlock Cable Removal and Installation (Ignition Switch Model)
Precautions: Precautions for Diagnosing Trouble · Precautions for Disassembly and Reassembly · Precautions for Transmission / Transaxle · General safety (00)
NOTE:
Do not bend interlock cable excessively when removing and installing it, or system will not operate correctly.
Removal
1)Remove steering column lower cover. 
2)Turn ignition switch to “ACC” position.
3)Pull out key interlock cable (1) from key cylinder cover (2) while pressing check hook with a flat-bladed screwdriver or the like (3).
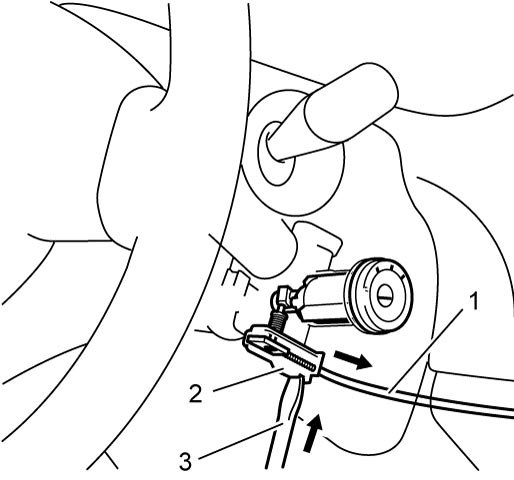

4)Turn ignition switch to “LOCK” position.
5)Remove floor console front cover.
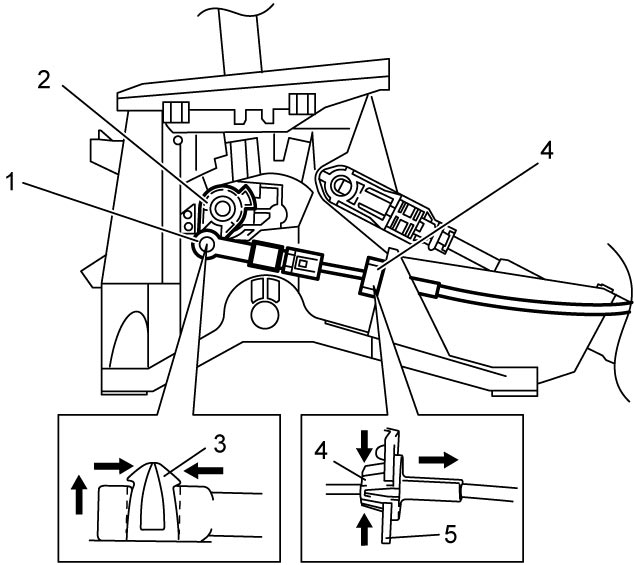
6)Detach cable end (1) from interlock cam (2) while pressing claws (3) of interlock cam boss.
At this time, be careful not to cause damage to its claws.
At this time, be careful not to cause damage to its claws.
7)Detach cable casing cap (4) from selector bracket (5) while pressing check hook.
8)Remove interlock cable.
Installation
1)Lay interlock cable to its original cabling route as shown in figure.
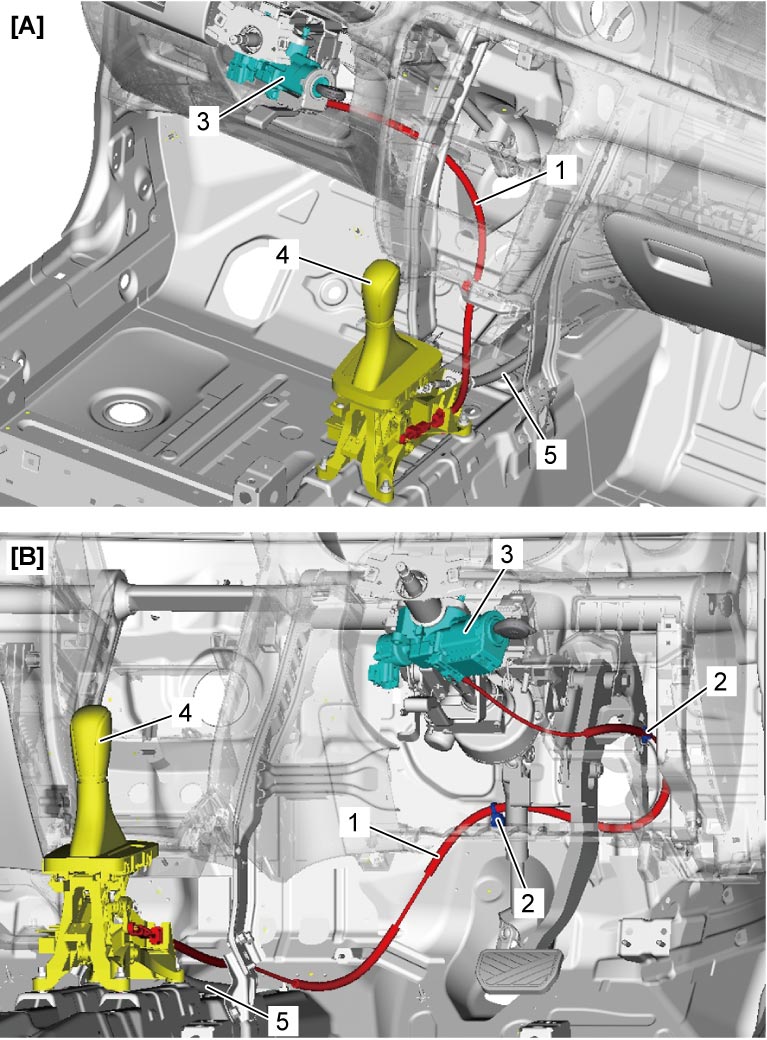
| [A]: | LHD model | 3. | Steering lock assembly |
| [B]: | RHD model | 4. | Select lever assembly |
| 1. | Key interlock cable | 5. | Select cable |
| 2. | Clamp |
2)Turn ignition switch to “ACC” position.
3)Insert cable casing cap (1) into key cylinder cover (2) securely.
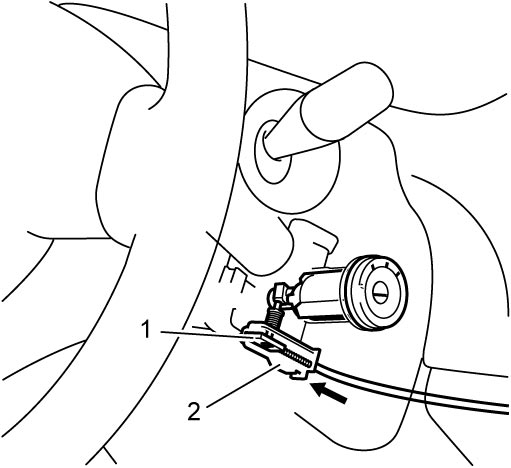
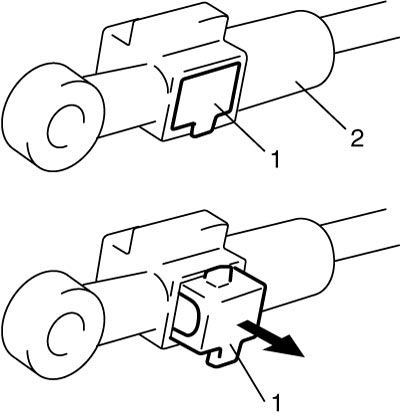
4)Pull out lock button (1) of selector side cable end (2).
5)Shift select lever to N range.
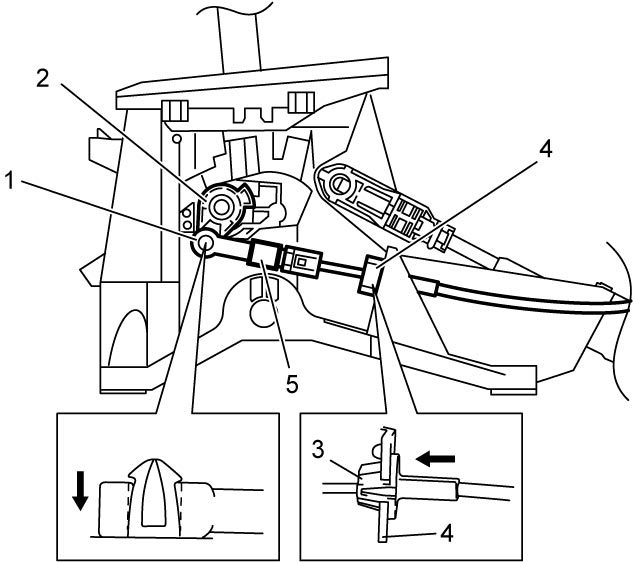
6)Install cable casing cap (3) to selector bracket (4).
7)Connect cable end (1) to interlock cam (2) with ignition switch turned to “ACC” position.
8)Drive lock button (5) in cable end until it locks cable expansion and contraction.
9)Check key interlock cable.
10)Install floor console front cover.
11)Install steering column lower cover.