Front Door Lock Assembly Removal and Installation
Precautions: Precautions for Diagnosing Trouble · Precautions for Replacing Ignition Key (Ignition Switch Model) · Precautions for Transmitter Disposal (Ignition Switch Model) · Precautions for Replacing Keyless Entry Control Module (Ignition Switch Model) · Precautions for Body, Cab and Accessories · General safety (00)
Removal
1)Remove door trim and sealing cover referring to Step 1) – 7) of Front Door Glass Removal and Installation.
NOTE:
Perform this work with front window fully closed.
2)Remove front door rear sash.
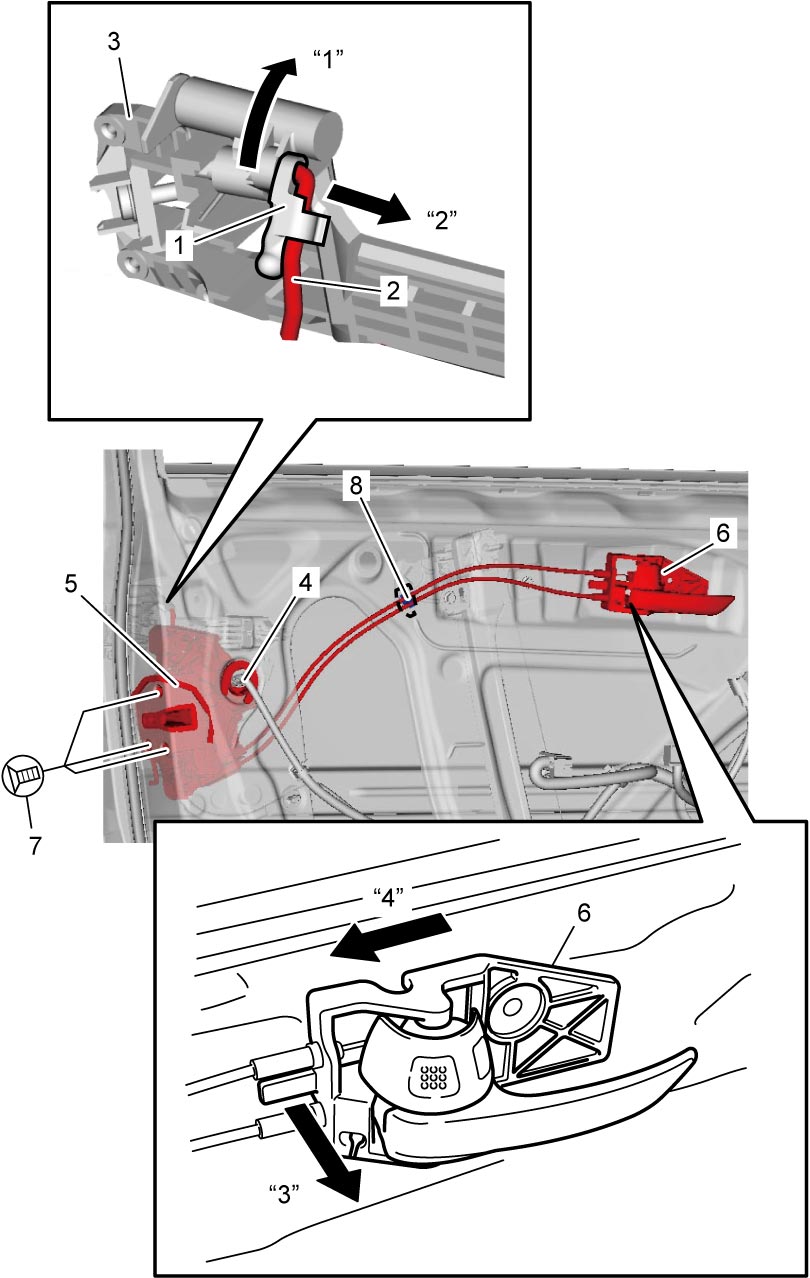
3)Remove lock (1) in arrow direction “1” and then move door lock open rod (2) in arrow direction “2” to remove it from outside door handle (3).
4)Disconnect door lock connector (4) from front door lock assembly (5).
5)Remove door lock screws (7).
6)Remove inside door handle (6) by moving it in arrow directions “3” and “4”.
7)Remove inside door handle wire clip (8).
8)Remove inside door handle and door lock assembly as a unit.

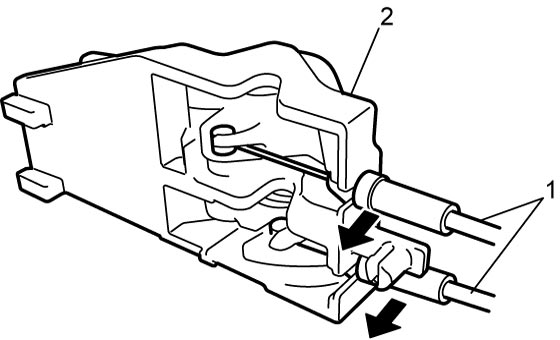
9)Remove door lock wires (1) from inside door handle (2) by pulling them in arrow direction.
Installation
Reverse removal procedure noting the following points.
•Apply grease to sliding parts and rotation parts of door lock assembly.
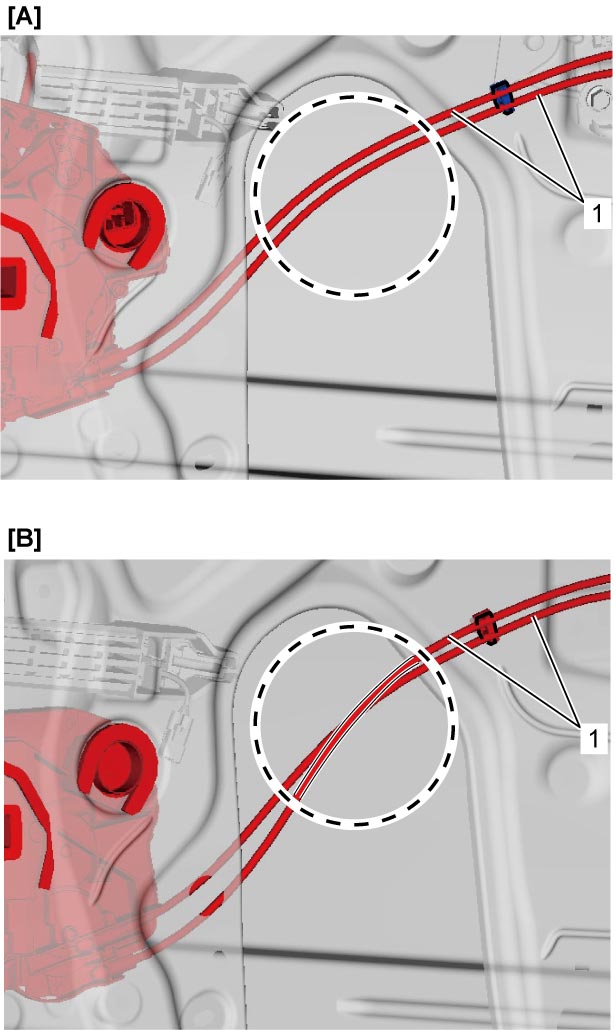
•Install door lock wires (1) as shown in figure.
•Tighten each screw to specified torque referring to Front Door Lock Components.
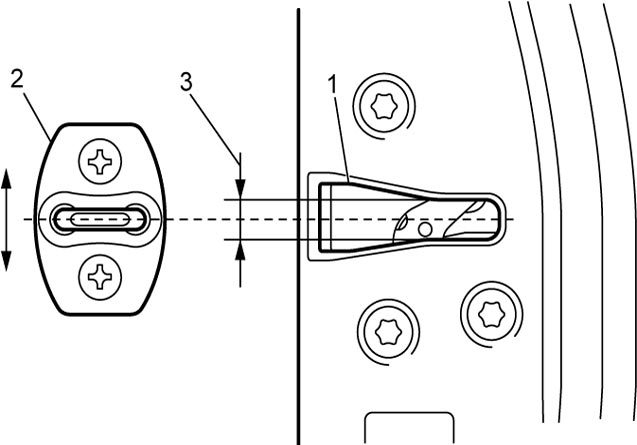
•Move door latch striker (2) up or down to align its center with the center of groove (3) on door lock assembly (1) as shown in figure.
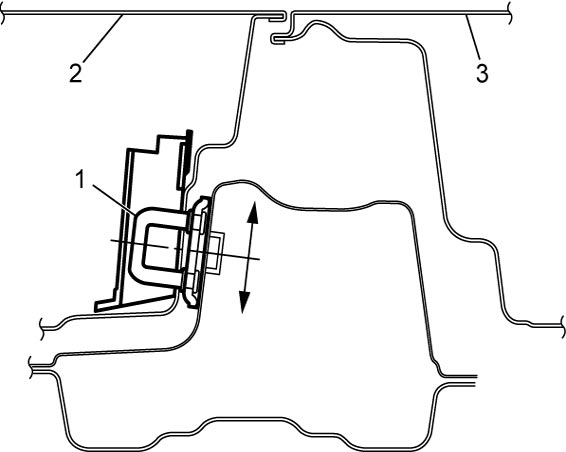
 •Move door latch striker (1) to adjust front door panel surface (2) flat with rear door panel surface (3) as shown in figure.
•Install door lock wires (1) as shown in figure.
| [A]: | Non-deadlock model | [B]: | Deadlock model |
•Move door latch striker (2) up or down to align its center with the center of groove (3) on door lock assembly (1) as shown in figure.