AUDIO / VIDEO RADIO ANTENNA INSTALLATION
CAUTION / NOTICE / HINT
- HINT:
-
A bolt without a torque specification is shown in the standard bolt chart (See page General>SPECIFICATIONS>STANDARD BOLT>SPECIFIED TORQUE FOR STANDARD BOLTS).
PROCEDURE

 86392
1.INSTALL ANTENNA ORNAMENT
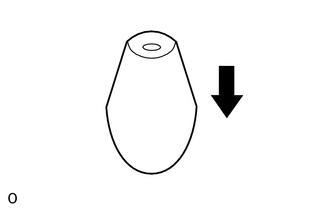
Install the antenna ornament as shown in the illustration.
86300
2.INSTALL FENDER ANTENNA ASSEMBLY
Install the grommet and attach the radio antenna to the 2 clamps.
Connect the connector.
Insert the fender antenna into the antenna ornament, and set it on the bracket.
- Torque:
- 7.9 N*m (81 kgf*cm, 70 in.*lbf)
Install the fender antenna with the bolt.
Connect the connector.
55607
3.INSTALL NO. 2 INSTRUMENT PANEL UNDER COVER SUB-ASSEMBLY
62111C
4.INSTALL COWL SIDE TRIM BOARD RH
67910
5.INSTALL DOOR SCUFF PLATE ASSEMBLY RH
53875A
6.INSTALL FRONT FENDER LINER RH (for Standard)
Attach 13 new grommets.
Install the 5 screws.
75601A
7.INSTALL FRONT FENDER MOULDING SUB-ASSEMBLY RH (for Standard)
76621D
8.INSTALL FRONT FENDER MUDGUARD RH (for Standard)
53875A
9.INSTALL FRONT FENDER LINER RH (for X-Runner)
Attach 13 new grommets.
Install the 6 screws.
75851
10.INSTALL ROCKER PANEL MOULDING RH (for X-Runner)
75601A
11.INSTALL FRONT FENDER MOULDING SUB-ASSEMBLY RH (for X-Runner)
76621D
12.INSTALL FRONT FENDER MUDGUARD RH (for X-Runner)
13.INSTALL FRONT WHEEL
- Torque:
- 103 N*m (1050 kgf*cm, 76 ft.*lbf)
14.CONNECT CABLE TO NEGATIVE BATTERY TERMINAL
- NOTICE:
-
When disconnecting the cable, some systems need to be initialized after the cable is reconnected (See page General>INTRODUCTION>REPAIR INSTRUCTION>INITIALIZATION).