POWER DISTRIBUTION MAIN BODY ECU REMOVAL
CAUTION / NOTICE / HINT
- HINT:
- ·
Use the same procedure for RHD and LHD vehicles.
·The procedure listed below is for LHD vehicles.
PROCEDURE

 1.DISCONNECT CABLE FROM NEGATIVE BATTERY TERMINAL
- CAUTION:
-
Wait at least 90 seconds after disconnecting the cable from the negative (-) battery terminal to disable the SRS system.
- NOTICE:
-
When disconnecting the cable, some systems need to be initialized after the cable is reconnected (See page General>INTRODUCTION>REPAIR INSTRUCTION>INITIALIZATION).
67920
2.REMOVE DOOR SCUFF PLATE ASSEMBLY LH
62112
3.REMOVE COWL SIDE TRIM BOARD LH
55474C
4.REMOVE NO. 1 INSTRUMENT CLUSTER FINISH PANEL GARNISH
55480D
5.REMOVE LOWER INSTRUMENT PANEL FINISH PANEL ASSEMBLY
6.REMOVE DRIVER SIDE JUNCTION BLOCK ASSEMBLY
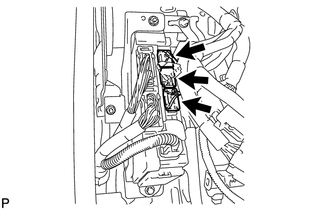
Disconnect the 3 connectors.
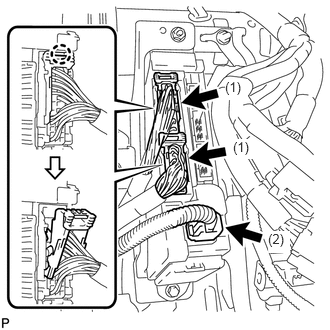
Disconnect the 2 connectors labeled (1) as shown in the illustration.
Disconnect the connector labeled (2).
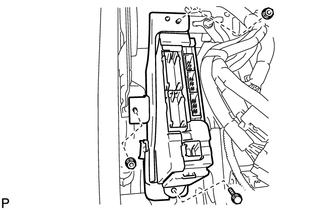
Remove the bolt and 2 nuts and disconnect the driver side junction block assembly.
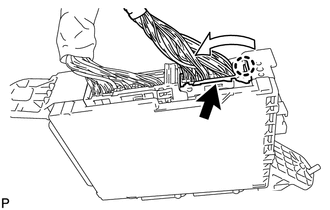
Detach the claw and disconnect the connector as shown in the illustration.
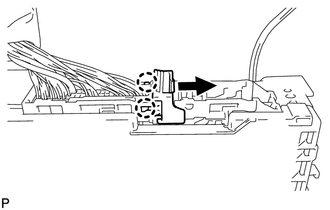
Detach the 2 claws and release the connector's lock as shown in the illustration.
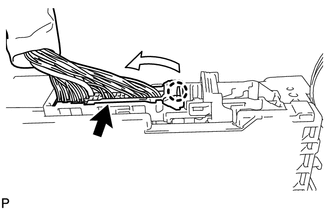
Detach the claw and disconnect the connector as shown in the illustration.
Remove the driver side junction block assembly.
89221
7.REMOVE MULTIPLEX NETWORK BODY ECU
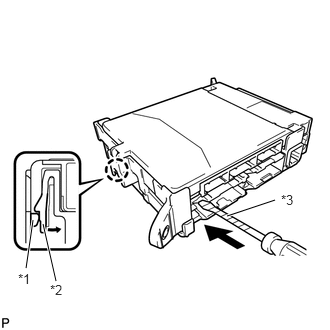
Press the claw of the junction block as shown in the illustration to release the lock.
| *1 | Multiplex Network Body ECU |
| *2 | Driver Side Junction Block |
| *3 | Protective Tape |
With the junction block lock released, insert a screwdriver with its tip wrapped with protective tape horizontally between the multiplex network body ECU and junction block.
- NOTICE:
-
Use a screwdriver with a radius of between 5.0 mm (0.197 in.) and 6.3 mm (0.248 in.) and a length of approximately 90 mm (3.54 in.).
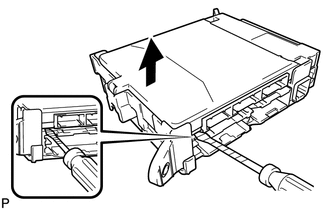
Using the screwdriver, carefully raise the multiplex network body ECU until the connector becomes disengaged.
- NOTICE:
-
Do not twist the screwdriver to raise the multiplex network body ECU.
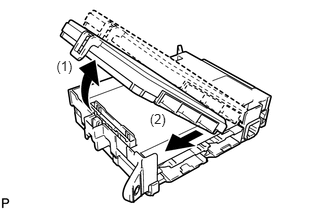
Raise the multiplex network body ECU as shown by arrow (1), and then pull it out as shown by arrow (2) in the illustration.
- NOTICE:
-
Do not touch the ECU connector.