AIR CONDITIONING UNIT > REMOVAL |
| 1. DRAIN ENGINE COOLANT |
Drain engine coolant (Click here).
| 2. RECOVER REFRIGERANT FROM REFRIGERATION SYSTEM |
Start the engine.
Turn the A/C switch on.
Operate the cooler compressor while the engine speed is approximately 1000 rpm for 5 to 6 minutes to circulate the refrigerant and collect the compressor oil remaining in each component into the cooler compressor.
Stop the engine.
Recover the refrigerant from the A/C system using a refrigerant recovery unit.
| 3. DISCONNECT CABLE FROM NEGATIVE BATTERY TERMINAL |
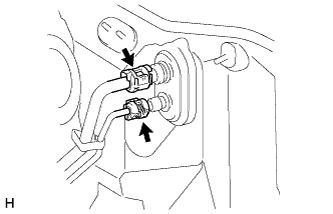
| 4. DISCONNECT AIR CONDITIONING TUBE AND ACCESSORY ASSEMBLY |
|
Using SST, remove the piping clamp.
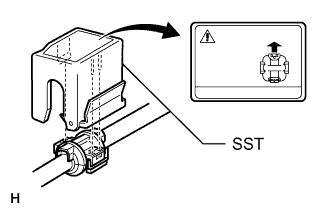 |
Attach SST to the piping clamp.
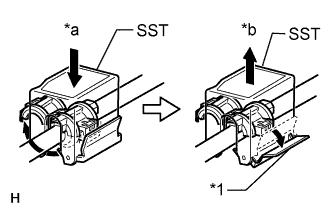 |
Push down SST and release the clamp lock.
| *1 | Release Lever |
| *a | Push |
| *b | Pull |
Pull SST slightly and push the release lever, and then remove the piping clamp with SST.
Remove the piping clamp from SST.
Disconnect the air conditioning tube and accessory assembly.
Remove the grommet.
| 5. DISCONNECT INLET HEATER WATER HOSE AND OUTLET HEATER WATER HOSE |
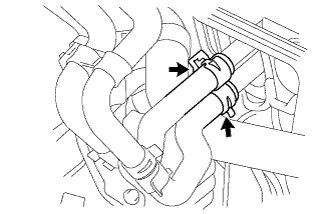 |
Using pliers, grip the claws of the clips and slide the 2 clips.
Disconnect the 2 heater water hoses.
| 6. REMOVE WINDSHIELD WIPER MOTOR ASSEMBLY |
Remove the windshield wiper motor assembly (Click here).
| 7. REMOVE INSTRUMENT PANEL SUB-ASSEMBLY |
Remove the instrument panel (Click here).
| 8. REMOVE STEERING COLUMN ASSEMBLY |
Remove the steering column (Click here).
| 9. REMOVE FRONT SEAT ASSEMBLY LH |
for Manual Seat:
Remove the front seat assembly LH (Click here).
for Power Seat:
Remove the front seat assembly LH (Click here).
| 10. REMOVE FRONT SEAT ASSEMBLY RH |
for Manual Seat:
Remove the front seat assembly RH (Click here).
for Power Seat:
Remove the front seat assembly RH (Click here).
| 11. REMOVE FRONT FLOOR CARPET ASSEMBLY |
| 12. REMOVE REAR NO. 3 AIR DUCT |
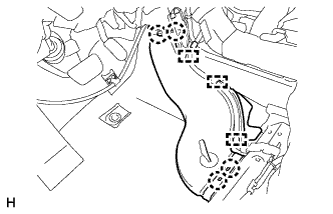 |
Detach the 3 clamps and 4 claws and remove the rear No. 3 air duct.
| 13. REMOVE REAR NO. 1 AIR DUCT |
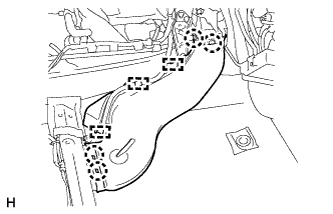 |
Detach the 3 clamps and 4 claws and remove the rear No. 1 air duct.
| 14. REMOVE NO. 1 CONSOLE BOX DUCT |
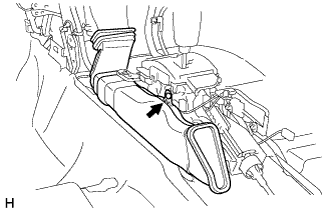 |
Remove the clip and No. 1 console box duct.
| 15. REMOVE NO. 1 INSTRUMENT PANEL BRACE MOUNTING BRACKET LH |
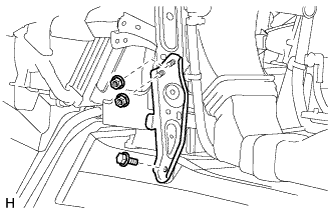 |
Remove the 2 nuts, bolt and instrument panel brace.
| 16. REMOVE NO. 1 INSTRUMENT PANEL BRACE MOUNTING BRACKET RH |
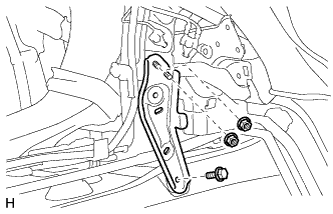 |
Remove the 2 nuts, bolt and instrument panel brace.
| 17. REMOVE NO. 1 AIR DUCT SUB-ASSEMBLY |
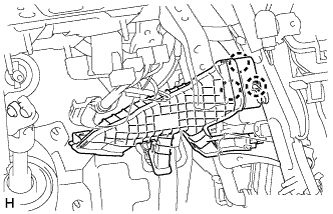 |
Detach the 3 claws and remove the duct.
| 18. REMOVE NO. 2 AIR DUCT SUB-ASSEMBLY |
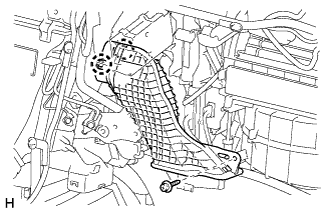 |
Remove the screw.
Detach the 2 claws and remove the air duct.
| 19. REMOVE INSTRUMENT PANEL REINFORCEMENT ASSEMBLY WITH AIR CONDITIONING UNIT ASSEMBLY |
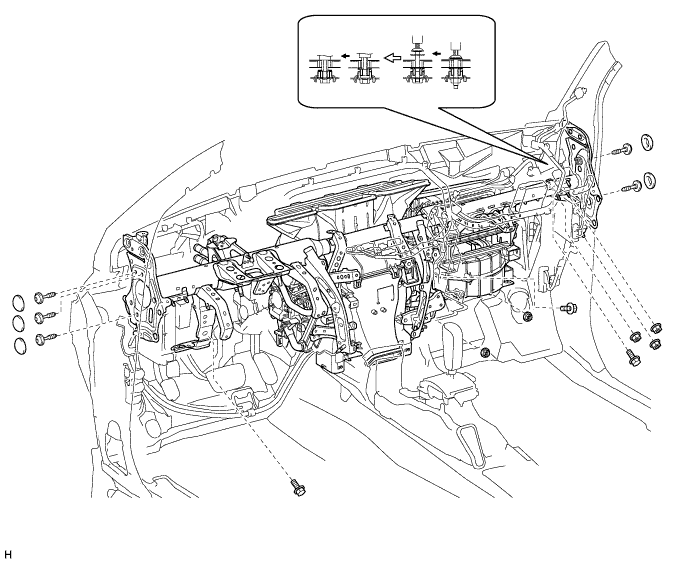
Detach the clamps and disconnect the connectors and wire harness.
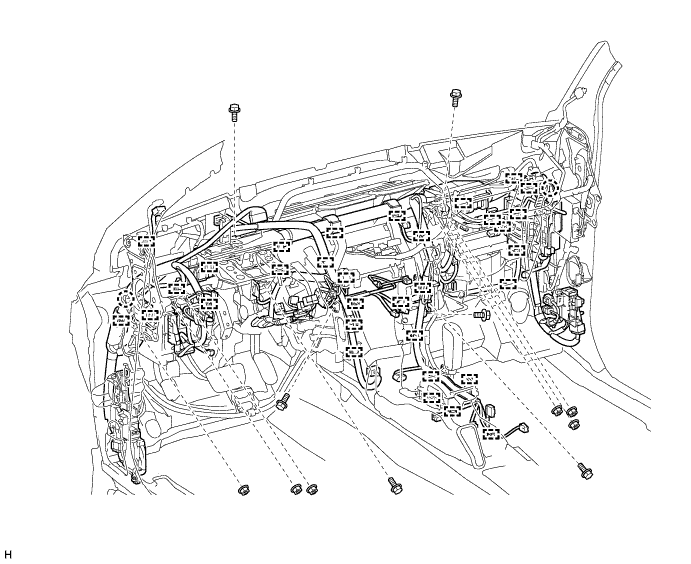
Remove the instrument panel reinforcement assembly with air conditioning unit assembly.
Remove the 5 caps.
Using a T40 "TORX" socket, remove the 5 "TORX" bolts.
Using a 12 mm hexagon wrench, loosen the 2 collars.
Remove the bolts, nuts and instrument panel reinforcement assembly with air conditioning unit assembly.
| 20. REMOVE INSTRUMENT PANEL REINFORCEMENT ASSEMBLY |
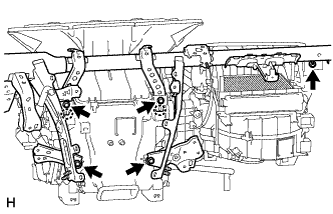 |
Remove the 5 bolts.
Detach the 2 claws and remove the instrument panel reinforcement assembly.