AXLE AND DIFFERENTIAL REAR AXLE CARRIER INSTALLATION
CAUTION / NOTICE / HINT
- HINT:
- ·
Use the same procedure for the RH and LH sides.
·The procedure listed below is for the LH side.
PROCEDURE

 42305
1.INSTALL REAR AXLE CARRIER SUB-ASSEMBLY LH
Using a jack and wooden block, jack up the rear axle carrier sub-assembly LH to replicate the standard vehicle height conditions.
48790
2.TEMPORARILY TIGHTEN REAR UPPER CONTROL ARM ASSEMBLY LH
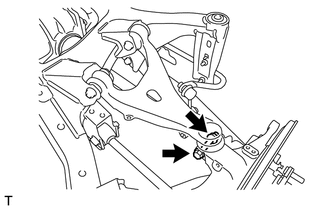
Temporarily tighten the rear upper control arm assembly LH to the rear axle carrier sub-assembly with the bolt and new nut.
48720A
3.TEMPORARILY TIGHTEN REAR NO. 1 SUSPENSION ARM ASSEMBLY LH
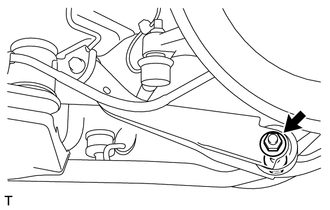
Temporarily tighten the rear No. 1 suspension arm assembly LH to the rear axle carrier sub-assembly with the bolt and new nut.
48740F
4.TEMPORARILY TIGHTEN REAR NO. 2 SUSPENSION ARM ASSEMBLY LH
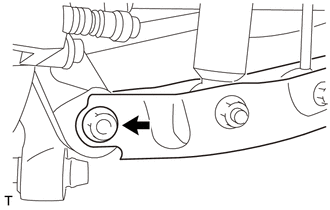
Temporarily tighten the rear No. 2 suspension arm assembly LH to the rear axle carrier sub-assembly with the bolt and new nut.
48706B
5.INSTALL TOE CONTROL LINK SUB-ASSEMBLY LH
Install the nut and the toe control link sub-assembly LH to the rear axle carrier sub-assembly.
- Torque:
- 60 N*m (612 kgf*cm, 44 ft.*lbf)
Install the cotter pin.
48802
6.TEMPORARILY TIGHTEN STABILIZER LINK SUB-ASSEMBLY (for LH Side)
89408C
7.INSTALL REAR HEIGHT CONTROL SENSOR SUB-ASSEMBLY LH (w/ HID Headlight System)
46430
8.REMOVE NO. 3 PARKING BRAKE CABLE ASSEMBLY
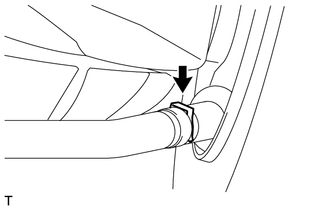
Install the clip and the No. 3 parking brake cable assembly to the parking brake plate sub-assembly.
9.REASSEMBLY PARKING BRAKE ASSEMBLY
10.STABILIZE SUSPENSION
48790
11.FULLY TIGHTEN REAR UPPER CONTROL ARM ASSEMBLY LH
Fully tighten the bolt.
- Torque:
- 80 N*m (816 kgf*cm, 59 ft.*lbf)
- HINT:
-
Hold the bolt and tighten the nut.
48720A
12.REMOVE REAR NO. 1 SUSPENSION ARM ASSEMBLY LH
Fully tighten the bolt.
- Torque:
- 110 N*m (1122 kgf*cm, 81 ft.*lbf)
- HINT:
-
Hold the bolt and tighten the nut.
48740F
13.INSTALL REAR NO. 2 SUSPENSION ARM ASSEMBLY LH
Fully tighten the bolt.
- Torque:
- 80 N*m (816 kgf*cm, 59 ft.*lbf)
- HINT:
-
Hold the bolt and tighten the nut.
42450B
14.INSTALL REAR AXLE HUB AND BEARING ASSEMBLY LH
15.INSPECT AND ADJUST REAR WHEEL ALIGNMENT
16. VSC SENSOR NEUTRAL MEMORIZATION
17. HEIGHT CONTROL SENSOR SIGNAL INITIALIZE (w/ HID Headlight System)
18.ADJUST HID Headlight System (w/ HID Headlight System)