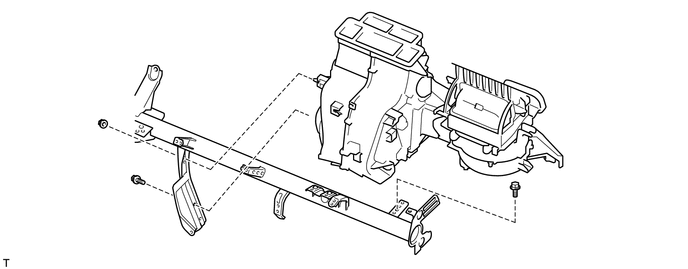
HEATING / AIR CONDITIONING FRONT AIR CONDITIONING UNIT REMOVAL
PROCEDURE

 1. PRECAUTION
- NOTICE:
-
After turning the ignition switch off, waiting time may be required before disconnecting the cable from the battery terminal. Therefore, make sure to read the disconnecting the cable from the battery terminal notice before proceeding with work (See page General>INTRODUCTION>REPAIR INSTRUCTION>PRECAUTION).
2.RECOVER REFRIGERANT FROM REFRIGERATION SYSTEM
3.DISCONNECT CABLE FROM NEGATIVE BATTERY TERMINAL
4.DRAIN ENGINE COOLANT
87245X
5.REMOVE NO. 1 HEATER WATER HOSE (w/ Heater)
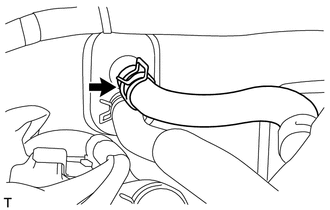
Slide the clip and disconnect the No. 1 heater water hose from the air conditioning unit.
- HINT:
-
Use the same procedure for the RHD and LHD vehicle.
87246X
6.REMOVE NO. 2 HEATER WATER HOSE (w/ Heater)
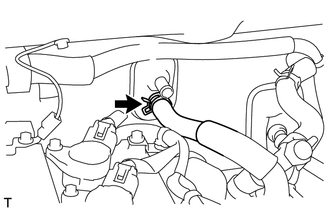
Slide the clip and disconnect the No. 2 heater water hose from the air conditioning unit.
- HINT:
-
Use the same procedure for the RHD and LHD vehicle.
88717U
7.SEPARATE SUCTION TUBE SUB-ASSEMBLY (for RHD)
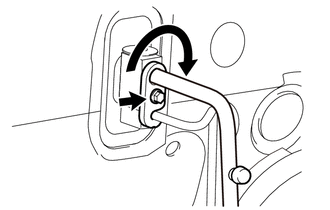
Remove the bolt.
Turn the hook connector clockwise and disconnect the suction tube sub-assembly.
Remove the O-ring from the suction tube sub-assembly.
- NOTICE:
-
Seal the openings of the disconnected parts using vinyl tape to prevent the entry of moisture and foreign matter.
88717U
8.SEPARATE SUCTION TUBE SUB-ASSEMBLY (for LHD)
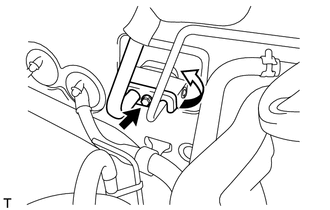
Remove the bolt.
Turn the hook connector counterclockwise and disconnect the suction tube sub-assembly.
Remove the O-ring from the suction tube sub-assembly.
- NOTICE:
-
Seal the openings of the disconnected parts using vinyl tape to prevent the entry of moisture and foreign matter.
88716A
9.SEPARATE LIQUID TUBE SUB-ASSEMBLY (for RHD)
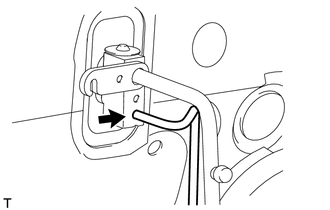
Disconnect the liquid tube sub-assembly.
Remove the O-ring from the liquid tube sub-assembly.
- NOTICE:
-
Seal the opening of the disconnected parts using vinyl tape to prevent the entry of moisture and foreign matter.
88716A
10.SEPARATE LIQUID TUBE SUB-ASSEMBLY (for LHD)
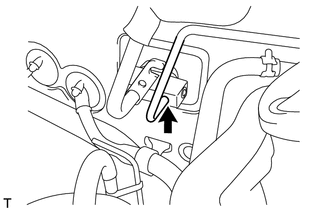
Disconnect the liquid tube sub-assembly.
Remove the O-ring from the liquid tube sub-assembly.
- NOTICE:
-
Seal the opening of the disconnected parts using vinyl tape to prevent the entry of moisture and foreign matter.
11.REMOVE FRONT SEAT ASSEMBLY
55302A
12.REMOVE UPPER INSTRUMENT PANEL SUB-ASSEMBLY
55303B
13.REMOVE LOWER INSTRUMENT PANEL SUB-ASSEMBLY
45250
14.REMOVE STEERING COLUMN ASSEMBLY
89561
15.REMOVE ECM (for RHD)
89561
16.REMOVE ECM (for LHD)
89530C
17.REMOVE TCM (for Automatic Transmission)
85918A
18.REMOVE DOOR CONTROL RELAY
82600
19.REMOVE RELAY BLOCK ASSEMBLY (for RHD)
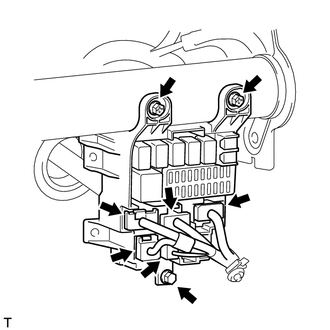
Disconnect each connector.
Remove the 3 bolts and the relay block assembly.
82600
20.REMOVE RELAY BLOCK ASSEMBLY (for LHD)
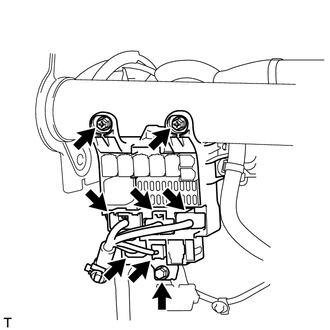
Disconnect each connector.
Remove the 3 bolts and the relay block assembly.
82141
21.SEPARATE INSTRUMENT PANEL WIRE (for RHD)
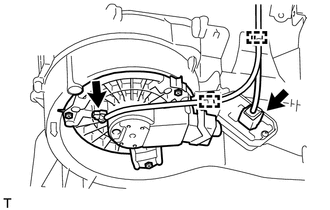
Disconnect the 2 connectors and 2 clamps.
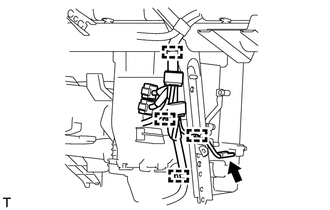
Disconnect the connector and 4 clamps.
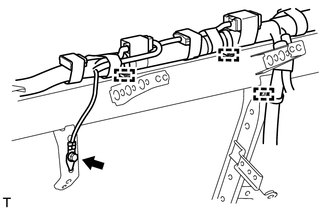
Remove the bolt and 3 clamps and disconnect the ground wire from the instrument panel reinforcement.
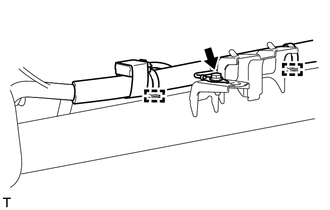
Remove the bolt and disconnect the ground wire from the instrument panel reinforcement.
Remove the 2 clamps and the instrument panel wire from the instrument panel reinforcement.
82141
22.SEPARATE INSTRUMENT PANEL WIRE (for LHD)
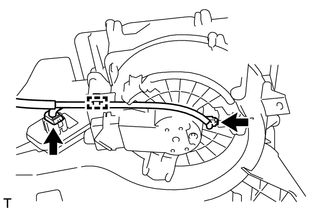
Disconnect the 2 connectors and the clamp.
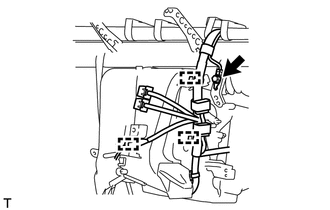
Remove the bolt and 3 clamps and disconnect the ground wire from the instrument panel reinforcement.
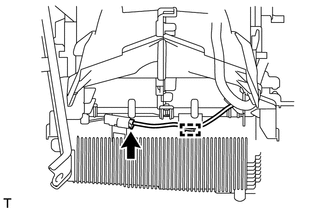
Disconnect the connector and the clamp.
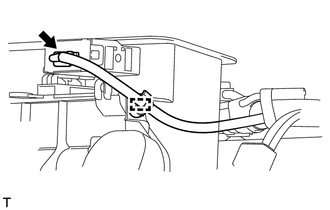
Disconnect the connector and clamp.
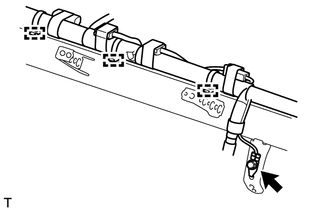
Remove the bolt and 3 clamps and disconnect the ground wire from the instrument panel reinforcement.
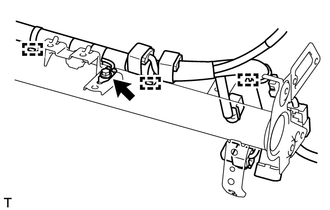
Remove the bolt and 3 clamps and disconnect the ground wire from the instrument panel reinforcement.
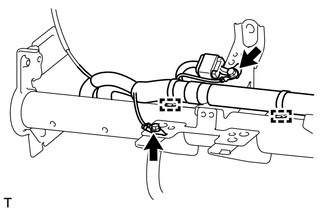
Disengage the 2 camps.
Remove the 2 bolts and disconnect the ground wire from the instrument panel reinforcement.
87220
23.REMOVE AIR DUCT ASSEMBLY
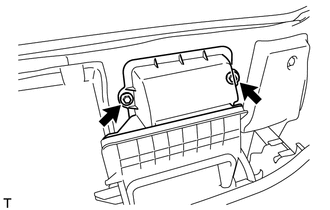
Remove the 2 bolts and air duct assembly.
- HINT:
-
Use the same procedure for the RHD and LHD vehicle.
88539J
24.SEPARATE DRAIN COOLER HOSE
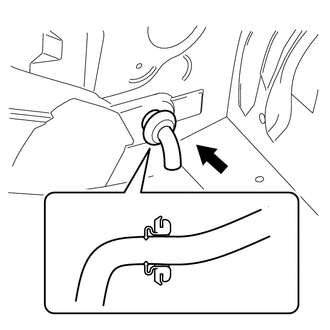
Separate the drain cooler hose from vehicle.
- HINT:
-
Use the same procedure for the RHD and LHD vehicle.
55331
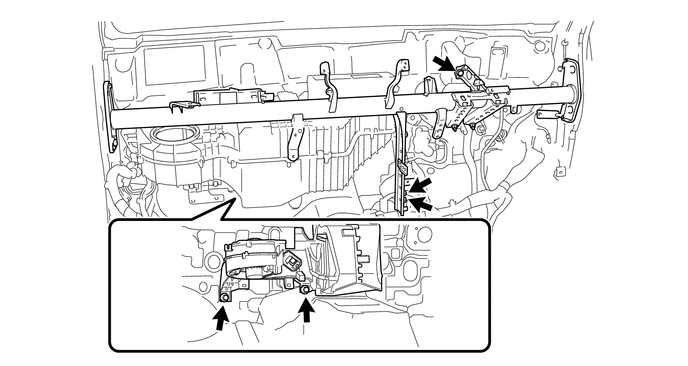
25.REMOVE INSTRUMENT PANEL REINFORCEMENT (for RHD)
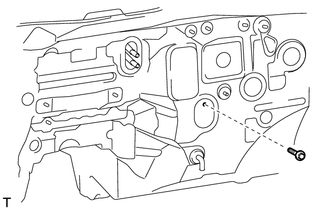
Remove the bolt from engine room side.
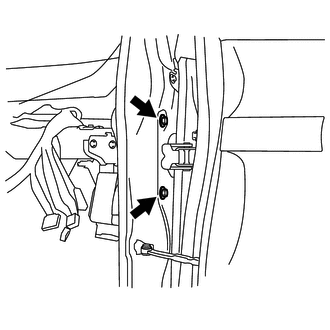
Remove the 2 bolts from front pillar.
- HINT:
-
Use the same procedure as for the LH side and RH side.
Remove the 5 bolts and the instrument panel reinforcement with the air conditioning unit assembly.
55331
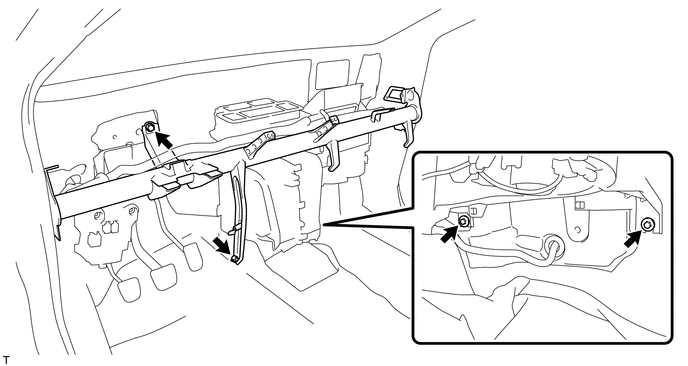
26.REMOVE INSTRUMENT PANEL REINFORCEMENT (for LHD)
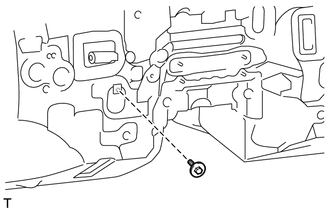
Remove the bolt from engine room side.
Remove the 2 bolts from front pillar.
- HINT:
-
Use the same procedure as for the LH side and RH side.
Remove the 4 bolts and the instrument panel reinforcement with the air conditioning unit assembly.
27.REMOVE AIR CONDITIONING UNIT ASSEMBLY (for RHD)
Remove the 2 bolts, nut and air conditioning unit assembly from the instrument panel reinforcement.
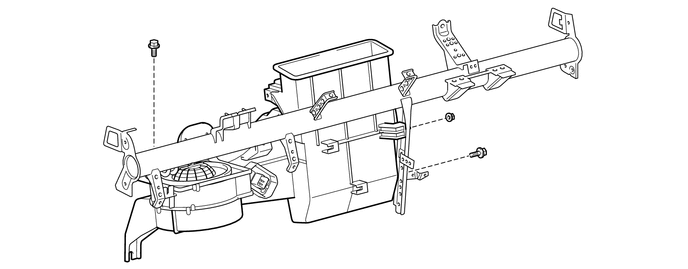
28.REMOVE AIR CONDITIONING UNIT ASSEMBLY (for LHD)
Remove the 2 bolts, nut and air conditioning unit assembly from the instrument panel reinforcement.