DOOR / HATCH LUGGAGE DOOR LOCK CONTROL CABLE ASSEMBLY(for LHD) REMOVAL
PROCEDURE

 1. PRECAUTION
- NOTICE:
-
After turning the ignition switch off, waiting time may be required before disconnecting the cable from the negative (-) battery terminal. Therefore, make sure to read the disconnecting the cable from the negative (-) battery terminal notices before proceeding with work.
-
Click hereGeneral>INTRODUCTION>REPAIR INSTRUCTION>PRECAUTION
2.REMOVE FRONT SEAT ASSEMBLY LH (for Manual Seat)
3.REMOVE FRONT SEAT ASSEMBLY LH (for Power Seat)
67914
4.REMOVE FRONT DOOR SCUFF PLATE LH
62312B
5.DISCONNECT FRONT DOOR OPENING TRIM WEATHERSTRIP LH
67918A
6.REMOVE REAR DOOR SCUFF PLATE LH
62332A
7.REMOVE REAR DOOR OPENING TRIM WEATHERSTRIP LH
73233
8.REMOVE LAP BELT OUTER ANCHOR COVER
73220
9.DISCONNECT FRONT SEAT OUTER BELT ASSEMBLY LH
62414A
10.REMOVE CENTER PILLAR LOWER GARNISH LH
11.REMOVE REAR SEAT CUSHION ASSEMBLY (for Fixed Seat Type)
72693
12.REMOVE REAR SEAT CUSHION LOCK HOOK (for Fixed Seat Type)
13.REMOVE REAR SEAT CUSHION ASSEMBLY (for Fold Down Seat Type)
72693
14.REMOVE REAR SEAT CUSHION LOCK HOOK (for Fold Down Seat Type)
15.REMOVE REAR SEATBACK ASSEMBLY (for Fixed Seat Type)
16.REMOVE REAR SIDE SEATBACK ASSEMBLY LH (for Fold Down Seat Type)
64719A
17.REMOVE LUGGAGE COMPARTMENT DOOR COVER
64711
18.REMOVE LUGGAGE COMPARTMENT FLOOR MAT
58387
19.REMOVE REAR FLOOR FINISH PLATE
64725D
20.REMOVE NO. 1 LUGGAGE COMPARTMENT TRIM HOOK
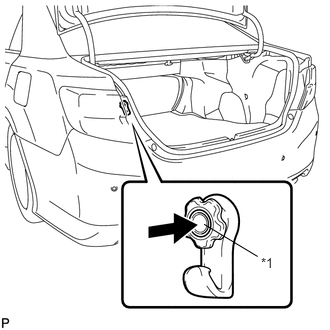
| *1 | Pin |
Push the pin and remove the No. 1 luggage compartment trim hook.
64722
21.REMOVE LUGGAGE COMPARTMENT INNER TRIM COVER LH
77306
22.REMOVE FUEL LID LOCK OPEN LEVER SUB-ASSEMBLY
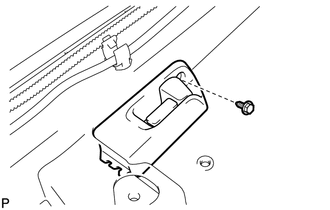
Remove the screw.
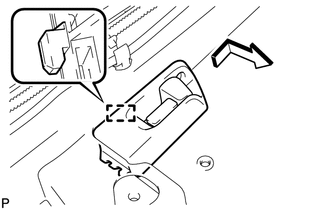
Disengage the guide and disconnect the fuel lid lock open lever sub-assembly as shown in the illustration.
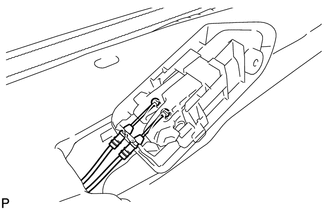
Disconnect the fuel lid lock control cable sub-assembly and luggage door lock control cable sub-assembly and remove the fuel lid lock open lever sub-assembly.
64607
23.REMOVE LUGGAGE DOOR LOCK CONTROL CABLE SUB-ASSEMBLY
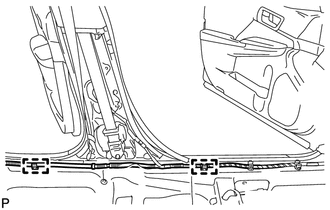
Disengage the 2 clamps.
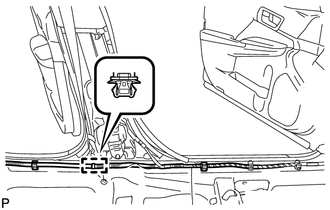
Disengage the clamp and disconnect the wire harness.
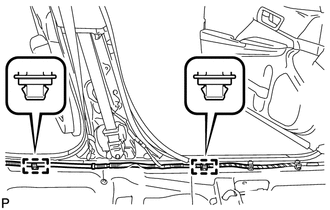
Disengage the 2 clamps and remove the 2 scuff plate clips.
Turn back the floor carpet so that the luggage door lock control cable sub-assembly and fuel lid lock control cable sub-assembly can be removed.
w/o Wireless Door Lock Control System:
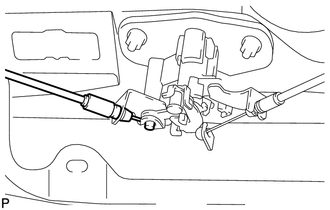
Disconnect the luggage door lock control cable sub-assembly.
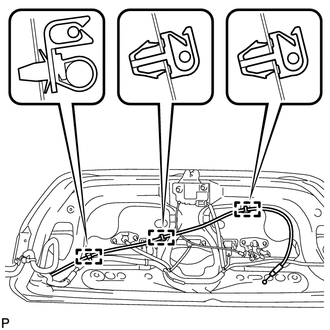
Disengage the 3 clamps and disconnect luggage door lock control cable sub-assembly.
w/ Wireless Door Lock Control System:
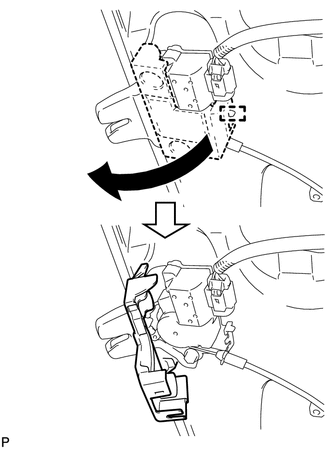
Disengage the guide as shown in the illustration.
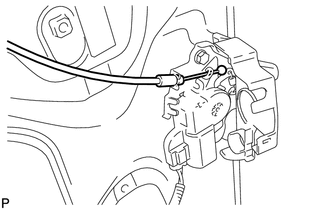
Disconnect the luggage door lock control cable sub-assembly.
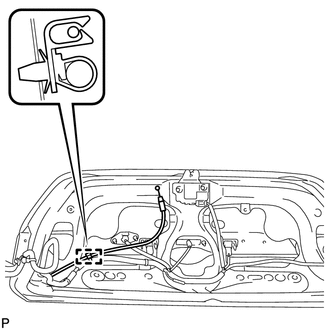
Disengage the clamp and disconnect the luggage door lock control cable sub-assembly.
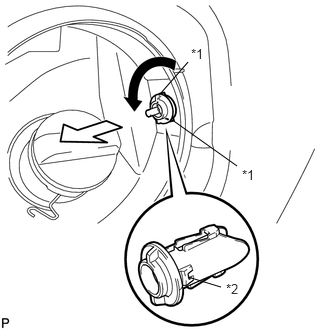
| *1 | Cutout |
| *2 | Guide <A> |
Rotate the fuel filler opening lid lock retainer as shown in the illustration to align the cutouts and the guides <A>, and then pull the fuel filler opening lid lock retainer.
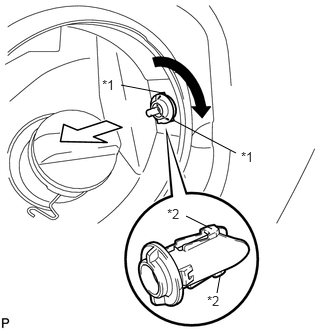
| *1 | Cutout |
| *2 | Guide <A> |
Rotate the fuel filler opening lid lock retainer as shown in the illustration to align the cutouts and guides <B>, and then pull the fuel filler opening lid lock retainer.
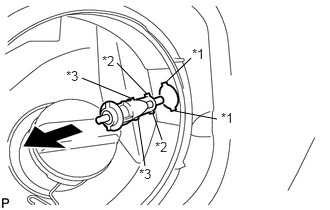
| *1 | Cutout |
| *2 | Guide <C> |
| *3 | Guide <B> |
Pull out the fuel filler opening lid lock retainer with both guides <B> and <C> aligned with the cutouts.
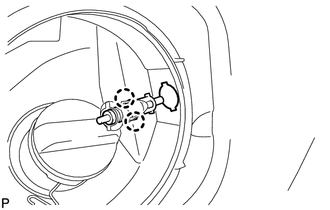
Disengage the 2 claws and remove the fuel filler opening lid lock retainer.
Disengage the 10 clamps and remove the fuel lid lock control cable sub-assembly and luggage door lock control cable sub-assembly.
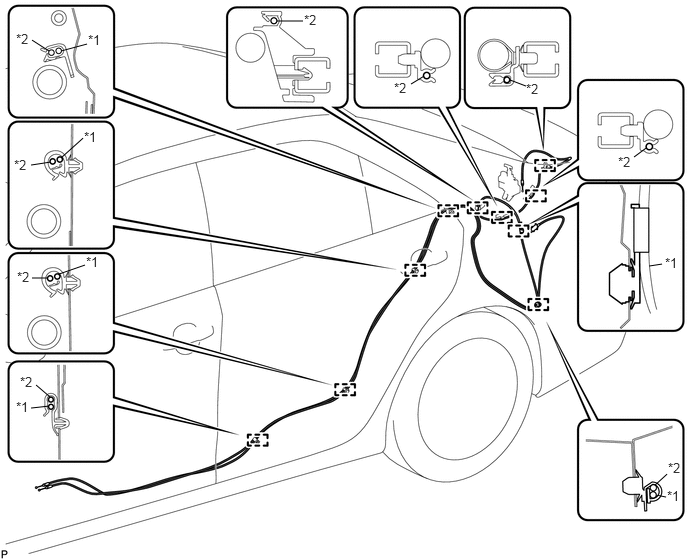
| *1 | Fuel Lid Lock Control Cable Sub-assembly | *2 | Luggage Door Lock Control Cable Sub-assembly |
Using a knife, cut off the clamp as shown in the illustration.
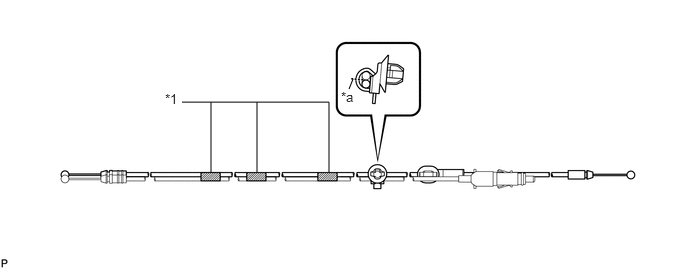
| *1 | Tape | - | - |
| *a | Cut | - | - |
- NOTICE:
-
Be careful not to damage the vehicle fuel lid lock control cable sub-assembly and luggage door lock control cable sub-assembly.
Remove the clamp.
Remove the 3 pieces of tape and luggage door lock control cable sub-assembly.