FRONT SUSPENSION FRONT LOWER SUSPENSION ARM REMOVAL
PROCEDURE

 1. PRECAUTION
- NOTICE:
-
After turning the power switch off, waiting time may be required before disconnecting the cable from the negative (-) auxiliary battery terminal. Therefore, make sure to read the disconnecting the cable from the negative (-) auxiliary battery terminal notices before proceeding with work.
-
Click hereGeneral>INTRODUCTION>REPAIR INSTRUCTION>PRECAUTION
G9200
2.REMOVE INVERTER WITH CONVERTER ASSEMBLY
3.REMOVE FRONT WHEELS
4.REMOVE WINDSHIELD WIPER MOTOR AND LINK ASSEMBLY
55702A
5.REMOVE FRONT OUTER COWL TOP PANEL SUB-ASSEMBLY
82284
6.SEPARATE EARTH WIRE
12327A
7.REMOVE NO. 2 ENGINE MOUNTING STAY RH
12309
8.REMOVE ENGINE MOVING CONTROL ROD SUB-ASSEMBLY
53852K
9.REMOVE FRONT WHEEL OPENING EXTENSION PAD LH
53851Z
10.REMOVE FRONT WHEEL OPENING EXTENSION PAD RH
51442C
11.REMOVE ENGINE UNDER COVER LH
51441C
12.REMOVE ENGINE UNDER COVER RH
53737B
13.REMOVE FRONT FENDER APRON SEAL LH (for LH Side)
53736
14.REMOVE FRONT FENDER APRON SEAL RH (for RH Side)
82124
15.SEPARATE NO. 4 ENGINE WIRE
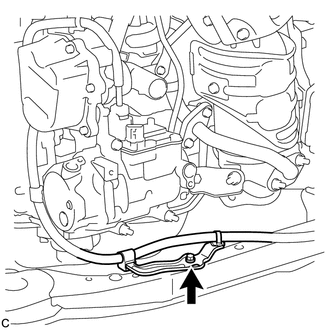
Remove the bolt and separate the No. 4 engine wire from the front frame assembly.
89465
16.DISCONNECT OXYGEN SENSOR
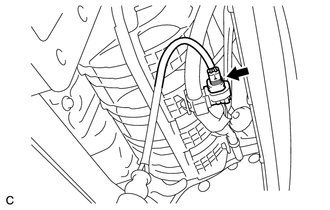
Disconnect the oxygen sensor connector.
12361A
17.SEPARATE FRONT ENGINE MOUNTING INSULATOR
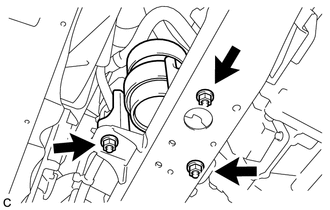
Remove the 3 nuts to separate the front engine mounting insulator from the front frame assembly.
12372A
18.REMOVE ENGINE MOUNTING INSULATOR LH (for LH Side)
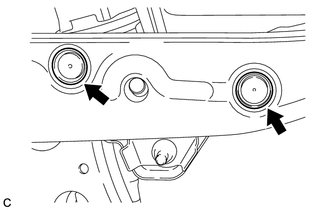
Remove the 2 hole plugs.
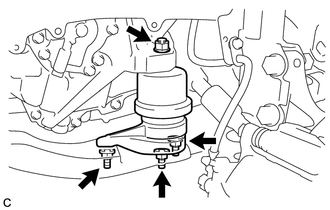
Remove the 4 nuts from the engine mounting insulator LH.
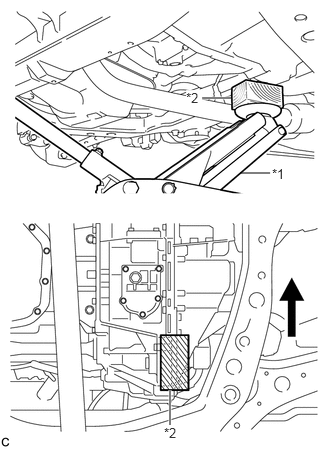
| *1 | Jack |
| *2 | Wooden Block |

|
Front of the Vehicle |
Using a jack and a wooden block, support the engine assembly with transaxle at the position shown in the illustration. While ensuring that there is no interference from the components surrounding the engine, tilt the engine assembly with transaxle to a position that allows the engine mounting insulator LH to be removed.
- NOTICE:
- ·
Do not position the wooden block on the oil pan.
·Do not damage the components surrounding the engine assembly with transaxle.
·Tilt the engine assembly with transaxle as little as possible.
·Ensure that the jack and wooden block are stable.
·Keep the engine assembly with transaxle supported until installation of the engine mounting insulator LH is complete.
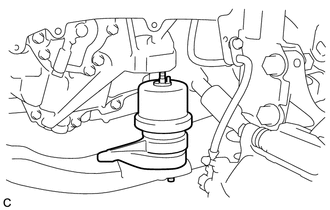
Remove the engine mounting insulator LH from the front frame assembly.
48069
19.REMOVE FRONT LOWER NO. 1 SUSPENSION ARM SUB-ASSEMBLY LH (for LH Side)
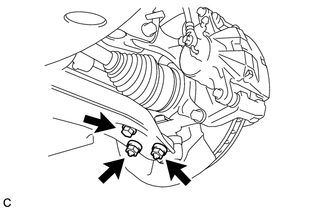
Remove the bolt and 2 nuts, and separate the front lower No. 1 suspension arm sub-assembly LH from the front lower ball joint assembly.
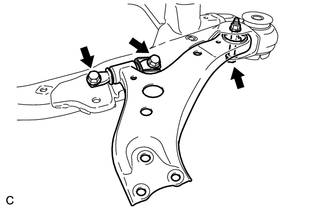
Remove the 3 bolts, nut and front lower No. 1 suspension arm sub-assembly LH from the front frame assembly.
- NOTICE:
-
When removing the bolt, keep the nut from rotating.
Remove the front lower arm bushing stopper from the front lower No. 1 suspension arm sub-assembly LH.
12362
20.REMOVE ENGINE MOUNTING INSULATOR RH (for RH Side)
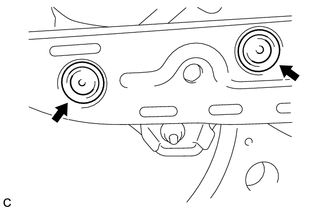
Remove the 2 hole plugs.
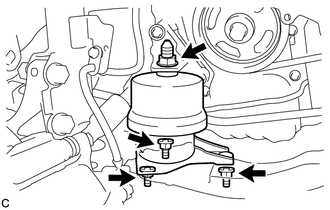
Remove the 4 nuts from the engine mounting insulator RH.
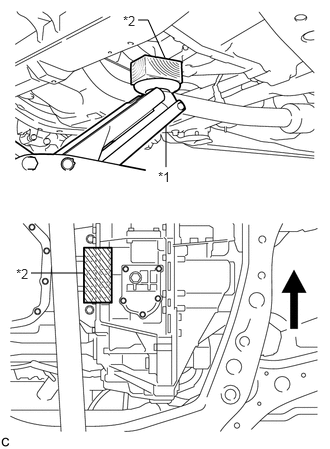
| *1 | Jack |
| *2 | Wooden Block |
|
|
Front of the Vehicle |
Using a jack and a wooden block, support the engine assembly with transaxle at the position shown in the illustration. While ensuring that there is no interference from the components surrounding the engine, tilt the engine assembly with transaxle to a position that allows the engine mounting insulator RH to be removed.
- NOTICE:
- ·
Do not position the wooden block on the oil pan.
·Do not damage the components surrounding the engine assembly with transaxle.
·Tilt the engine assembly with transaxle as little as possible.
·Ensure that the jack and wooden block are stable.
·Keep the engine assembly with transaxle supported until installation of the engine mounting insulator RH is complete.
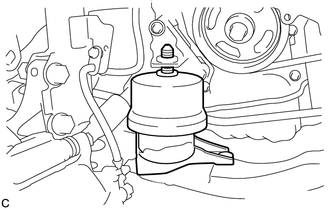
Remove the engine mounting insulator RH from the front frame assembly.
48068
21.REMOVE FRONT LOWER NO. 1 SUSPENSION ARM SUB-ASSEMBLY RH (for RH Side)
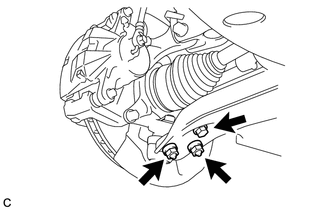
Remove the bolt and 2 nuts, and separate the front lower No. 1 suspension arm sub-assembly RH from the front lower ball joint assembly.
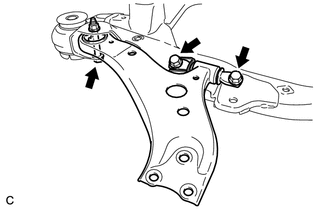
Remove the 3 bolts, nut and front lower No. 1 suspension arm sub-assembly RH from the front frame assembly.
- NOTICE:
-
When removing the bolt, keep the nut from rotating.
Remove the front lower arm bushing stopper from the front lower No. 1 suspension arm sub-assembly RH.