BRAKE SYSTEM (OTHER) BRAKE BOOSTER REMOVAL
PROCEDURE

 1. PRECAUTION
- NOTICE:
-
After turning the power switch off, waiting time may be required before disconnecting the cable from the negative (-) auxiliary battery terminal, Therefore, make sure to read the disconnecting the cable from the negative (-) auxiliary battery terminal notice before proceeding with work.
-
Click hereGeneral>INTRODUCTION>REPAIR INSTRUCTION>PRECAUTION
2.REMOVE WINDSHIELD WIPER MOTOR AND LINK ASSEMBLY
55702A
3.REMOVE FRONT OUTER COWL TOP PANEL SUB-ASSEMBLY
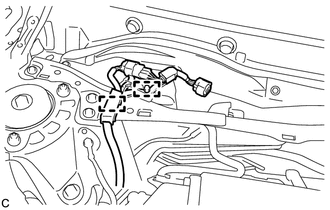
Disengage the 2 clamps and separate the wire harness from the front outer cowl top panel sub-assembly.
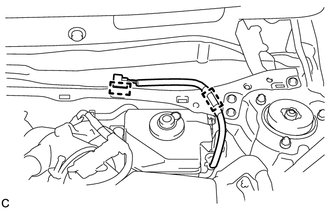
Disengage the 2 clamps and separate the wire harness from the front outer cowl top panel sub-assembly.
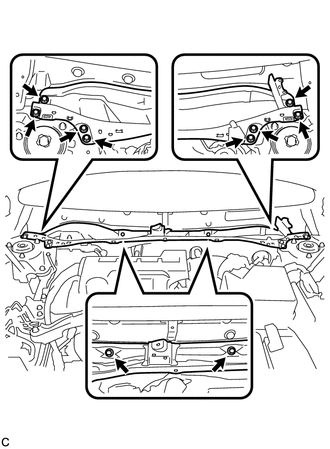
Remove the 10 bolts and front outer cowl top panel sub-assembly.
4. DISABLE BRAKE CONTROL
Wait at least 2 minutes after turning the power switch off.
- NOTICE:
-
When the brake pedal is depressed or the door courtesy switch is turned on even if the power switch is off, the brake control system activates. Therefore do not depress the brake pedal or open/close the doors until the reservoir level switch connector is disconnected.
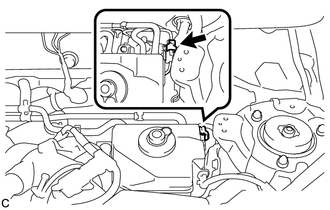
Disconnect the reservoir level switch connector with the parking brake applied.
Disconnect the cable from the negative (-) auxiliary battery terminal.
Click herePower Source / Network>2AR-FXE BATTERY / CHARGING>AUXILIARY BATTERY>REMOVAL
Depress the brake pedal 40 times or more to return all the fluid in the accumulator back to the reservoir.
Check that the brake pedal can not be further depressed.
Release the parking brake.
5.DRAIN BRAKE FLUID
- NOTICE:
-
If brake fluid leaks onto any painted surface, immediately clean it off.
53295E
6.REMOVE COOL AIR INTAKE DUCT SEAL
17750A
7.REMOVE INLET AIR CLEANER ASSEMBLY
8.REMOVE AIR CLEANER CAP SUB-ASSEMBLY
17801
9.REMOVE AIR CLEANER FILTER ELEMENT SUB-ASSEMBLY
10.REMOVE AIR CLEANER CASE SUB-ASSEMBLY
47220D
11.SEPARATE BRAKE MASTER CYLINDER RESERVOIR ASSEMBLY
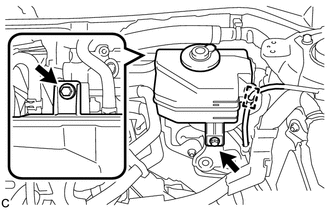
Disengage the clamp of the wire harness.
Remove the 2 bolts and separate the brake master cylinder reservoir assembly from the reservoir bracket.
47238C
12.SEPARATE RESERVOIR TUBE
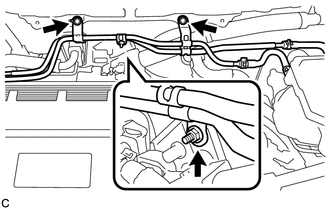
Remove the 2 bolts and nut, and separate the reservoir tube from the vehicle body.
47235G
13.DISCONNECT NO. 2 RESERVOIR HOSE
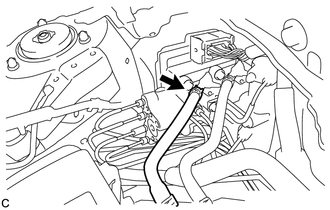
Move the clip and disconnect the No. 2 reservoir hose from the brake booster with master cylinder assembly.
47234L
14.DISCONNECT NO. 1 RESERVOIR HOSE
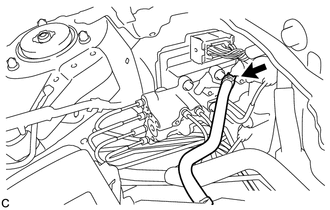
Move the clip and disconnect the No. 1 reservoir hose from the brake booster with master cylinder assembly.
47264A
15.REMOVE PUSH ROD PIN
47210L
16.REMOVE BRAKE BOOSTER WITH MASTER CYLINDER ASSEMBLY
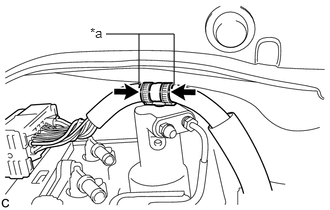
| *a | Matchmark |

|
Cut |
Put matchmarks at the position where the wire harness clamp is installed.
Cut the wire harness clamp and separate the wire harness from the brake booster with master cylinder assembly.
|
|
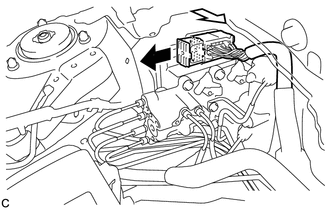
Release the lock lever |

|
Disconnect the connector |
Release the lock lever and disconnect the connector from the brake booster with master cylinder assembly.
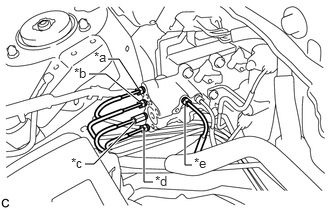
| *a | to Front Wheel Cylinder LH (Way) |
| *b | to Rear Wheel Cylinder RH |
| *c | to Brake Booster Pump Assembly |
| *d | to Rear Wheel Cylinder LH |
| *e | to Front Wheel Cylinder RH |
Using a union nut wrench, disconnect the 5 brake lines from the brake booster with master cylinder assembly.
Use tags or make a memo to identify the places to reconnect.
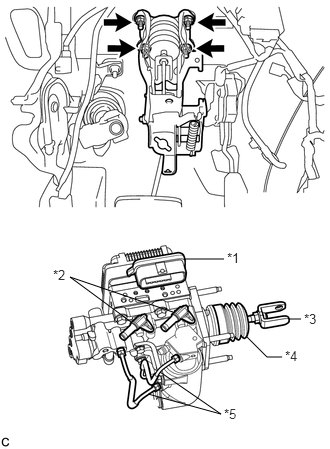
| *1 | Connector Portion |
| *2 | Union |
| *3 | Brake Master Cylinder Push Rod Clevis |
| *4 | Boot |
| *5 | Front No. 2 Brake Tube |
Remove the 4 nuts and brake booster with master cylinder assembly.
- NOTICE:
- ·
Do not kink or damage the brake lines.
·Do not carry the brake booster with master cylinder assembly by the parts shown in bold in the illustration.
·Be careful not to allow any brake fluid to enter the connector.
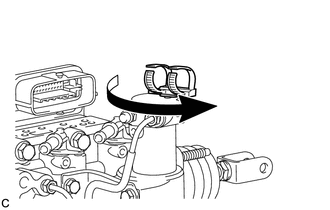
Turn the wire harness clamp counterclockwise to remove it from the brake booster with master cylinder assembly.
44785
17.REMOVE BRAKE BOOSTER GASKET