PARK ASSIST / MONITORING CLEARANCE WARNING ECU(for RHD) REMOVAL
CAUTION / NOTICE / HINT
The necessary procedures (adjustment, calibration, initialization, or registration) that must be performed after parts are removed and installed, or replaced during clearance warning ECU assembly removal/installation are shown below.
| Replaced Part or Performed Procedure | Necessary Procedures | Effect/Inoperative Function When Necessary Procedures are not Performed | Link |
|---|---|---|---|
| Disconnect cable from negative battery terminal | Perform steering sensor zero point calibration | Lane departure alert system (w/ Steering Control) | ( ) |
| Pre-collision system | |||
| Memorize steering angle neutral point | Parking assist monitor system | ()
|
|
| Replacement of clearance warning ECU assembly | Adjust TOYOTA parking assist-sensor system | TOYOTA parking assist-sensor system | ()
|
- CAUTION:
-
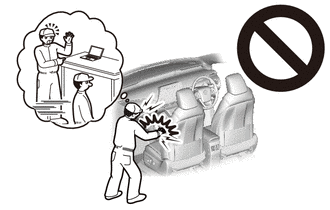
-
Some of these service operations affect the SRS airbag system. Read the precautionary notices concerning the SRS airbag system before servicing.
-
Click hereVehicle Interior>SUPPLEMENTAL RESTRAINT SYSTEMS>AIRBAG SYSTEM>PRECAUTION
PROCEDURE

 1. PRECAUTION
- NOTICE:
-
After turning the ignition switch off, waiting time may be required before disconnecting the cable from the negative (-) battery terminal. Therefore, make sure to read the disconnecting the cable from the negative (-) battery terminal notices before proceeding with work.
-
Click hereGeneral>INTRODUCTION>REPAIR INSTRUCTION>PRECAUTION
2.DISCONNECT CABLE FROM NEGATIVE BATTERY TERMINAL
for 2AR-FE:
Click hereGeneral>MAINTENANCE>2AR-FE BATTERY>REMOVAL
for A25A-FKS:
Click hereGeneral>MAINTENANCE>A25A-FKS BATTERY>REMOVAL
for 2GR-FKS:
Click hereGeneral>MAINTENANCE>2GR-FKS BATTERY>REMOVAL
- CAUTION:
-
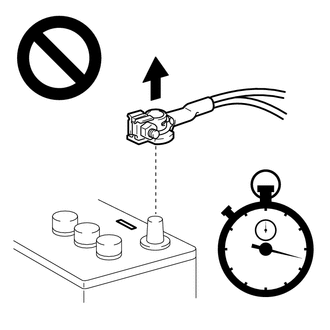
- ·
Wait at least 90 seconds after disconnecting the cable from the negative (-) battery terminal to disable the SRS system.
·If an airbag deploys for any reason, it may cause a serious injury.
55435B
3.REMOVE NO. 1 METER HOOD CLUSTER
- HINT:
-
Use the same procedure as for LHD.
-
Click hereVehicle Interior>INTERIOR PANELS / TRIM>FRONT CONSOLE BOX>REMOVAL
55434B
4.REMOVE LOWER CENTER INSTRUMENT PANEL FINISH PANEL
- HINT:
-
Use the same procedure as for LHD.
-
Click hereVehicle Interior>INTERIOR PANELS / TRIM>FRONT CONSOLE BOX>REMOVAL
67913
5.REMOVE FRONT DOOR SCUFF PLATE RH
- HINT:
-
Use the same procedure as for LHD.
-
Click hereVehicle Interior>INTERIOR PANELS / TRIM>ROOF HEADLINING>REMOVAL
62111A
6.REMOVE COWL SIDE TRIM SUB-ASSEMBLY RH
- HINT:
-
Use the same procedure as for LHD.
-
Click hereVehicle Interior>INTERIOR PANELS / TRIM>ROOF HEADLINING>REMOVAL
62311B
7.DISCONNECT FRONT DOOR OPENING TRIM WEATHERSTRIP RH
- HINT:
-
Use the same procedure as for the LH side.
-
Click hereVehicle Interior>INTERIOR PANELS / TRIM>INSTRUMENT PANEL SAFETY PAD>REMOVAL
55317A
8.REMOVE INSTRUMENT SIDE PANEL RH
- HINT:
-
Use the same procedure as for LHD.
-
Click hereVehicle Interior>INTERIOR PANELS / TRIM>INSTRUMENT PANEL SAFETY PAD>REMOVAL
55606
9.REMOVE NO. 1 INSTRUMENT PANEL UNDER COVER SUB-ASSEMBLY
55436B
10.REMOVE NO. 2 METER HOOD CLUSTER
- HINT:
-
Use the same procedure as for LHD.
-
Click hereVehicle Interior>INTERIOR PANELS / TRIM>INSTRUMENT PANEL SAFETY PAD>REMOVAL
53601
11.DISCONNECT HOOD LOCK CONTROL LEVER SUB-ASSEMBLY
- HINT:
-
Use the same procedure as for LHD.
-
Click hereVehicle Interior>INTERIOR PANELS / TRIM>INSTRUMENT PANEL SAFETY PAD>REMOVAL
55302D
12.REMOVE NO. 1 INSTRUMENT PANEL SUB-ASSEMBLY (w/o Driver Side Knee Airbag)
- HINT:
-
Use the same procedure as for LHD.
-
Click hereVehicle Interior>INTERIOR PANELS / TRIM>INSTRUMENT PANEL SAFETY PAD>REMOVAL
55302D
13.REMOVE NO. 1 INSTRUMENT PANEL SUB-ASSEMBLY (w/ Driver Side Knee Airbag)
- HINT:
-
Use the same procedure as for LHD.
-
Click hereVehicle Interior>INTERIOR PANELS / TRIM>INSTRUMENT PANEL SAFETY PAD>REMOVAL
73900
14.REMOVE LOWER NO. 1 INSTRUMENT PANEL AIRBAG ASSEMBLY (w/ Driver Side Knee Airbag)
55308B
15.REMOVE NO. 3 INSTRUMENT PANEL TO COWL BRACE SUB-ASSEMBLY
- HINT:
-
Use the same procedure as for LHD.
-
Click hereVehicle Interior>HEATING / AIR CONDITIONING>AIR CONDITIONING UNIT>REMOVAL
82877
16.REMOVE ECU INTEGRATION BOX RH
89340A
17.REMOVE CLEARANCE WARNING ECU ASSEMBLY
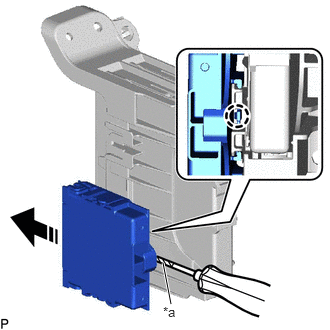
| *a | Protective Tape |

|
Remove in this Direction |
Using a screwdriver with its tip wrapped with protective tape, disengage the claw and remove the clearance warning ECU assembly as shown in the illustration.
- NOTICE:
- ·
If the ECU integration box is deformed or damaged, replace it.
·Do not bend the claw more than necessary.