TELEMATICS TELEMATICS TRANSCEIVER REMOVAL
CAUTION / NOTICE / HINT
The necessary procedures (adjustment, calibration, initialization, or registration) that must be performed after parts are removed and installed, or replaced during telematics transceiver removal/installation are shown below.
| Replaced Part or Performed Procedure | Necessary Procedure | Effect/Inoperative Function When Necessary Procedures are not Performed | Link |
|---|---|---|---|
| Telematics transceiver | Register vehicle information | Emergency call service | ( )for eCall ( )for Toyota Connected Services
|
PROCEDURE

 55900
1.REMOVE AIR CONDITIONING CONTROL ASSEMBLY
55405B
2.REMOVE CENTER INSTRUMENT CLUSTER FINISH PANEL SUB-ASSEMBLY (for 7 Inch Display)
55405B
3.REMOVE CENTER INSTRUMENT CLUSTER FINISH PANEL SUB-ASSEMBLY (for 9 Inch Display)
55420A
4.REMOVE CENTER INSTRUMENT CLUSTER FINISH PANEL ASSEMBLY
55476C
5.REMOVE INSTRUMENT PANEL FINISH PLATE GARNISH
55434B
6.REMOVE LOWER CENTER INSTRUMENT PANEL FINISH PANEL
33554C
7.REMOVE SHIFT LOCK RELEASE BUTTON COVER
33504F
8.REMOVE SHIFT LEVER KNOB SUB-ASSEMBLY
58805C
9.REMOVE REAR UPPER CONSOLE PANEL SUB-ASSEMBLY
10.REMOVE TELEMATICS TRANSCEIVER WITH BRACKET
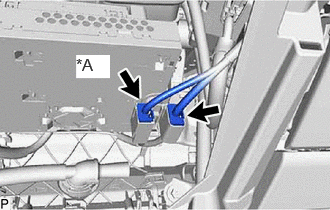
| *A | w/ Navigation System |
Disconnect each connector.
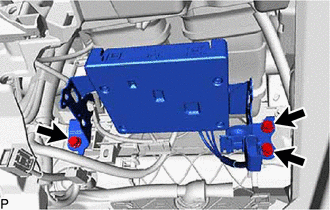
Remove the 3 bolts.
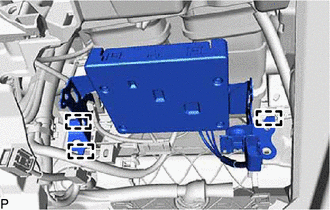
Disengage the 3 guides.
for LHD:
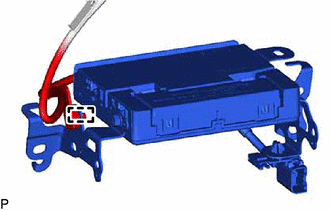
Disengage the clamp.
for RHD:
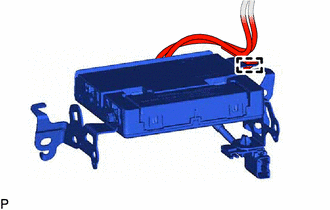
Disengage the clamp.
Disconnect each connector and remove the telematics transceiver with bracket.
86101M
11.REMOVE ANTENNA CORD SUB-ASSEMBLY
w/o Navigation System:
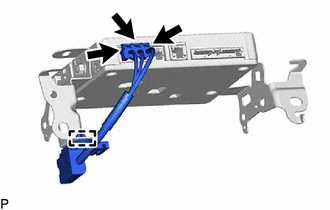
Disconnect the 3 connectors.
Disengage the clamp to remove the antenna cord sub-assembly.
w/ Navigation System:
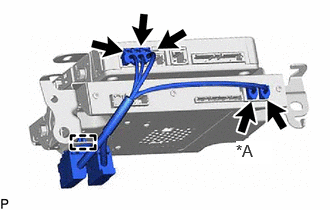
| *A | w/ Digital TV Function |
Disconnect each connector.
Disengage the clamp to remove the antenna cord sub-assembly.
86719B
12.REMOVE NO. 2 TELEPHONE BRACKET
w/o Navigation System:
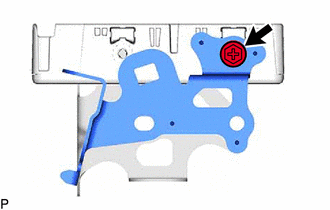
Remove the screw and No. 2 telephone bracket.
w/ Navigation System:
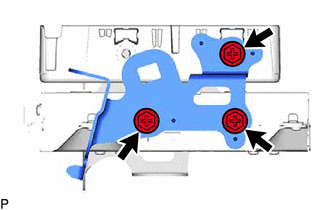
Remove the 3 screws and No. 2 telephone bracket.
86719A
13.REMOVE NO. 1 TELEPHONE BRACKET
w/o Navigation System:
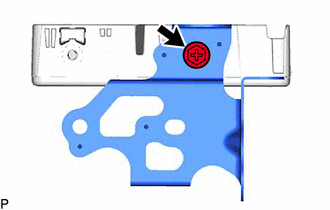
Remove the screw and No. 1 telephone bracket.
w/ Navigation System:
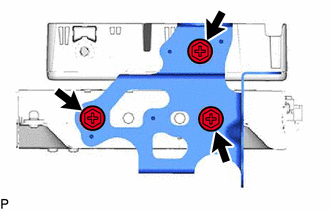
Remove the 3 screws and No. 1 telephone bracket.
86841
14.REMOVE NAVIGATION ECU (w/ Navigation System)
86740
15.REMOVE TELEMATICS TRANSCEIVER