WINDOW / GLASS BACK WINDOW GLASS(for Double Swing Out Type) REMOVAL
CAUTION / NOTICE / HINT
- HINT:
- ·
Use the same procedure for RHD and LHD vehicles.
·The procedure listed below is for RHD vehicles.
·Use the same procedure for RH and LH sides.
·The procedure listed below is for LH side.
PROCEDURE

 1.REMOVE REAR SEAT ASSEMBLY (for Rear End)
for Tumble Type 4-Passenger Seat:
Click hereVehicle Interior>SEAT>REAR SEAT ASSEMBLY (for Tumble Type 4-Passenger Seat)>REMOVAL
for Fixed Type 4-Passenger Seat:
Click hereVehicle Interior>SEAT>REAR SEAT ASSEMBLY (for Fixed Type 4-Passenger Seat)>REMOVAL
45619K
2.REMOVE KNUCKLE STOPPER COVER (w/ Room Rack)
3.REMOVE ROOM RACK (w/ Room Rack)
63372A
4.REMOVE NO. 2 ROOF BOARD SET MOULDING
63372F
5.REMOVE NO. 3 ROOF BOARD SET MOULDING
63324
6.REMOVE NO. 4 ROOF BOARD
58614A
7.REMOVE NO. 4 MAT SET PLATE
66301D
8.REMOVE ROPE HOOK SUB-ASSEMBLY (w/ Rope Hook)
63349A
9.REMOVE REAR ROOF HEADLINING GARNISH
62487A
10.REMOVE INNER ROOF SIDE GARNISH COVER RH
62488A
11.REMOVE INNER ROOF SIDE GARNISH COVER LH
62471D
12.REMOVE REAR UPPER PILLAR GARNISH RH
62472D
13.REMOVE REAR UPPER PILLAR GARNISH LH
62228
14.REMOVE LOWER QUARTER PILLAR COVER LH
62512R
15.REMOVE REAR BODY REAR INSIDE TRIM LH
63316A
16.REMOVE NO. 6 ROOF HEADLINING
65936
17.REMOVE NO. 1 CURTAIN RAIL (w/ Curtain)
63940
18.REMOVE NO. 4 INNER COOLER DUCT LH (for Long Body)
64814A
19.REMOVE BACK WINDOW CORNER GLASS LH
- NOTICE:
-
The back window corner glass LH may fall while performing this procedure. Therefore, use suction cups to hold the back window corner glass LH from the outside of the vehicle.
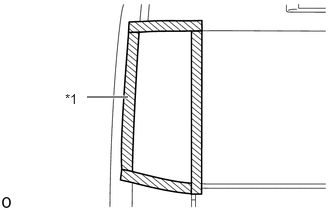
Apply protective tape to the outer surface of the vehicle body and glass to prevent scratches.
| *1 | Protective Tape |
Install the suction cups to the back window corner glass LH.
From the interior, insert a piano wire between the vehicle body and glass.
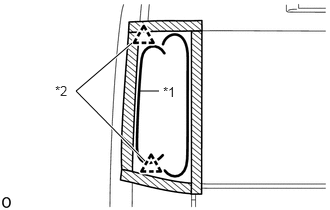
Tie objects that can serve as handles (for example, wooden blocks) to both wire ends.
- NOTICE:
-
When separating the glass from the vehicle, Do not damage the vehicle paint or interior/exterior ornaments.
| *1 | Piano Wire |
| *2 | Back Window Glass Clip LH |
Cut through the adhesive by pulling the piano wire around the glass.
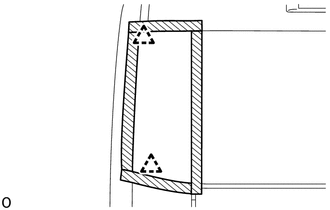
Using suction cups, disconnect the 2 clips and remove the back window corner glass LH.
- NOTICE:
-
Be careful not to drop the back window corner glass LH.
64813D
20.REMOVE BACK WINDOW GLASS ADHESIVE DAM
When reusing the back window corner glass LH:
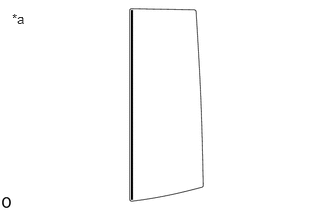
Using a scraper, remove the back window glass adhesive dam.
- NOTICE:
- ·
Do not damage the back window corner glass LH.
·Be sure to replace the back window glass adhesive dam with a new one.
| *a | Back Side |
64828
21.REMOVE BACK WINDOW GLASS CLIP LH
When reusing the back window corner glass LH:
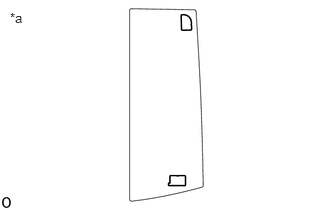
Using a scraper, remove the 2 back window glass clips LH.
- NOTICE:
- ·
Do not damage the back window corner glass LH.
·Be sure to replace the back window glass clip LH with a new one.
| *a | Back Side |
68294A
22.REMOVE BACK DOOR GLASS ADHESIVE DAM
When reusing the back window corner glass LH:
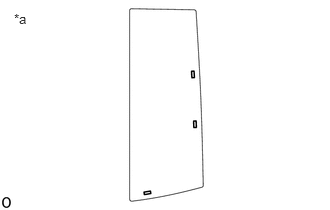
Using a scraper, remove the 3 back door glass adhesive dams.
- NOTICE:
- ·
Do not damage the back window corner glass LH.
·Be sure to replace the back door glass adhesive dam with a new one.
| *a | Back Side |