AIR CONDITIONING FRONT COOLING UNIT REMOVAL
PROCEDURE

 1.RECOVER REFRIGERANT FROM REFRIGERATION SYSTEM
2.DISCONNECT CABLE FROM NEGATIVE BATTERY TERMINAL
- CAUTION:
-
Wait at least 90 seconds after disconnecting the cable from the negative (-) battery terminal to prevent airbag and seat belt pretensioner activation.
- NOTICE:
-
Make sure to select FACE mode before disconnecting the cable from the negative (-) battery terminal.
88707
3.REMOVE TUBE SUB-ASSEMBLY
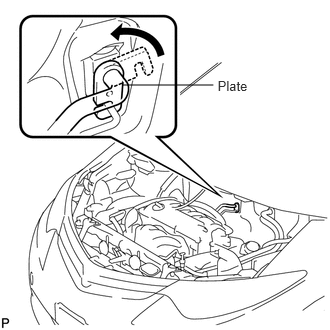
Remove the bolt.
Remove plate, as shown in the illustration.
Disconnect the suction tube and liquid tube.
- NOTICE:
- ·
Do not use a screwdriver or similar tool to disconnect the tube.
·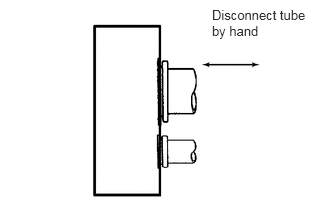 2.208,0.073 3.208,0.458 1,0.385 10 false Disconnect tube by hand
Seal the opening of the disconnected parts using vinyl tape to prevent moisture and foreign matter from entering them.
Remove the 2 O-rings from the suction tube and liquid tube.
87246
4.DISCONNECT OUTLET HEATER WATER HOSE
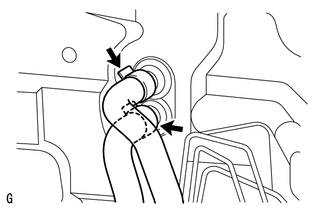
Using pliers, grip the claws of the clip and slide the clip.
Disconnect the outlet heater water hose.
87245A
5.DISCONNECT INLET HEATER WATER HOSE A
- HINT:
-
Disconnection of the inlet heater water hose A is the same as for the outlet heater water hose.
45250
6.REMOVE STEERING COLUMN ASSEMBLY
Remove the steering column (See page Steering>STEERING COLUMN>STEERING COLUMN ASSEMBLY>REMOVAL).
55302A
7.REMOVE UPPER INSTRUMENT PANEL
Remove the upper instrument panel (See page Vehicle Interior>INTERIOR PANEL>UPPER INSTRUMENT PANEL>REMOVAL).
55303B
8.REMOVE LOWER INSTRUMENT PANEL
Remove the lower instrument panel (See page Vehicle Interior>INTERIOR PANEL>LOWER INSTRUMENT PANEL>REMOVAL).
87212
9.REMOVE NO. 1 AIR DUCT REAR
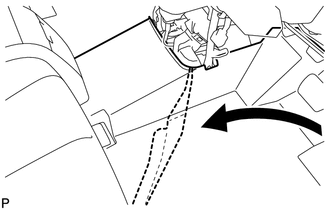
Lift up part of the floor carpet.
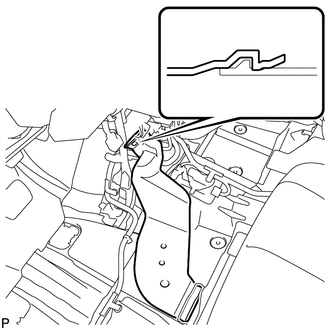
Detach the 2 claws and remove the duct.
87213D
10.REMOVE NO. 2 AIR DUCT REAR
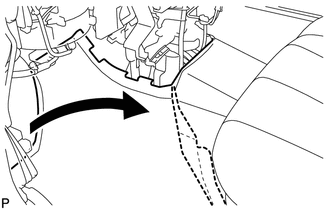
Lift up part of the floor carpet.
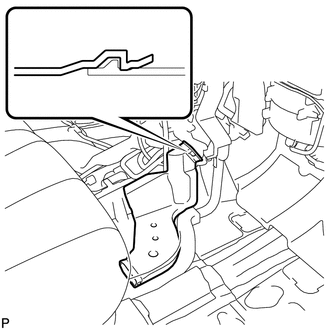
Detach the 2 claws and remove the duct.
88650E
11.REMOVE AIR CONDITIONING AMPLIFIER ASSEMBLY
55342A
12.REMOVE NO. 2 INSTRUMENT PANEL TO COWL BRACE
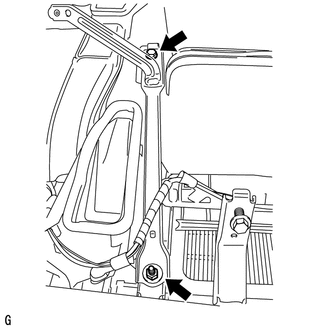
Remove the bolt, nut and brace.
55330B
13.REMOVE INSTRUMENT PANEL REINFORCEMENT ASSEMBLY
Disconnect the clamps, connectors and wire harness.
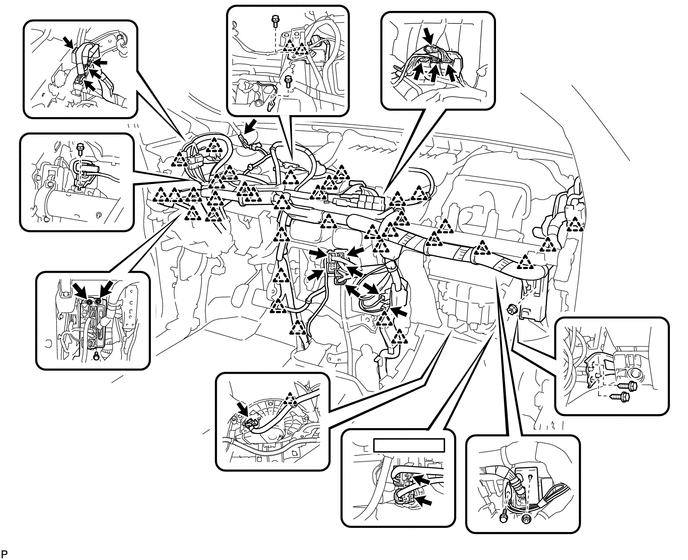
Remove the 7 bolts and 4 nuts and disconnect the ground wire and junction block.
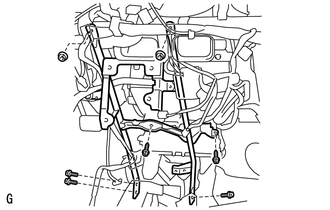
Remove the 3 bolts, 2 screws, 2 nuts and No. 1 instrument to cowl brace.
Remove the 11 bolts and instrument panel reinforcement.
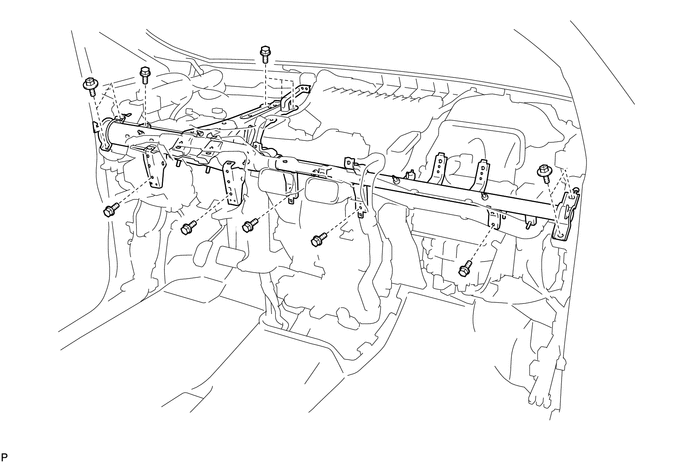
14.REMOVE AIR CONDITIONING UNIT
Remove the nut and air conditioning unit.
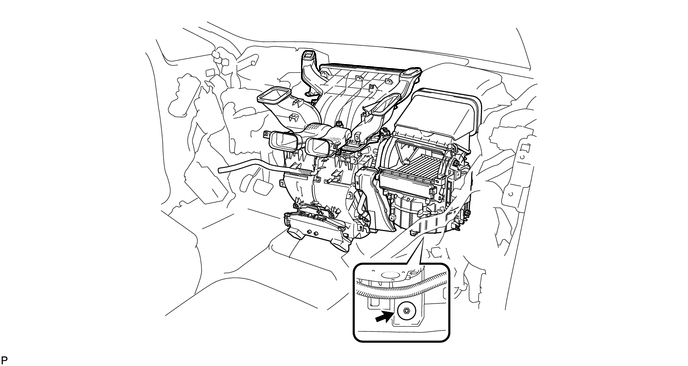
55835A
15.REMOVE HEATER TO REGISTER DUCT CENTER
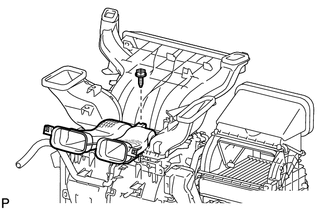
Remove the screw and duct.
55950G
16.REMOVE DEFROSTER NOZZLE ASSEMBLY
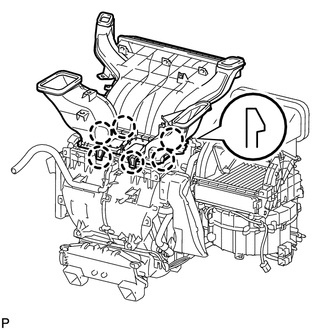
Detach the 4 claws and remove the nozzle.
87211B
17.REMOVE NO. 3 AIR DUCT
87211
18.REMOVE NO. 1 AIR DUCT
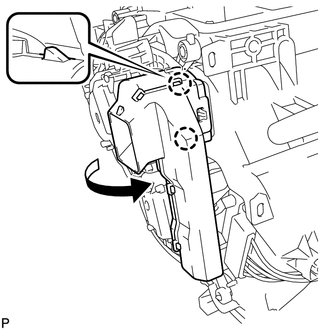
Detach the 2 claws and remove the duct.
87211A
19.REMOVE NO. 2 AIR DUCT
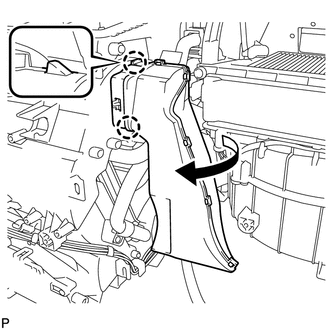
Detach the 2 claws and remove the duct.
87130D
20.REMOVE BLOWER UNIT ASSEMBLY
Disconnect the connector.
w/o PTC Heater:
Remove the 2 screws and blower unit.
w/ PTC Heater:
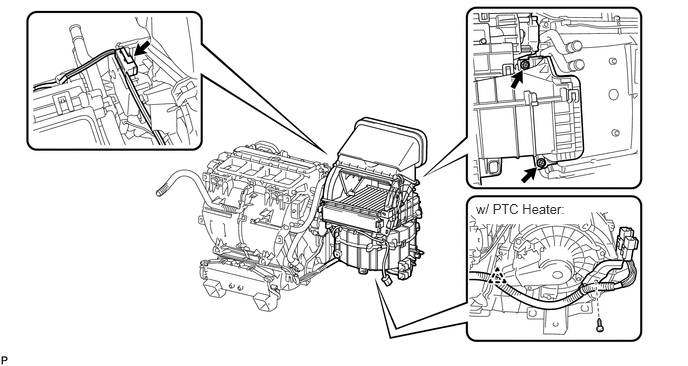
Remove the screw.
w/ PTC Heater:
Disconnect the clamp and remove the blower unit.