REMOVAL
Removal / installation · Vehicles built from Jan 2017
- NOTICE:
- When replacing the parts in the following chart (A), replace the No. 1 injection pipe sub-assembly, No. 2 injection pipe sub-assembly and/or fuel inlet pipe sub-assembly with new ones.
Replaced Parts (A)
Pipes Requiring New Replacement
- Injector assembly (including shuffling the injector assemblies between the cylinders)
- Common rail assembly
- Cylinder head sub-assembly
- No. 1 injection pipe sub-assembly
- No. 2 injection pipe sub-assembly
Supply pump assembly
Fuel inlet pipe sub-assembly
- Common rail assembly
- Cylinder block sub-assembly
- Cylinder head sub-assembly
- Cylinder head gasket
- Timing chain case assembly
- No. 1 injection pipe sub-assembly
- No. 2 injection pipe sub-assembly
- Fuel inlet pipe sub-assembly
- Injector assembly (including shuffling the injector assemblies between the cylinders)
- After removing the No. 1 injection pipe sub-assembly, No. 2 injection pipe sub-assembly and/or fuel inlet pipe sub-assembly, clean them with a brush and compressed air.
- The injector assembly is a precision instrument. Do not use the injector assembly if it is struck or dropped.
- Make sure foreign matter does not enter the fuel path.
- When replacing the parts in the following chart (A), replace the No. 1 injection pipe sub-assembly, No. 2 injection pipe sub-assembly and/or fuel inlet pipe sub-assembly with new ones.
| 1. PRECAUTION |

- NOTICE:
- After turning the ignition switch off, waiting time may be required before disconnecting the cable from the battery terminal. Therefore, make sure to read the disconnecting the cable from the battery terminal notice before proceeding with work (Click here).
| 2. DISCONNECT CABLE FROM NEGATIVE BATTERY TERMINAL |
- NOTICE:
- When disconnecting the cable, some systems need to be initialized after the cable is reconnected (Click here).
| 3. REMOVE EGR COOLER ASSEMBLY |
| 4. CHECK INJECTOR COMPENSATION CODE |
- HINT:
- If the injector compensation code is not correctly registered, it may cause malfunctions.
Read the injector compensation code.
(Click here)
Check that the compensation code of the installed injector assembly is the same as the code registered in the ECM. If the code is not the same, register the injector compensation code on the injector assembly.
(Click here)
| 5. REMOVE NO. 1 FUEL PIPE |
Remove the bolt, union bolt and gasket and disconnect the No. 1 fuel pipe from the cylinder head cover sub-assembly and exhaust fuel addition injector assembly.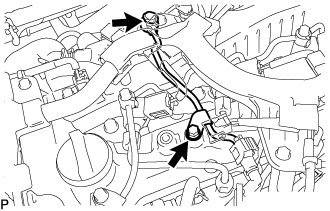

Disconnect the No. 4 fuel pipe and remove the No. 1 fuel pipe (Click here).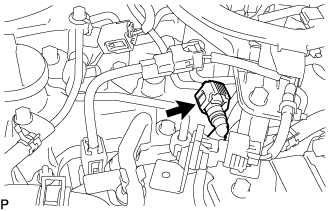
| 6. REMOVE NO. 2 WATER BY-PASS PIPE |
Disconnect the heater hose from the No. 2 water by-pass pipe.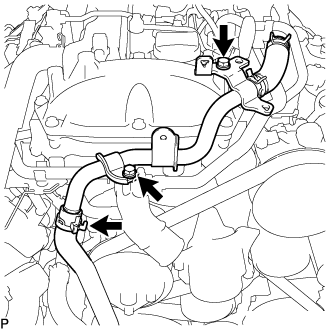
Remove the 2 bolts and No. 2 water by-pass pipe.
| 7. REMOVE WIRING HARNESS CLAMP BRACKET |
Disconnect the pressure discharge valve connector from the common rail assembly.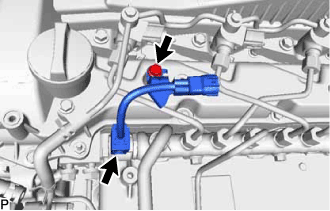
Remove the bolt and wiring harness clamp bracket from the cylinder head cover sub-assembly.
| 8. REMOVE HARNESS BRACKET |
Remove the bolt and harness bracket.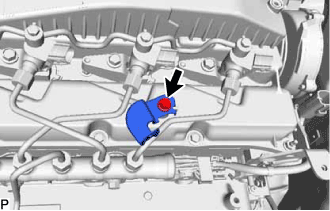
| 9. REMOVE NOZZLE LEAKAGE PIPE ASSEMBLY |
Slide the clamp and disconnect the No. 5 fuel hose from the nozzle leakage pipe assembly.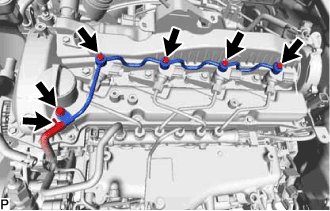
Remove the 4 union bolts and 4 gaskets.
Remove the bolt and nozzle leakage pipe assembly.
| 10. REMOVE NO. 1 AND NO. 2 INJECTION PIPE SUB-ASSEMBLY |
- NOTICE:
- After removing the No. 1 and No. 2 injection pipe sub-assemblies, cover the common rail assembly with electrical tape to prevent dirt or foreign objects from entering the pipe inlet. Also, protect the injector inlets with electrical tape or plastic bags.
Using SST, loosen the No. 1 and No. 2 injection pipe sub-assemblies and 8 union nuts of the fuel injector assembly side and common rail assembly side.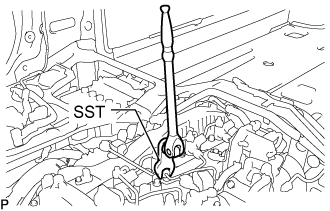
- SST
- 09245-11010
Remove the 2 No. 1 injection pipe sub-assemblies and 2 No. 2 injection pipe sub-assemblies.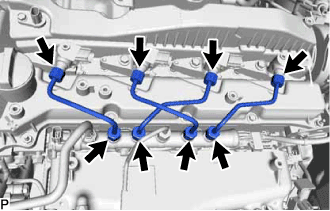
- NOTICE:
- When removing the No. 1 injection pipe sub-assembly and No. 2 injection pipe sub-assembly, store the injector assemblies in the correct order so that they can be returned to their original locations when reassembling.
| 11. REMOVE INJECTOR ASSEMBLY |
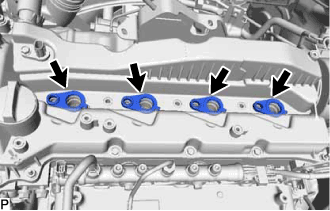
Remove the 4 nozzle holder clamp bolts, 4 washers and 4 nozzle holder clamps.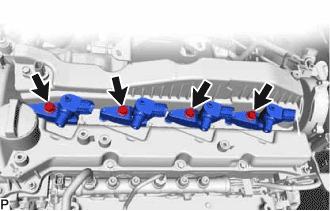
Remove the 4 fuel injector assemblies and 4 injection nozzle seats from the cylinder head sub-assembly.
- NOTICE:
- When removing the injector assembly, store the injector assemblies in the correct order so that they can be returned to their original locations when reassembling.
Remove the O-ring from each injector assembly.
| 12. REMOVE NOZZLE HOLDER GASKET |
Remove the 4 nozzle holder gaskets from the cylinder head cover sub-assembly.