CLUTCH CLUTCH PEDAL INSTALLATION
CAUTION / NOTICE / HINT
- HINT:
- ·
Use the same procedure for RHD and LHD vehicles.
·The procedure listed below is for LHD vehicles.
PROCEDURE

 31301S
1.INSTALL NO. 2 CLUTCH PEDAL CUSHION
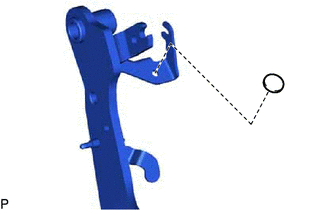
Install the No. 2 clutch pedal cushion to the clutch pedal sub-assembly.
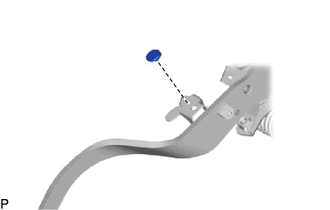
Install the No. 2 clutch pedal cushion to the clutch pedal sub-assembly.
2.INSTALL PEDAL SUPPORT TO COWL PLATE
Install the nut clip.
Install the pedal support to cowl plate to the clutch pedal support sub-assembly with the bolt.
- Torque:
- 21 N*m (214 kgf*cm, 15 ft.*lbf)
31321
3.INSTALL CLUTCH PEDAL PAD
Install the clutch pedal pad to the clutch pedal sub-assembly
31395
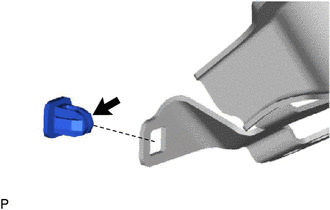
4.INSTALL PEDAL SPRING HOOK

|
MP Grease |
Apply MP grease to the contact surface of the pedal spring hook and install the pedal spring hook to the clutch pedal support sub-assembly.
31453B
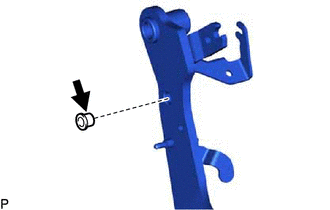
5.INSTALL CLUTCH MASTER CYLINDER PUSH ROD CLEVIS BUSH
|
|
MP Grease |
Apply MP grease to the inside of a new clutch master cylinder push rod clevis bush.
Install the clutch master cylinder push rod clevis bush to the clutch pedal sub-assembly.
- HINT:
-
Install the clutch master cylinder push rod clevis bush from the left side of the vehicle.
31301P
6.INSTALL CLUTCH PEDAL TURNOVER BUSH
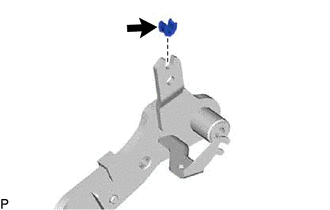
|
|
MP Grease |
Apply MP grease to the contact surface of the clutch pedal turnover bush.
Install the clutch pedal turnover bush.
31324A
7.INSTALL CLUTCH PEDAL SHAFT COLLAR
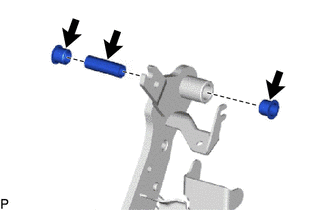
|
|
MP Grease |
Apply MP grease to both sides of a clutch pedal shaft collar and 2 new clutch pedal bushes.
Install the clutch pedal shaft collar.
Install the 2 clutch pedal bushes.
31301B
8.INSTALL NO. 1 CLUTCH PEDAL CUSHION
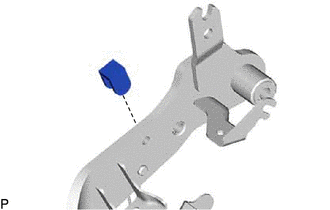
Install the No. 1 clutch pedal cushion to the clutch pedal sub-assembly.
31353
9.INSTALL CLUTCH PEDAL SPRING HOLDER
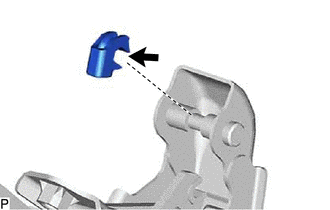
|
|
MP Grease |
Apply MP grease to the contact surface of the clutch pedal spring holder.
Install the clutch pedal spring holder.
31301
10.INSTALL CLUTCH PEDAL SUB-ASSEMBLY
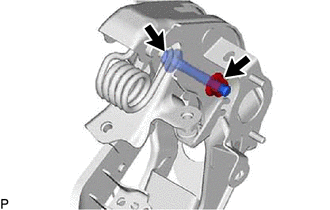
Install the clutch pedal sub-assembly to the clutch pedal support sub-assembly with the bolt and nut.
- Torque:
- 26 N*m (265 kgf*cm, 19 ft.*lbf)
- HINT:
-
Install the bolt from the left side of the vehicle.
31394A
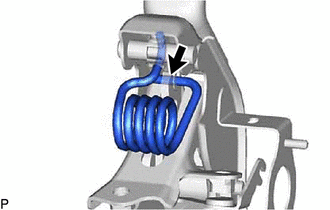
11.INSTALL PEDAL SPRING WITH HOOK
|
|
MP Grease |
Apply MP grease to the contact surface of the pedal spring with hook.
Install the pedal spring with hook.
|
|
MP Grease |
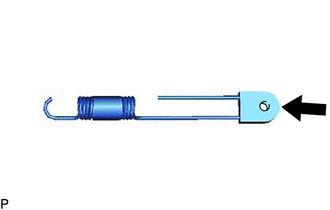
Apply MP grease to the inside of the hole in the hook and to the sliding areas of the spring.

|
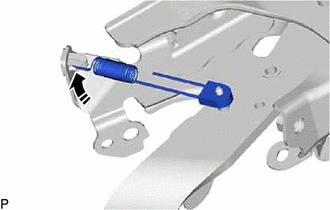
Install in this Direction |
Install the pedal spring with hook.
84520
12.INSTALL CLUTCH START SWITCH ASSEMBLY
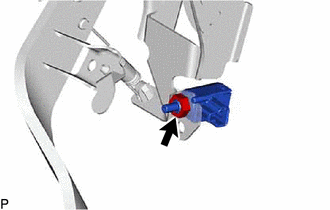
Install the clutch start switch assembly with the nut.
- Torque:
- 15.7 N*m (160 kgf*cm, 12 ft.*lbf)
89280
13.INSTALL CLUTCH PEDAL STROKE SENSOR ASSEMBLY (w/ Intelligent Manual Transmission)
55107A
14.INSTALL CLUTCH PEDAL SUPPORT SUB-ASSEMBLY
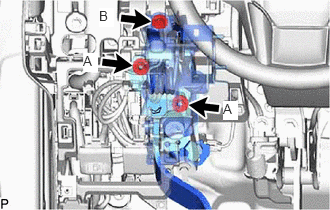
Install the clutch pedal support sub-assembly.
Install the bolt and 2 nuts.
- Torque:
- for nut A : 14.2 N*m (145 kgf*cm, 10 ft.*lbf)
- for bolt B : 23.6 N*m (241 kgf*cm, 17 ft.*lbf)
w/o Intelligent Manual Transmission:
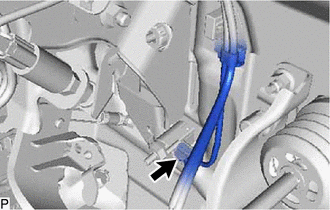
Connect the connector.
w/ Intelligent Manual Transmission:
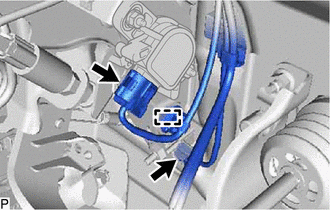
Connect the 2 connectors and clamp.
88280A
15.INSTALL CLUTCH SWITCH ASSEMBLY
31453A
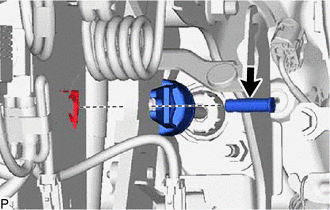
16.INSTALL CLUTCH MASTER CYLINDER PUSH ROD CLEVIS WITH HOLE PIN
|
|
MP Grease |
Apply MP grease to the contact surface of the clutch master cylinder push rod clevis with hole pin.
Connect the clevis to the clutch pedal assembly with the clutch master cylinder push rod clevis with hole pin.
- NOTICE:
-
Install the clutch master cylinder push rod clevis with hole pin from the right side of the vehicle.
Install a new clip to the clutch master cylinder push rod clevis with hole pin.
84520
17.INSPECT CLUTCH START SWITCH ASSEMBLY
89280
18.ADJUST CLUTCH PEDAL STROKE SENSOR ASSEMBLY (w/ Intelligent Manual Transmission)
31301
19.INSPECT CLUTCH PEDAL SUB-ASSEMBLY
73900
20.INSTALL LOWER NO. 1 INSTRUMENT PANEL AIRBAG ASSEMBLY (w/ Driver Side Knee Airbag)
55313
21.INSTALL LOWER INSTRUMENT PANEL LH (w/o Driver Side Knee Airbag)
55445B
22.INSTALL INSTRUMENT PANEL FINISH PLATE (w/o Driver Side Knee Airbag)
55433B
23.INSTALL LOWER NO. 2 INSTRUMENT PANEL FINISH PANEL
55432D
24.INSTALL LOWER NO. 1 INSTRUMENT PANEL FINISH PANEL (for LHD)
55641
25.INSTALL NO. 1 INSTRUMENT PANEL UNDER COVER
55318C
26.INSTALL INSTRUMENT SIDE PANEL LH
55011A
27.INSTALL NO. 1 INSTRUMENT PANEL GARNISH SUB-ASSEMBLY (for LHD)
55631A
28.INSTALL NO. 1 INSTRUMENT PANEL UNDER TRAY STOPPER (for LHD)
62112
29.INSTALL COWL SIDE TRIM BOARD LH
67914B
30.INSTALL FRONT DOOR SCUFF PLATE LH
67912A
31.INSTALL FRONT DOOR OUTSIDE SCUFF PLATE LH
32.CONNECT CABLE TO NEGATIVE BATTERY TERMINAL
for 7GR-FKS: Click hereGeneral>MAINTENANCE>7GR-FKS BATTERY>INSTALLATION
for 1GD-FTV: Click hereGeneral>MAINTENANCE>1GD-FTV BATTERY>INSTALLATION
33. INITIALIZATION AFTER RECONNECTING BATTERY TERMINAL
Click hereGeneral>SETUP>WHEN DISCONNECTING OR RECONNECTING BATTERY TERMINAL>WORK PROCEDURE
- HINT:
-
When disconnecting and reconnecting the battery, there is an automatic learning function that completes learning when the respective system is used.
-
Click hereGeneral>SETUP>WHEN DISCONNECTING OR RECONNECTING BATTERY TERMINAL>AUTOMATIC LEARNING CHART
34.PERFORM DIAGNOSTIC SYSTEM CHECK
35.CHECK SRS WARNING LIGHT