Home › BRAKE › BRAKE CONTROL › ELECTRONICALLY CONTROLLED BRAKE SYSTEM

ELECTRONICALLY CONTROLLED BRAKE SYSTEM > DIAGNOSIS SYSTEM

for Preparation Click here


DESCRIPTION
When troubleshooting a vehicle with the diagnosis system, the only difference from the usual troubleshooting procedure is connecting the Techstream to the vehicle and reading various data output from the vehicle's skid control ECU.
The skid control ECU records DTCs when it detects a malfunction in the ECU itself or in its circuits.
To check the DTCs, connect the Techstream to the DLC3 on the vehicle. The Techstream enables you to erase the DTCs, activate the various actuators, and check the Freeze Frame Data and Data List.
  1. Check the auxiliary battery voltage.

    Standard voltage:
    11 to 14 V

    If the voltage is below 11 V, recharge the auxiliary battery before proceeding to the next step.

  2. Check the DLC3 (Click here).


DIAGNOSIS


    C173762E01
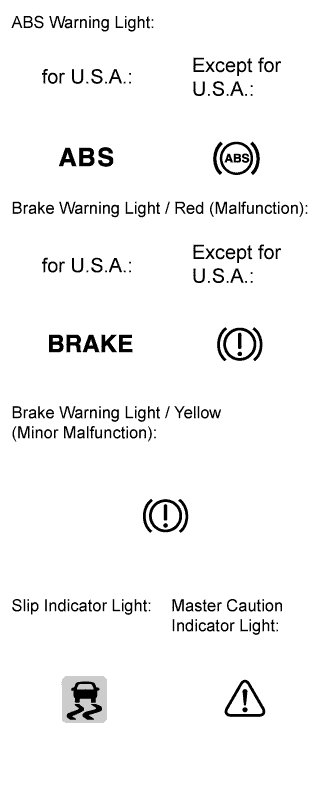
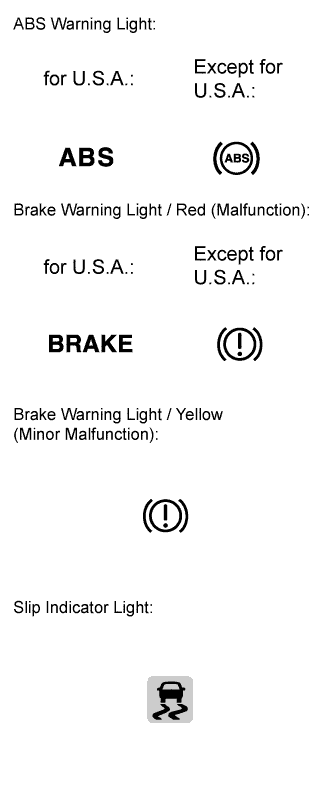
  1. If the skid control ECU detects a malfunction, the ABS warning, brake warning / red (malfunction), brake warning / yellow (minor malfunction) and slip indicator lights will come on in order to warn the driver.
    The master caution indicator light will come on and a warning message will be displayed on the multi-information display if the EBD system, BA system, or TRAC system is malfunctioning or if the ABS, VSC, electronically controlled brake system control cannot be performed.
    The table below indicates which lights will come on when there is a malfunction in a particular function.

    Item / Trouble Area
    ABS
    EBD
    BA
    TRAC
    VSC
    Hill-start assist control
    Skid control ECU
    ABS warning light
    ○
    ○
    ○
    -
    -
    -
    ○
    Brake warning light / red (malfunction)
    -
    ○
    -
    -
    -
    -
    ○
    Brake warning light / yellow (minor malfunction)
    ○
    ○
    ○
    ○
    ○
    ○
    ○
    Slip indicator light
    ○
    ○
    ○
    ○
    ○
    ○
    ○
    Master caution indicator light
    ○
    ○
    ○
    ○
    ○
    ○
    ○
    Multi-information display
    ○
    ○
    ○
    -
    -
    ○
    ○
    ○: Indicator light on or message displayed
    -: Indicator light off or no message displayed

    HINT:
    1. The DTCs are simultaneously stored in the memory.
      The DTCs can be read by connecting SST between terminals TC and CG of the DLC3 and observing the blinking pattern of the ABS warning, brake warning / yellow (minor malfunction) and slip indicator lights, or by connecting the Techstream (Click here).
    2. This system has a Test Mode (signal check) function.
      The DTCs can be read by connecting SST between terminals TS and CG of the DLC3 and observing the blinking pattern of the ABS warning, brake warning / yellow (minor malfunction) and slip indicator lights, or by connecting the Techstream (Click here).

WARNING LIGHT AND INDICATOR LIGHT INITIAL CHECK
  1. Release the parking brake.

    NOTICE:
    When releasing the parking brake, move the shift lever to P for safety.

    HINT:
    When the parking brake is applied or the brake fluid level is low, the brake warning light / red (malfunction) comes on.


  2. C193685E01
  3. When the power switch is turned on (IG), check that the ABS warning, brake warning / red (malfunction), brake warning / yellow (minor malfunction) and slip indicator lights come on for approximately 3 seconds.

    HINT:
    1. The master caution indicator light will come on and a warning message will be displayed on the multi-information display if the EBD system, BA system, or TRAC system is malfunctioning or if the ABS, VSC, electronically controlled brake system control cannot be performed.
    2. If the warning light and indicator light check result is not normal, proceed to troubleshooting for the ABS warning, brake warning / red (malfunction), brake warning / yellow (minor malfunction) and slip indicator light circuits.
    3. If the indicator remains on or does not come on, proceed to troubleshooting for the light circuits listed below.

    Trouble Area
    See procedure
    ABS warning light circuit (Remains on)
    Click here
    ABS warning light circuit (Does not come on)
    Click here
    Brake warning light / red (malfunction) circuit (Remains on)
    Click here
    Brake warning light / red (malfunction) circuit (Does not come on)
    Click here
    Brake warning light / yellow (minor malfunction) circuit (Remains on)
    Click here
    Brake warning light / yellow (minor malfunction) circuit (Does not come on)
    Click here
    Slip indicator light circuit (Remains on)
    Click here
    Slip indicator light circuit (Does not come on)
    Click here


SYMPTOM SIMULATION

HINT:
The most difficult case in troubleshooting is when no symptoms occur. In such cases, a thorough customer problem analysis must be carried out. Then the same or similar conditions and environment in which the problem occurred in the customer's vehicle should be reproduced. No matter how experienced or skilled a technician may be, if he/she proceeds to troubleshooting without confirming the problem symptoms, he/she will likely overlook something important and make a wrong guess at some points in the repair operation. This leads to a standstill in troubleshooting.


    C159239E01
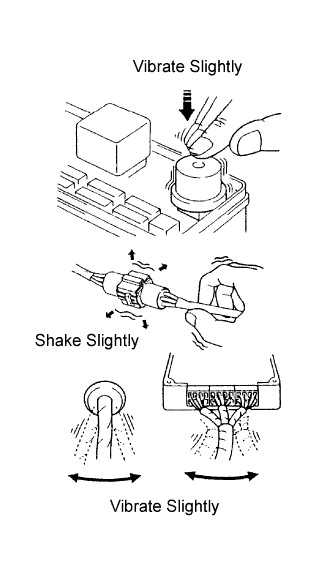
  1. Vibration method: When vibration seems to be the major cause.

    HINT:
    Perform the simulation method only during the primary check period (for approximately 6 seconds after the power switch is turned on (IG)).


    1. Slightly vibrate the part of the sensor considered to be the problem cause with your fingers and check whether the malfunction occurs.

    2. Slightly shake the connector vertically and horizontally.

      HINT:
      Shaking the relays too strongly may result in open relays.

    3. Slightly shake the wire harness vertically and horizontally. The connector joint and fulcrum of the vibration are the major areas to be checked thoroughly.