LIGHTING (INT) LIGHTING SYSTEM Back Door Courtesy Switch Circuit
DESCRIPTION
The main body ECU (Multiplex Network Body ECU) receives a door open/closed signal from each door courtesy light switch.
WIRING DIAGRAM
w/ Power Back Door System
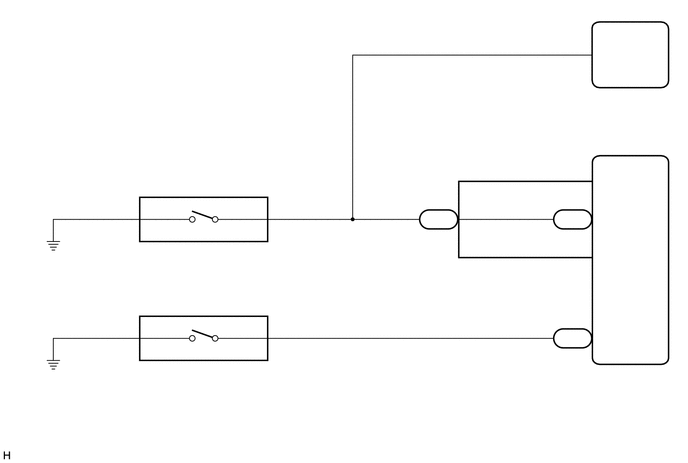
w/o Power Back Door System
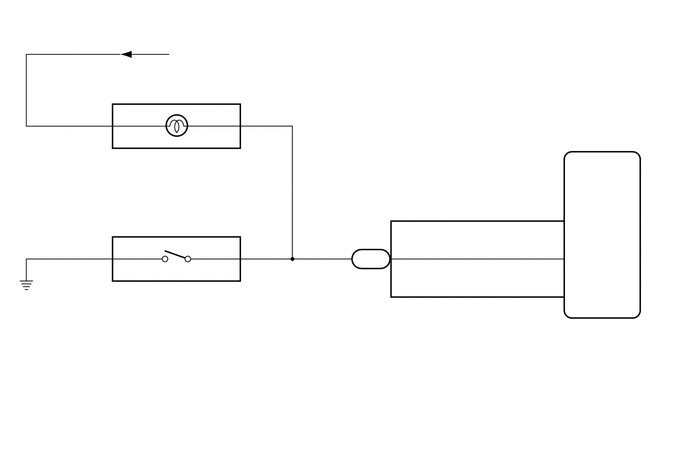
CAUTION / NOTICE / HINT
- NOTICE:
- ·
If the main body ECU (multiplex network body ECU) is replaced, refer to Service Bulletin.*1
·As the door control battery is installed between the vehicle battery and main body ECU (multiplex network body ECU), first perform the inspections in On-Vehicle Inspection to confirm that there are no malfunctions in the power source circuit for the main body ECU (multiplex network body ECU) before performing this troubleshooting procedure.*2
Click hereVehicle Interior>DOOR LOCK>POWER DOOR LOCK CONTROL SYSTEM>ON-VEHICLE INSPECTION
*1: w/ Smart Entry and Start System
*2: for LHD
PROCEDURE
Choose the model to be inspected.
- Result:
Result Proceed to w/ Power Back Door System A w/o Power Back Door System B
A
B
Connect the GTS to the DLC3.
Turn the ignition switch to ON.
Turn the GTS on.
Enter the following menus: Body Electrical / Main Body / Data List.
Read the Data List according to the display on the GTS.
- Body Electrical > Main Body > Data List
-
Tester Display Measurement Item Range Normal Condition Diagnostic Note Back Door Courtesy SW Back door courtesy light switch signal ON or OFF ON: Back door open
OFF: Back door closed- Glass Hatch Courtesy Switch Back door glass courtesy light switch signal* ON or OFF ON: Glass hatch open
OFF: Glass hatch closed-
*: w/ Power Back Door System
- Body Electrical > Main Body > Data List
-
Tester Display Back Door Courtesy SW Glass Hatch Courtesy Switch - 50003 123 26,156
- Body Electrical > Back Door > Data List
-
Tester Display Measurement Item Range Normal Condition Diagnostic Note Courtesy SW Back door courtesy light switch signal ON or OFF ON: Back door open
OFF: Back door closed-
- Body Electrical > Back Door > Data List
-
Tester Display Courtesy SW - 50003 159 4
- OK:
Normal conditions listed above are displayed.
- Result:
Result Proceed to OK A NG (Back door courtesy light switch does not operate) (Main Body ECU (Multiplex Network Body ECU)) B NG (Back door glass courtesy light switch does not operate) C NG (Back door courtesy light switch does not operate) (Multiplex Network Door ECU) D
A
B
C
D
Remove the back door lock assembly.
Inspect the back door courtesy light switch built into the back door lock assembly.
Click hereVehicle Interior>DOOR LOCK>BACK DOOR LOCK>INSPECTION
- Result:
Proceed to OK NG
OK
NG
Disconnect the 4H instrument panel junction block assembly connector.
Measure the resistance according to the value(s) in the table below.
- Standard Resistance:
Tester Connection Condition Specified Condition X19-3 (CTY) - 4H-33 Always Below 1 Ω X19-3 (CTY) or 4H-33 - Body ground Always 10 kΩ or higher X19-4 (E) - Body ground Always Below 1 Ω
- Result:
Proceed to OK NG
OK
NG
Remove the instrument panel junction block assembly.
Click herePower Source / Network>POWER DISTRIBUTION>MAIN BODY ECU>REMOVAL
Remove the main body ECU (multiplex network body ECU) from the instrument panel junction block assembly.
Click herePower Source / Network>POWER DISTRIBUTION>MAIN BODY ECU>REMOVAL
Measure the resistance according to the value(s) in the table below.
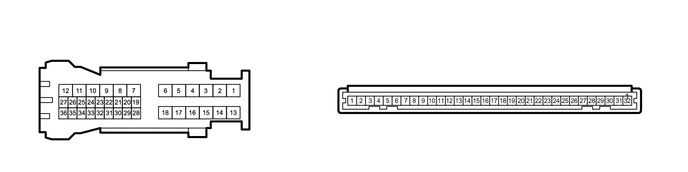
| *a | Component without harness connected
(Instrument Panel Junction Block Assembly) |
- | - |
- Standard Resistance:
Tester Connection Condition Specified Condition 4H-33 - MB-4 (BCTY) Always Below 1 Ω
- Result:
Proceed to OK NG
OK
NG
Remove the back window lock assembly.
Click hereVehicle Exterior>WINDOW / GLASS>BACK WINDOW LOCK>INSPECTION
Inspect the back door glass courtesy light switch built into the back window lock assembly.
Click hereVehicle Exterior>WINDOW / GLASS>BACK WINDOW LOCK>REMOVAL
- Result:
Proceed to OK NG
OK
NG
Disconnect the F18 main body ECU (multiplex network body ECU) connector.
Measure the resistance according to the value(s) in the table below.
- Standard Resistance:
Tester Connection Condition Specified Condition X11-1 (+) - F18-27 (GCTY) Always Below 1 Ω X11-1 (+) or F18-27 (GCTY) - Body ground Always 10 kΩ or higher X11-2 (-) - Body ground Always Below 1 Ω
- Result:
Proceed to OK NG
OK
NG
Remove the back door lock assembly.
Inspect the back door courtesy light switch built into the back door lock assembly.
Click hereVehicle Interior>DOOR LOCK>BACK DOOR LOCK>INSPECTION
- Result:
Proceed to OK NG
OK
NG
Disconnect the X6 multiplex network door ECU connector.
Measure the resistance according to the value(s) in the table below.
- Standard Resistance:
Tester Connection Condition Specified Condition X19-3 (CTY) - X6-19 Always Below 1 Ω X19-3 (CTY) or X6-19 - Body ground Always 10 kΩ or higher X19-4 (E) - Body ground Always Below 1 Ω
- Result:
Proceed to OK NG
OK
NG
Connect the GTS to the DLC3.
Turn the ignition switch to ON.
Turn the GTS on.
Enter the following menus: Body Electrical / Main Body / Data List.
Read the Data List according to the display on the GTS.
- Body Electrical > Main Body > Data List
-
Tester Display Measurement Item Range Normal Condition Diagnostic Note Back Door Courtesy SW Back door courtesy light switch signal ON or OFF ON: Back door open
OFF: Back door closed-
- Body Electrical > Main Body > Data List
-
Tester Display Back Door Courtesy SW - 50003 123 26
- OK:
Normal conditions listed above are displayed.
- Result:
Proceed to OK NG
OK
NG
Remove the back door lock assembly.
Inspect the back door courtesy light switch built into the back door lock assembly.
Click hereVehicle Interior>DOOR LOCK>BACK DOOR LOCK>INSPECTION
- Result:
Proceed to OK NG
OK
NG
Disconnect the 4H instrument panel junction block assembly connector.
Disconnect the M23 No. 1 room light assembly connector.
Measure the resistance according to the value(s) in the table below.
- Standard Resistance:
Tester Connection Condition Specified Condition X18-3 (D+) - 4H-33 Always Below 1 Ω X18-3 (D+) or 4H-33 - Body ground Always 10 kΩ or higher X18-1 (ACT-) - Body ground Always Below 1 Ω
- Result:
Proceed to OK NG
OK
NG
Remove the instrument panel junction block assembly.
Click herePower Source / Network>POWER DISTRIBUTION>MAIN BODY ECU>REMOVAL
Remove the main body ECU (multiplex network body ECU) from the instrument panel junction block assembly.
Click herePower Source / Network>POWER DISTRIBUTION>MAIN BODY ECU>REMOVAL
Measure the resistance according to the value(s) in the table below.
| *a | Component without harness connected
(Instrument Panel Junction Block Assembly) |
- | - |
- Standard Resistance:
Tester Connection Condition Specified Condition 4H-33 - MB-4 (BCTY) Always Below 1 Ω
- Result:
Proceed to OK NG
OK
NG